

Introduction
This article will cover building a Quickstart Blog App using React and Altogic, a backend-as-a-service platform using its client library.
The application will cover the following features:
Create blog post
List all blog posts
View single blog post on a separate page
You can reach out the demo here.
YouTube Development Video
Altogic Designer
Create App
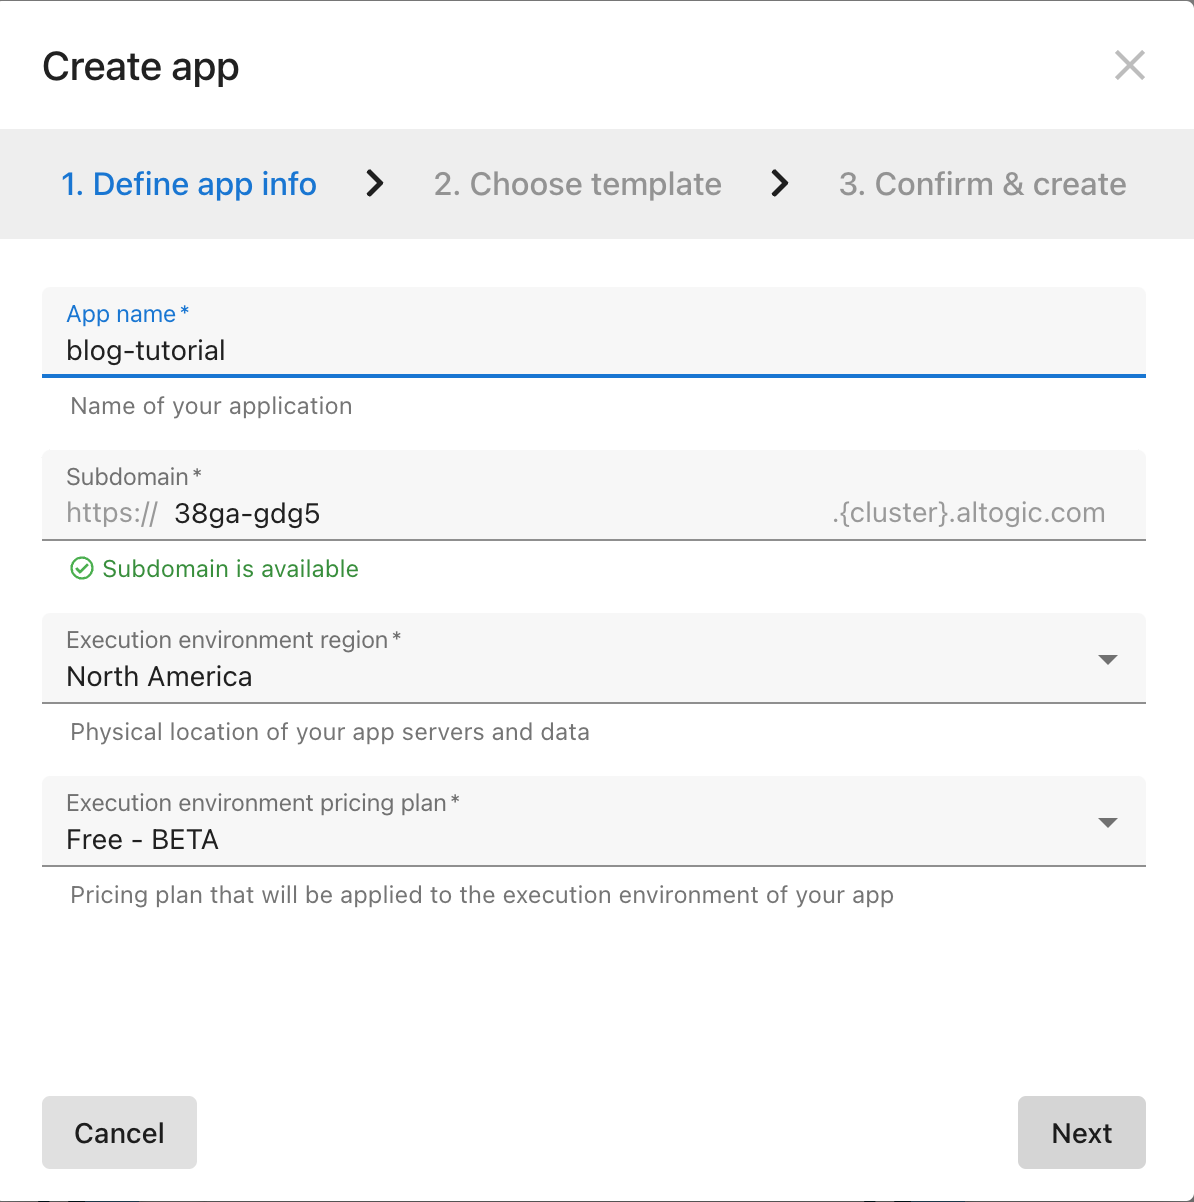
We can create an app with the Altogic Designer really fast. To create an app via the Designer:
Log in to Altogic with your credentials.
Select New app.
In the App name field, enter a name for the app.
And click Next.
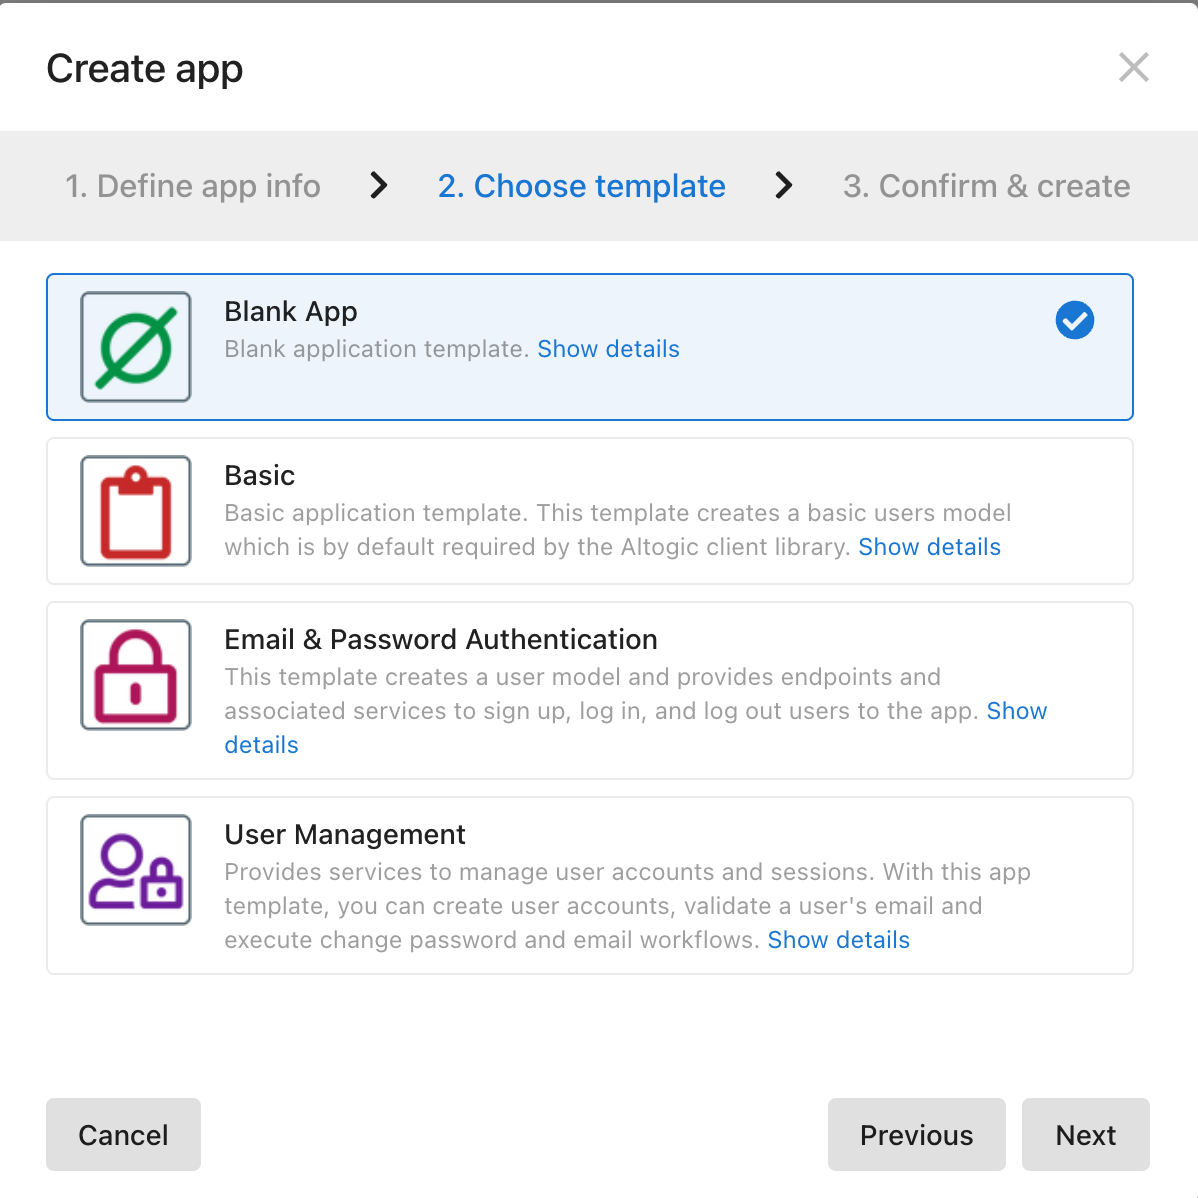
Choose Blank App template, and click on Next.
Click Create on the “Confirm & create” tab.
Here, you can customize your subdomain, but not necessarily to do, Altogic automatically creates one for you, which will be your envUrl. You don’t need to worry if you lost your envUrl; you can get it from the Environments view of Designer.
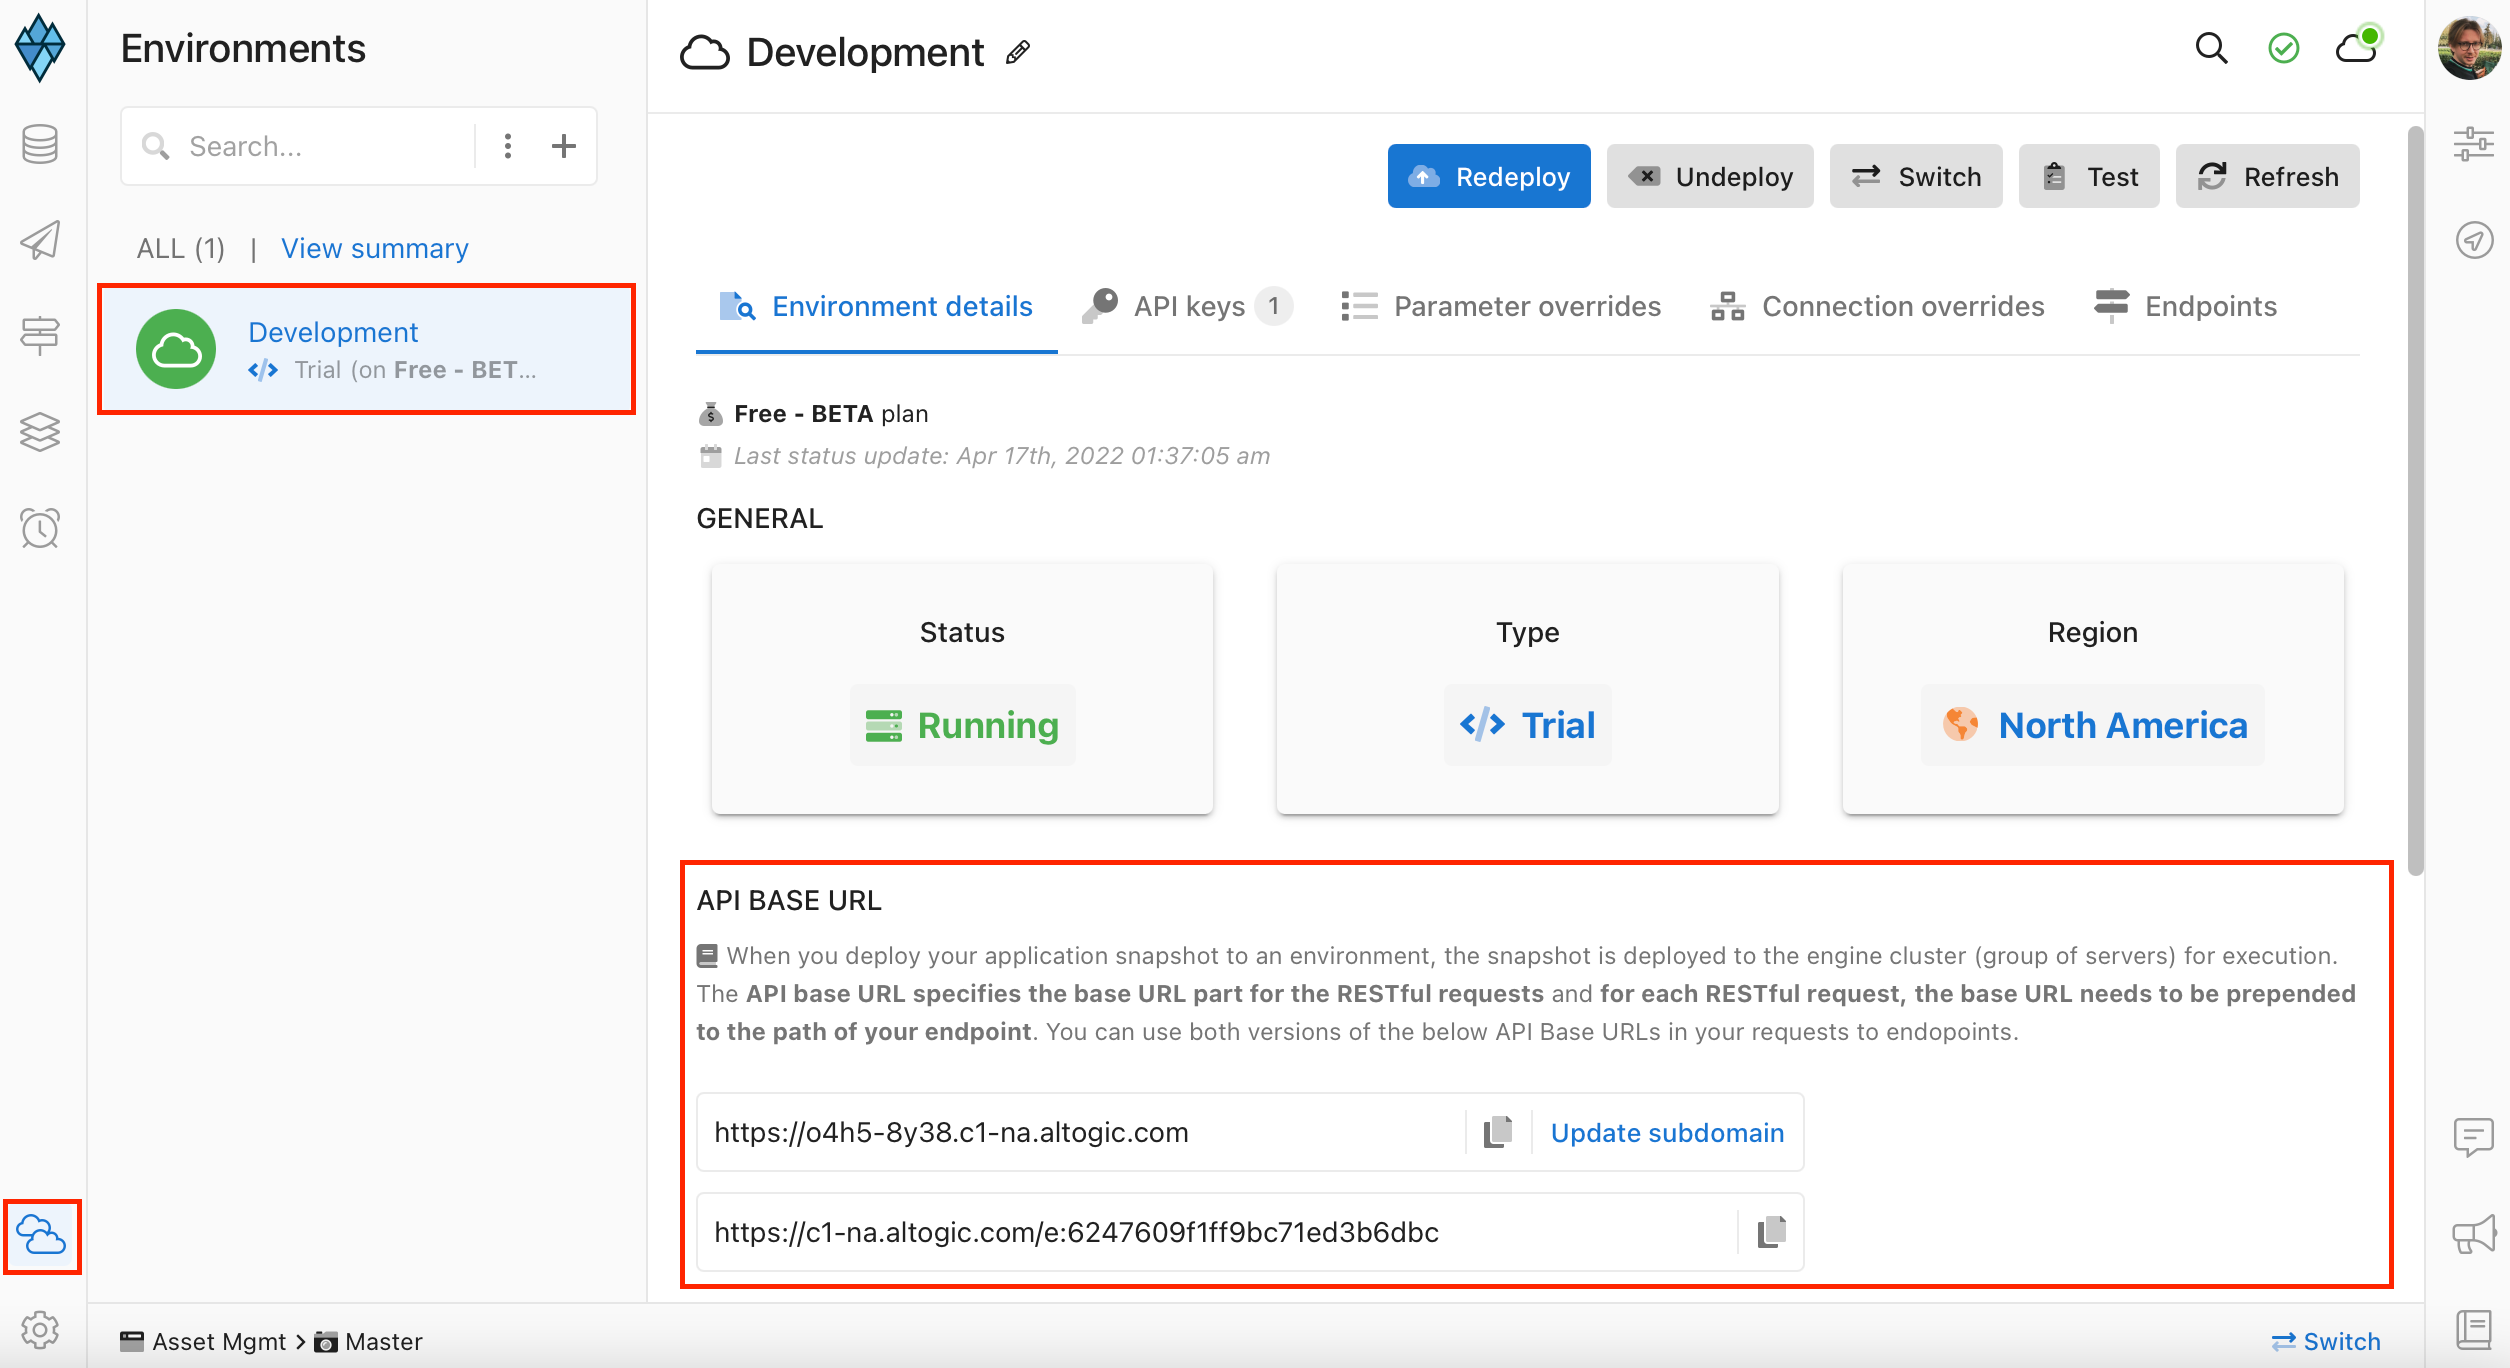
After creating our app, we need envUrl and clientKey to access our app via Altogic Client Library to create a web application.
In order to get the clientKey we need to enter the app which we have created before and;
Click on App Settings at the left-bottom of the designer.
And click on Client library keys section.

We can create new clientKey from that page, but thanks to Altogic for creating one clientKey automatically for us, so let’s copy the existing clientKey from the list.
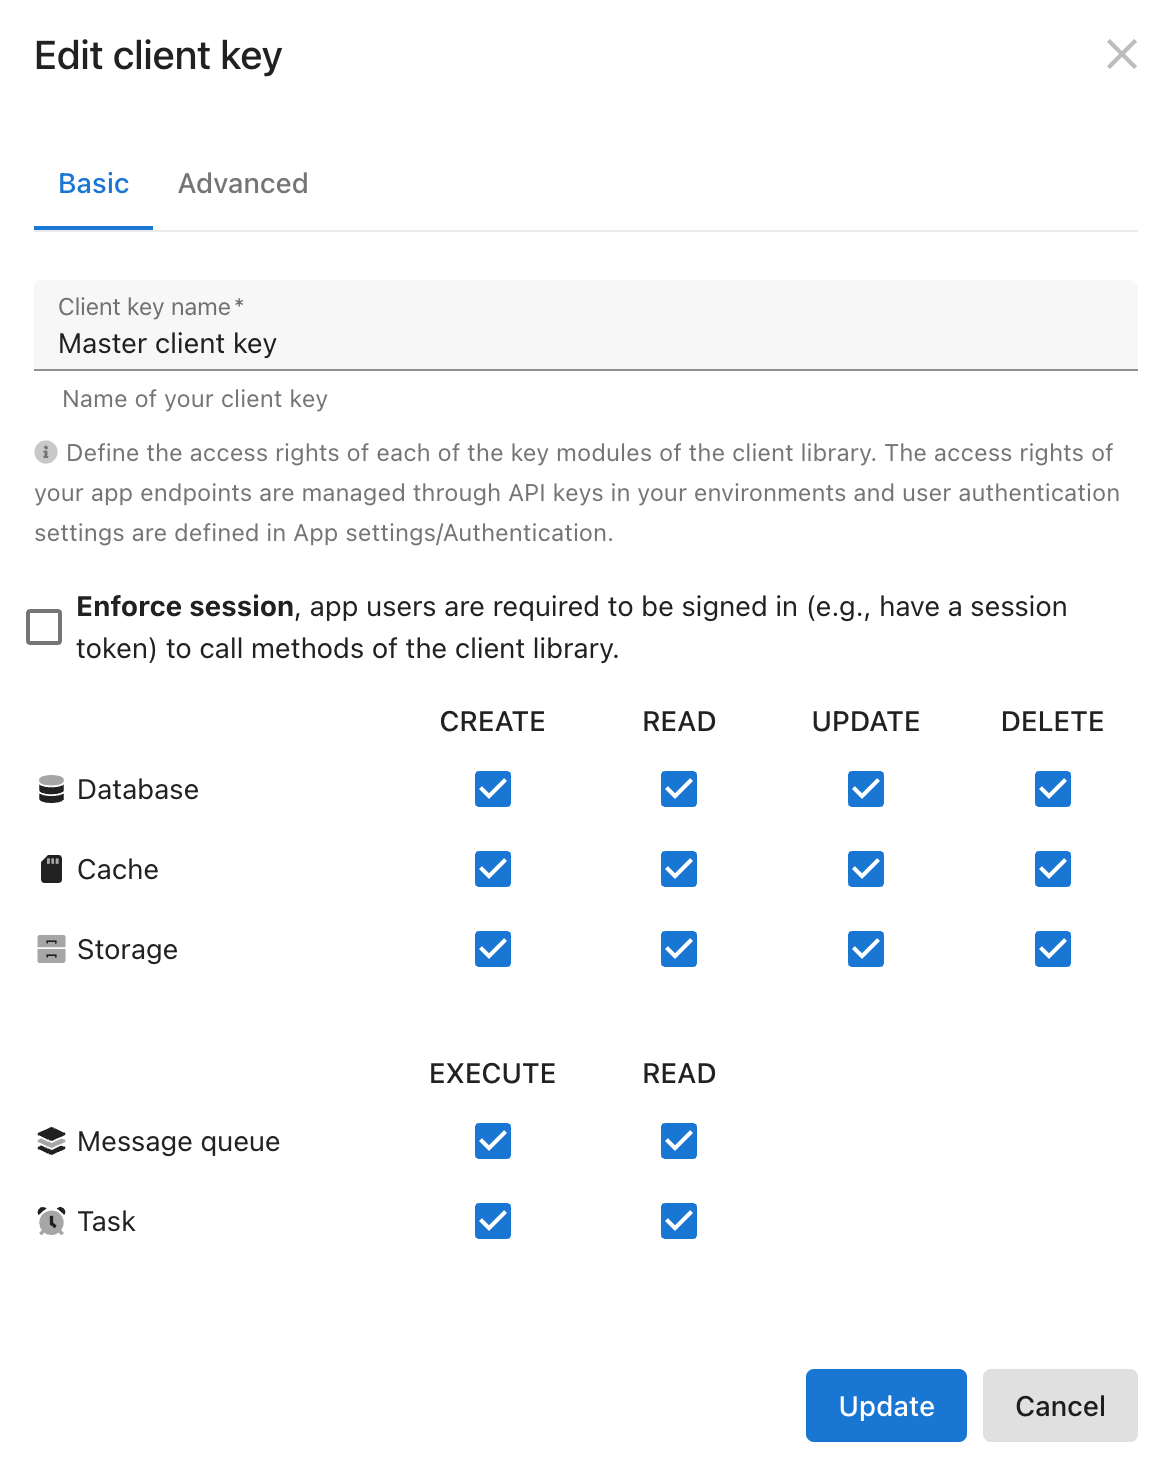
Additionally, since we won’t use any authentication user, we have to be able to send requests without session. We should remove the enforcement of the sessions from the client.
Click on the related client key.
Untick the Enforce session checkbox
Create Blog Model
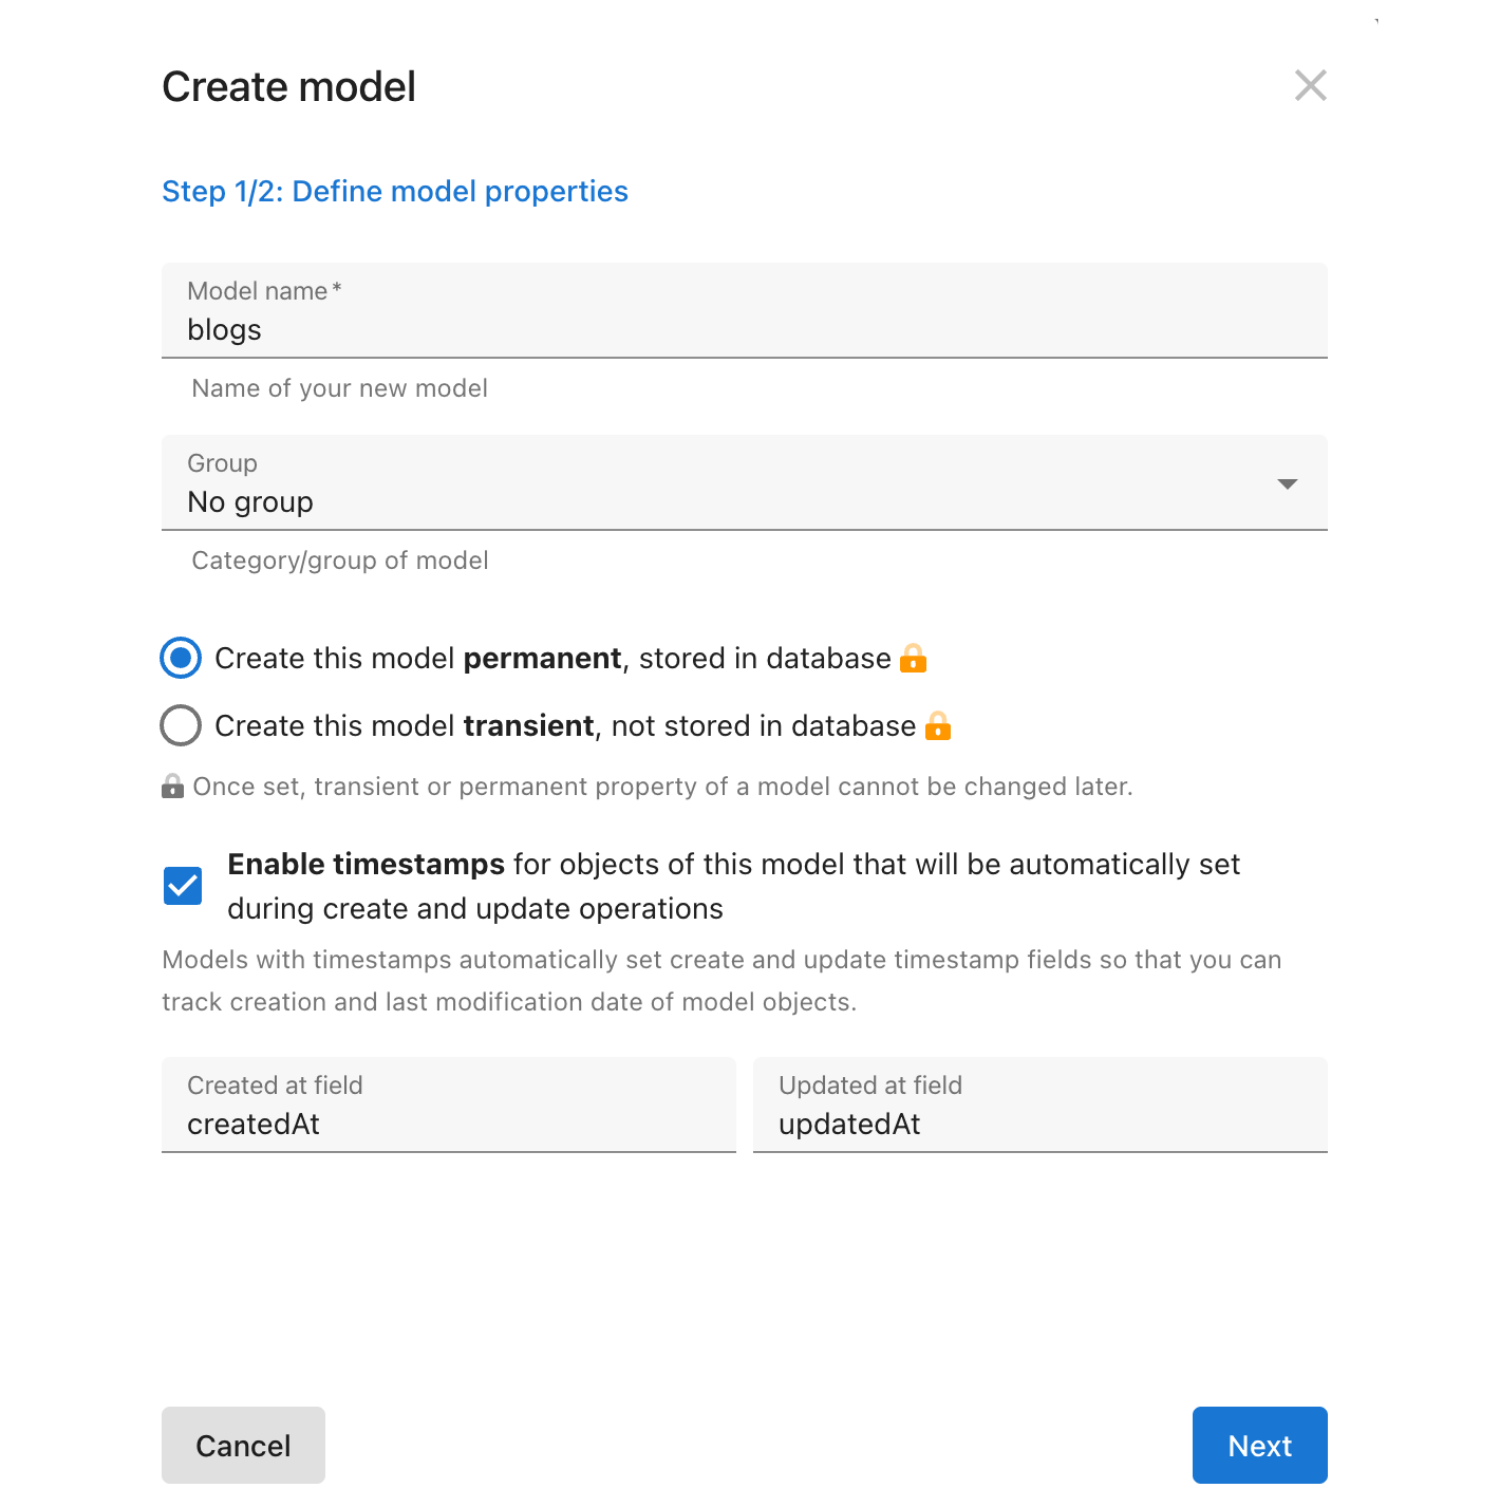
Click on Models on the left sidebar.
Click New on the right of the screen and select Model.
Set model name as blogs
Ensure that Enable timestamps is selected to store the creation date of the blog post.
Click Next.
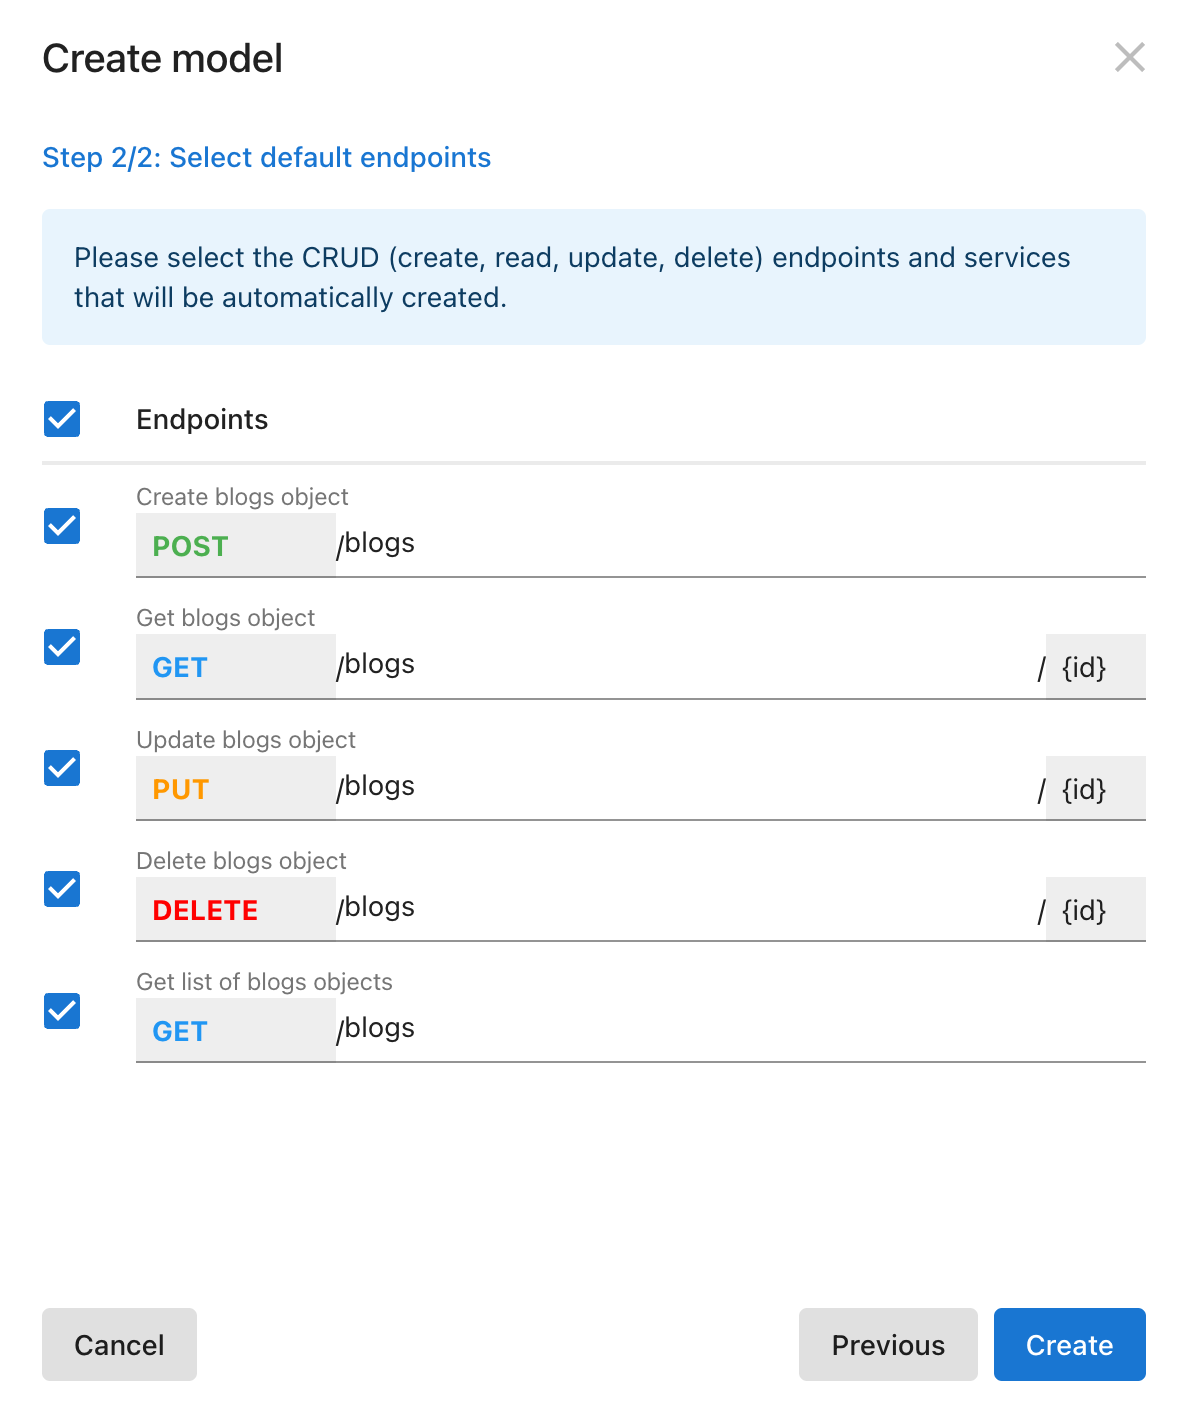
Altogic provides basic CRUD endpoints and services with the related model by default when you create a new model. Since we use Altogic Client Library, we won’t use these endpoints.
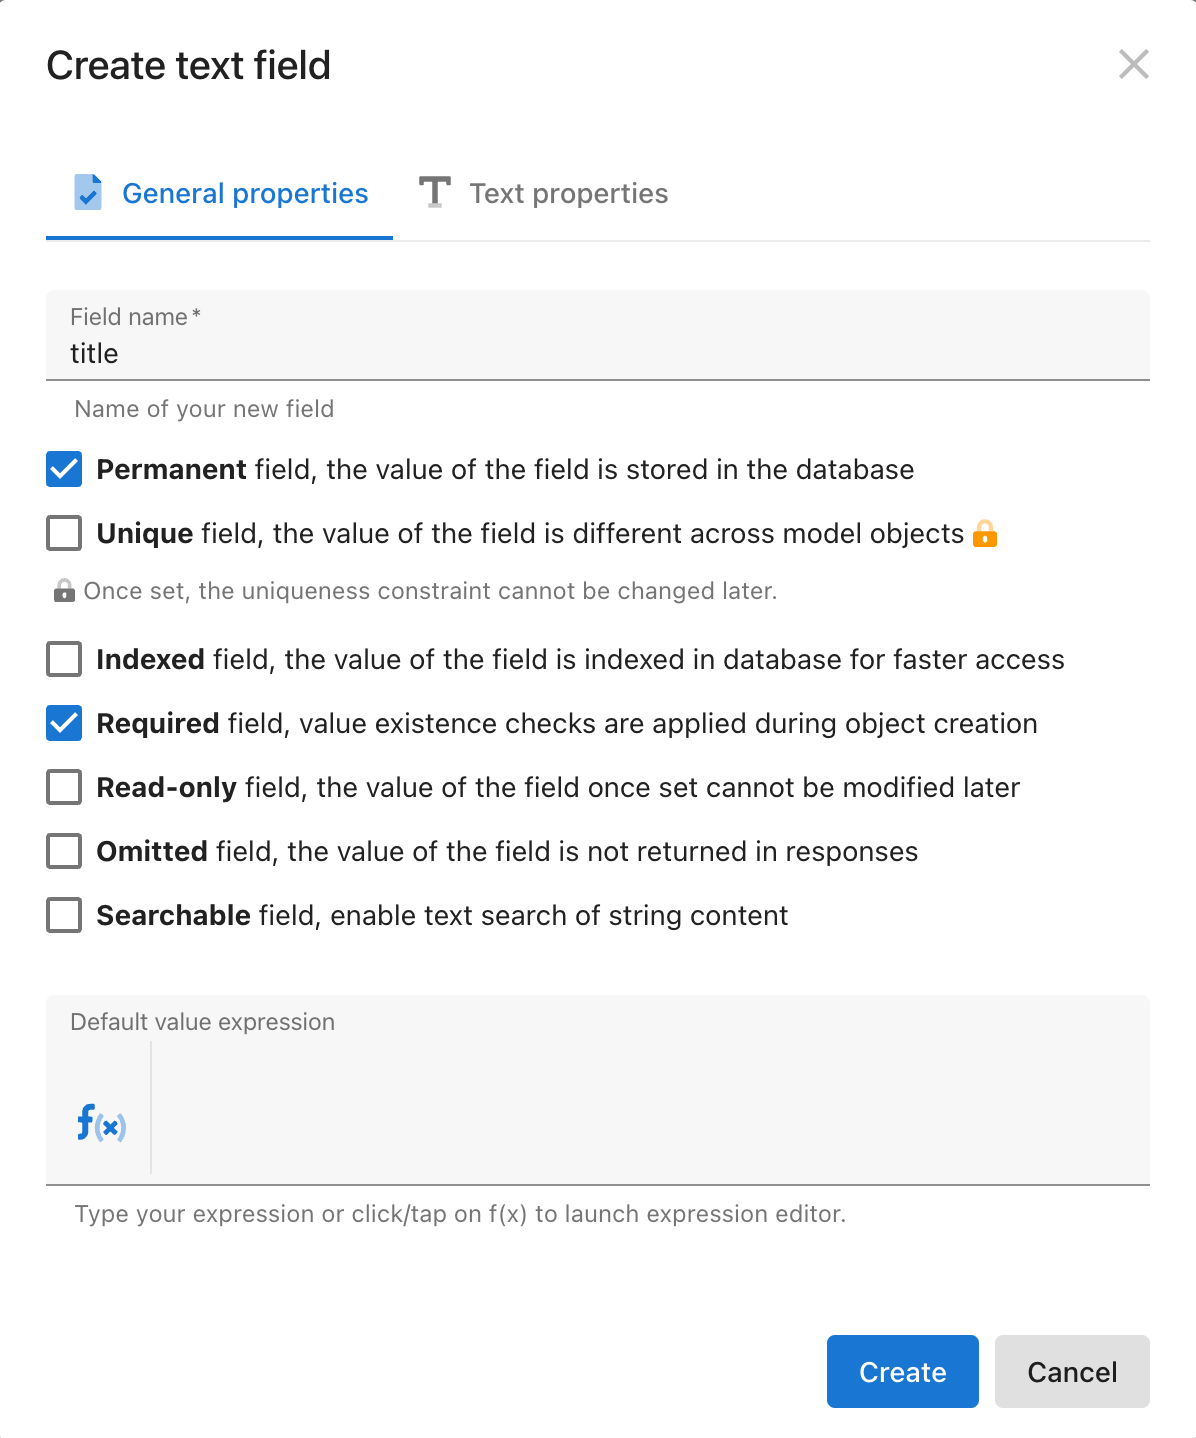
We created our first model ”blogs". All we have to do is define model properties title and content. Since we created the blogs model, we should define the content property as rich text and the title as text.
Click on the blogs model on the Models page
Click on New Field on the right-top of the page.
Select Text Field → Text.
Set model name title.
Ensure that the Required field is selected.
Click Create.
Click on New Field on the right-top of the page.
Select Text Field → Rich Text.
Set model name content.
Click Create
We completed the database design and the model definition on Altogic without any coding and complex configuration. Let’s move on to the development of the frontend.
Frontend Development
Create React App
First we need to create a React app. Open your terminal and paste the following script. The script will create altogic-react-blog-app-tutorial React app.
npx create-react-app altogic-react-blog-app-tutorial
It is time to install the necessary dependencies!
Installation of Altogic Client Library
Install the Altogic client library to our project by using NPM or Yarn by running the following command:
npm install altogic
Create a .env file in the root directory of your application to set environment variables of the app:
touch .env
Paste the following script to your .env file and replace YOUR-APPLICATION-ENV-URL and YOUR-APPLICATION-CLIENT-KEY with the envUrl and clientKey you copied before, then return to your terminal.
VUE_APP_ALTOGIC_ENV_URL=YOUR-APPLICATION-ENV-URL
VUE_APP_ALTOGIC_CLIENT_KEY=YOUR-APPLICATION-CLIENT-KEY
Next, create a file to handle the Altogic services and client.
Go back to your root directory and follow the commands below:
cd src
mkdir helpers
cd helpers
touch altogic.js
altogic.js will be created in the /src/helpers directory. Open the file in your editor and paste the following.
import { createClient } from "altogic";

let envUrl = process.env.REACT_APP_ALTOGIC_ENV_URL;
let clientKey = process.env.REACT_APP_ALTOGIC_CLIENT_KEY;

const altogic = createClient(envUrl, clientKey);

export default altogic;
Installation of React-Router
Since we need different pages for each blog posts and another route for listing all blog posts, we have to implement a route structure for our app. We will use react-router-dom in our app.
Open the root directory in the terminal and run the following script:
npm install react-router-dom@6
Installation of Tailwind CSS
We will use Tailwind CSS for styling the project. Run the following commands in the root directory.
npm install -D tailwindcss postcss autoprefixer
Below command will create tailwind.config.js file:
npx tailwindcss init -p
Open the tailwind.config.js in editor and copy/paste the following script to configure template paths:
module.exports = {
  content: [
    "./src/**/*.{js,jsx,ts,tsx}",
  ],
  theme: {
    extend: {},
  },
  plugins: [],
}
Open index.css file in src directory and add the following directives:
@tailwind base;
@tailwind components;
@tailwind utilities;
Components
We will develop two single components:
BlogList: List all blog posts and create a blog postSingleBlog: View single blog post details
We will create BlogList.js and SingleBlog.js files in the /src/components directory. Open the root directory in your project and paste the following script line by line.
cd src
mkdir components
cd components
touch SingleBlog.js BlogList.js
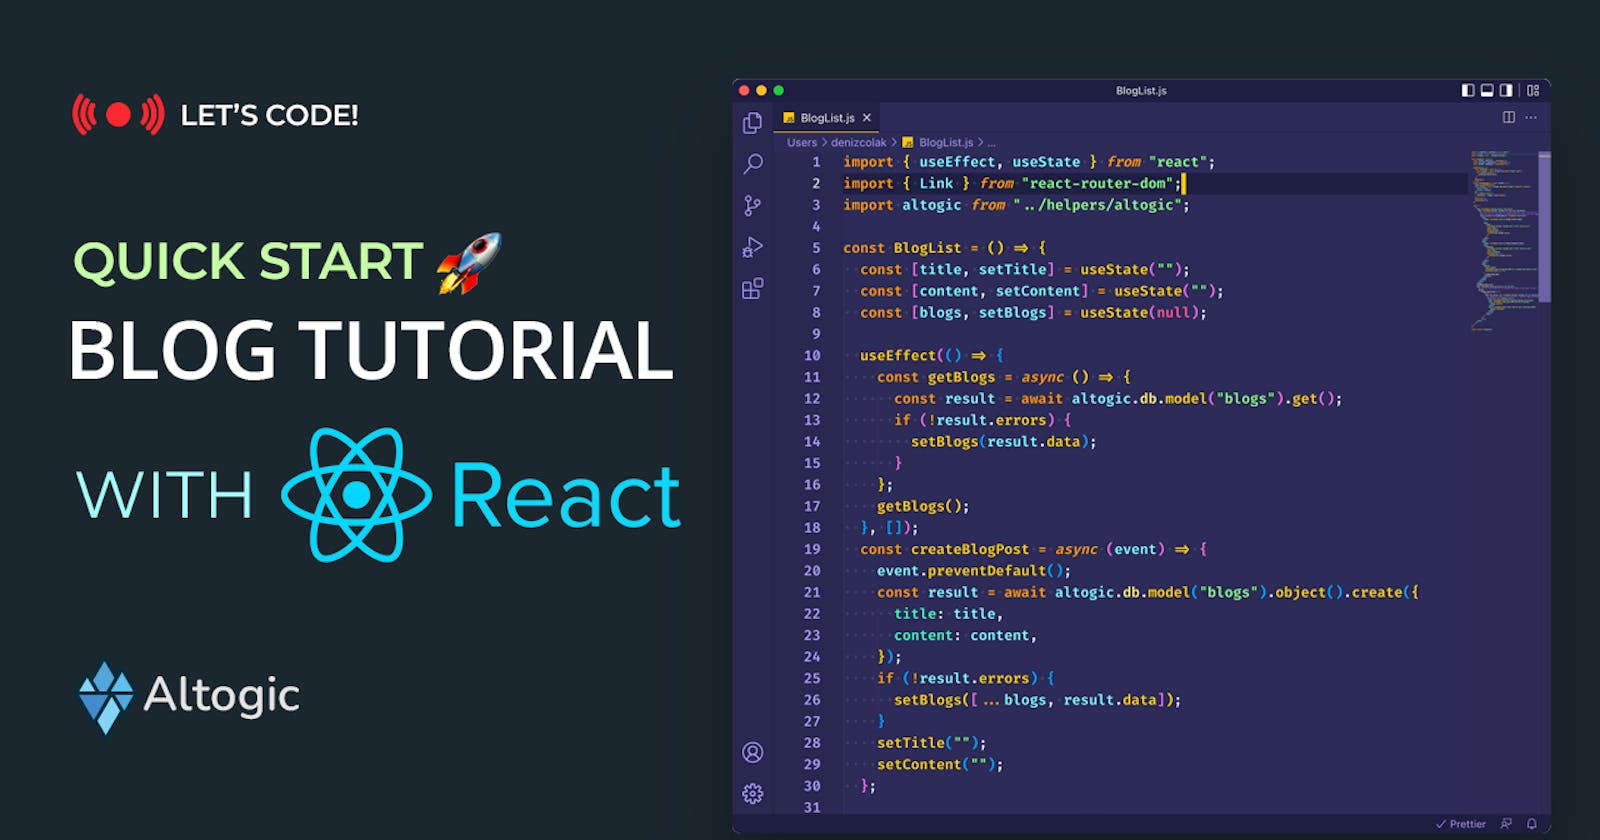
BlogList
We will list all the blog posts in this component. There is a form structure on the top of this component to create a new blog post.
Altogic Client Library provides us to create, get, update, delete, list any instance on the database by elementary functions. We will use create and get functions in our app:
*altogic.db.model(<MODEL_NAME>).get(): Retrieves all instances from the related table
altogic.db.model(<MODEL_NAME>).object(<CREATED_INSTANCE>).create()Creates an instance on the database with the input data
We call the altogic.db.model("blogs").get() function inside the useEffect() to fetch the blogs from the database when the component is rendered.
import { useEffect, useState } from "react";
import { Link } from "react-router-dom";
import altogic from "../helpers/altogic";

const BlogList = () => {
  // Title state for adding blog
  const [title, setTitle] = useState("");

  // Content state for adding blog
  const [content, setContent] = useState("");

  // Blogs state to store retrieved blgo posts from the Altogic
  const [blogs, setBlogs] = useState(null);

  useEffect(() => {
    // Since the fetching blog process works asynchronous;
    // We will define new async function and call it normally in the useEffect
    const getBlogs = async () => {
      // We can fetch all the instances in the database by calling altogic.db.model().get() function
      const result = await altogic.db.model("blogs").get();

      // It there are no error message set the blogs state with the retrieved data
      if (!result.errors) {
        setBlogs(result.data);
      }
    };
    getBlogs();
  }, []);

  // This function will be triggered by submitting the Create Blog Post form on the UI.
  const createBlogPost = async (event) => {
    event.preventDefault();

    // We can create an instance in the database by calling altogic.db.model().object().create() function
    const result = await altogic.db.model("blogs").object().create({
      title: title,
      content: content,
    });

    // If we create an blog post instance in the database successfully, we update our blogs state by appending the new blog post.
    if (!result.errors) {
      setBlogs([...blogs, result.data]);
    }
    setTitle("");
    setContent("");
  };

  return (
    <>
      <div className="justify-center flex mb-5">
        <div className="border rounded p-3 w-96 my-4 bg-white">
          {/* Form structure to get the created blog post data from the user.
          When the form is submitted, createBlogPost() function will be triggered.*/}
          <form onSubmit={createBlogPost} className="text-left">
            <div>
              <label className="text-xs">Blog Title</label>

              <div>
                <input
                  className="border rounded mb-2 w-full text-sm p-1"
                  type="text"
                  value={title}
                  onChange={(e) => {
                    setTitle(e.target.value);
                  }}
                />
              </div>
            </div>
            <div>
              <label className="text-xs">Blog Content</label>
              <div>
                <textarea
                  className="border rounded mb-2 w-full text-sm h-24"
                  type="text"
                  value={content}
                  onChange={(e) => {
                    setContent(e.target.value);
                  }}
                />
              </div>
            </div>
            <div>
              <button
                type="submit"
                className="text-sm bg-blue-600 p-1 rounded text-white w-full"
                disabled={title === ""}
              >
                Create Blog Post
              </button>
            </div>
          </form>
        </div>
      </div>
      <h2>Blog Posts</h2>
      <div className="grid grid-cols-3 m-3 px-12">
        {/* We will list blog post by mapping the blogs array state in here */}
        {blogs
          ? blogs.map((blog) => {
              return (
                <div key={blog._id} className="border rounded p-3 m-1 bg-white">
                  {/* Redirects user to the blog post's special page by clicking on it. */}
                  <Link to={`/blog/${blog._id}`}>
                    <div className="text-sm truncate">{blog.title}</div>
                    <div className="text-gray-400 text-sm truncate">
                      {blog.content}
                    </div>
                    <div className="text-right text-xs my-1 text-gray-400">
                      {blog.createdAt}
                    </div>
                  </Link>
                </div>
              );
            })
          : null}
      </div>
    </>
  );
};

export default BlogList;
SingleBlog
SingleBlog component is the component where you can view a single blog’s details such as blog content and creation date.
Each blog post has its own page in the /blog/:id route where id is the blog’s unique ID. We can reach the ID with the help of the useParams() hook inside the React component.
We retrieve the blog data with altogic.db.model("blogs").object(id).get() function in the useEffect() hook.
import { useEffect, useState } from "react";
import { Link, useParams } from "react-router-dom";
import altogic from "../helpers/altogic";

const SingleBlog = () => {
  // Stores the id value of the params in URL
  const { id } = useParams();

  // Single blog instance fecthed from the database
  const [blog, setBlog] = useState(null);

  useEffect(() => {
    const getBlog = async () => {
      // Gets the single blog object with given ID
      const result = await altogic.db.model("blogs").object(id).get();
      if (!result.errors) {
        setBlog(result.data);
      }
    };
    getBlog();
  }, []);
  return (
    <div className="text-left p-2 lg:mx-64">
      <Link className="text-xs text-blue-600" to="/">
        Back to Blogs
      </Link>
      {blog ? (
        <div className="text-sm mt-5 text-center ">
          <h2 className="text-xl my-2 ">{blog.title}</h2>
          <div className="text-sm text-gray-600">
            <div dangerouslySetInnerHTML={{ __html: blog.content }}></div>
          </div>
          <div className="mt-3 text-xs text-gray-500">{blog.createdAt}</div>
        </div>
      ) : null}
    </div>
  );
};

export default SingleBlog;
App
Since we use react-router-dom for routing we have to use the BrowserRouter component in our index.js file. Open the index.js and paste the following script:
import React from "react";
import ReactDOM from "react-dom/client";
import "./index.css";
import App from "./App";
import { BrowserRouter } from "react-router-dom";
import reportWebVitals from "./reportWebVitals";

const root = ReactDOM.createRoot(document.getElementById("root"));
root.render(
  <BrowserRouter>
    <App />
  </BrowserRouter>
);

// If you want to start measuring performance in your app, pass a function
// to log results (for example: reportWebVitals(console.log))
// or send to an analytics endpoint. Learn more: https://bit.ly/CRA-vitals
reportWebVitals();
Now, it only remains the customize the main App component. We have to define the routes in the App component with rendered components and route params. Paste the following code snippet to your App.js file:
import "./App.css";
import { Routes, Route } from "react-router-dom";
import SingleBlog from "./components/SingleBlog";
import BlogList from "./components/BlogList";

function App() {
  const placeholder =
    "Lorem ipsum dolor sit amet, consectetur adipiscing elit, sed do eiusmod tempor incididunt ut labore et dolore magna aliqua. Ut enim ad minim veniam, quis nostrud exercitation ullamco laboris nisi ut aliquip ex ea commodo consequat. Duis aute irure dolor in reprehenderit in voluptate velit esse cillum dolore eu fugiat nulla pariatur. Excepteur sint occaecat cupidatat non proident, sunt in culpa qui officia deserunt mollit anim id est laborum.";

  return (
    <div className="App bg-gray-50 h-screen">
      <Routes>
        <Route path="/" element={<BlogList />} />
        <Route
          path="/blog/:id"
          element={<SingleBlog title="Blog Post Title" content={placeholder} />}
        />
      </Routes>
    </div>
  );
}

export default App;
Conclusion
In this tutorial, we developed a full-stack React blog app using Altogic and Tailwind CSS. Backend development intimidates the frontend developers in the early stages. However, it took only 2 lines of code to build a backend app with the help of Altogic Client Library. You can reach out the source code of this app here.