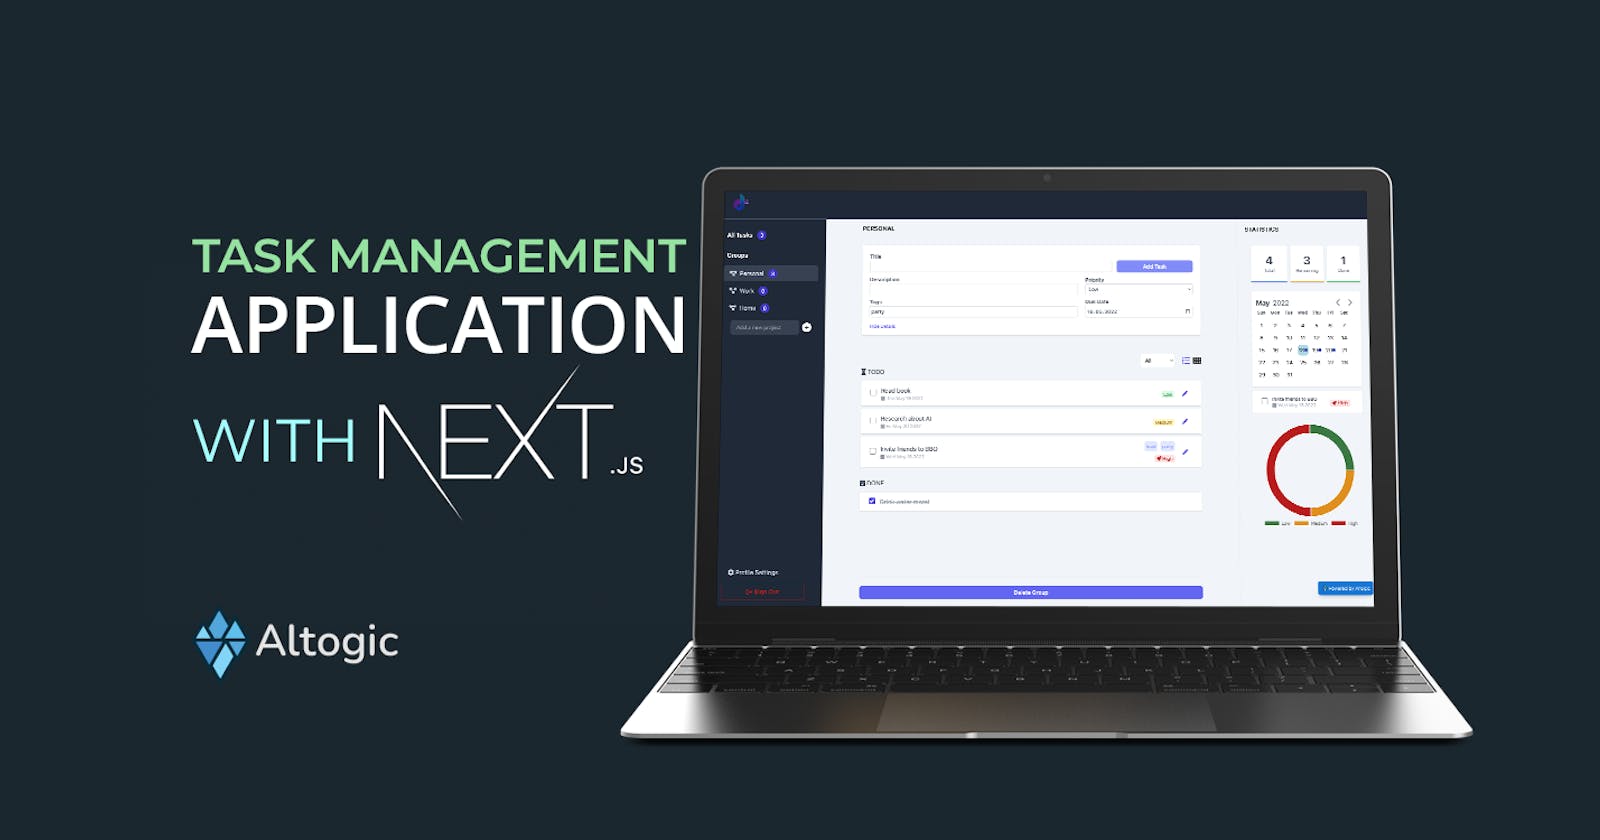


Introduction
This article will cover how to code a complete task management tool using Next.js, and Altogic, a Backend-as-a-Service platform using its client library. You can check out the source code and demo app.
What are the features of the task management tool?
- Create projects.
- Create tasks.
- Update tasks.
- Remove tasks.
- Remove projects.
- Get all tasks.
- Get all projects.
- Toggle the done status.
- Compute stats using Altogic.
Youtube Showcase Video
Set up the backend
Create an app in Altogic
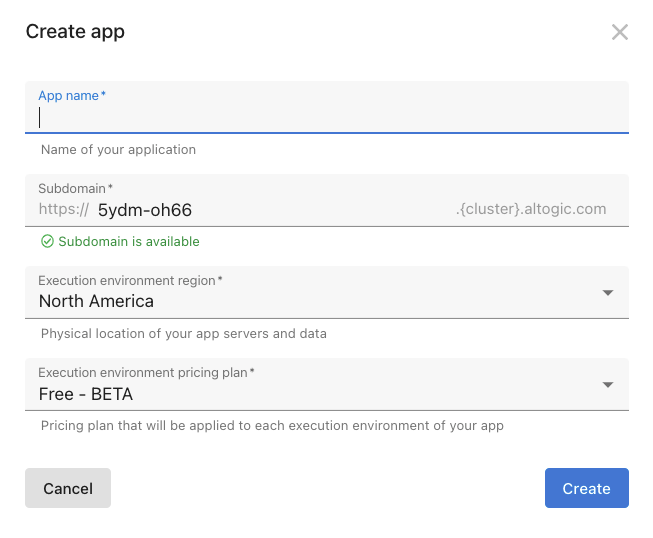
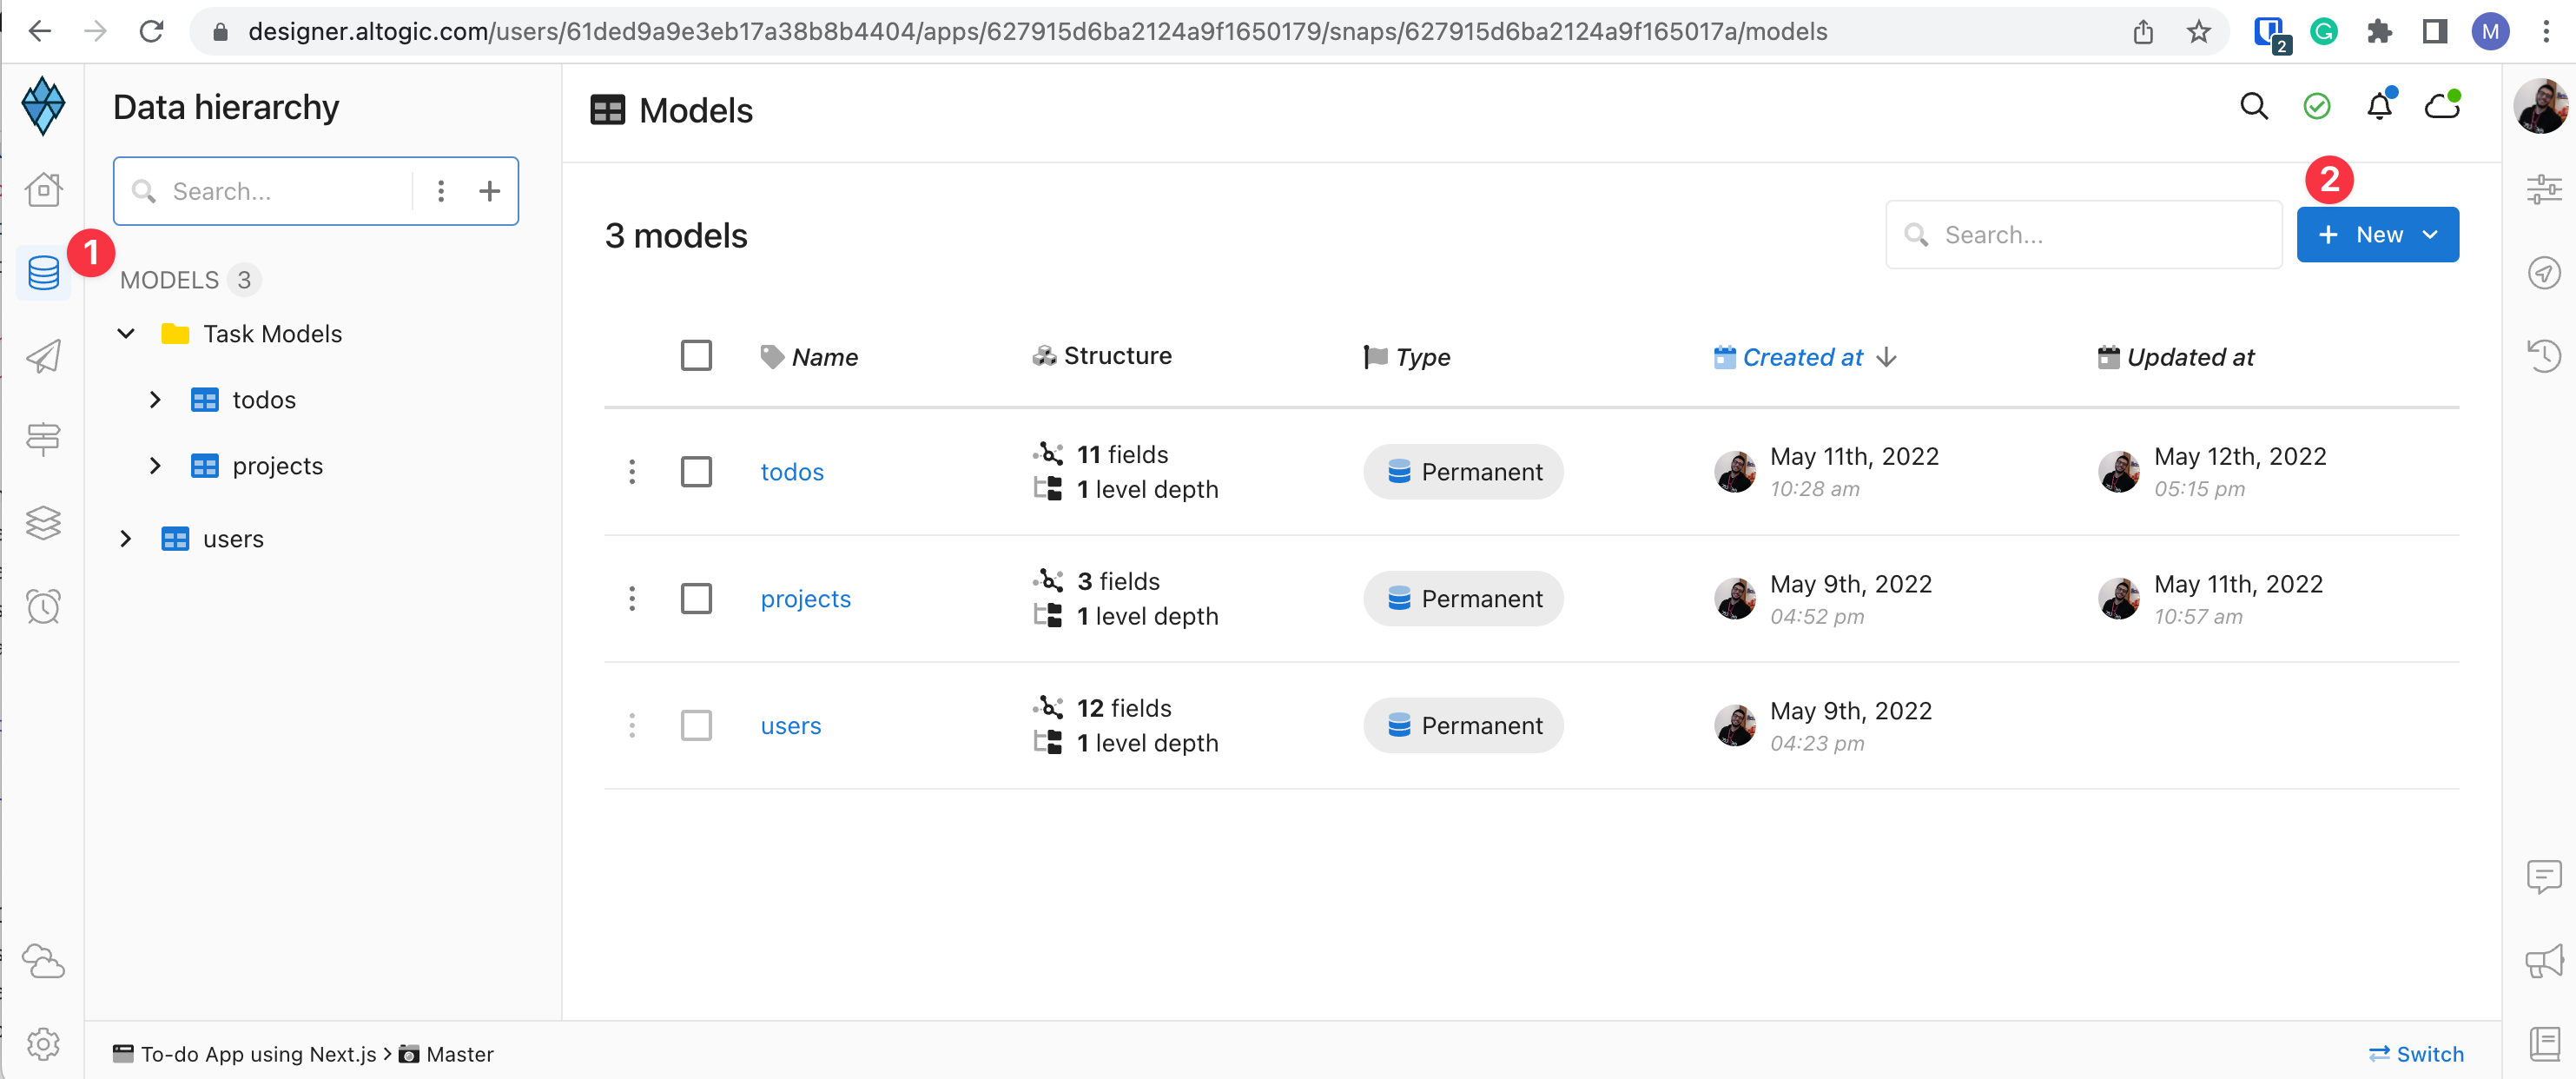
First things first: To use Altogic, we need to create an app in Altogic. We can create an app in Designer easily. All you need to do is enter a name for your app.
 How to create an application in Altogic Designer.
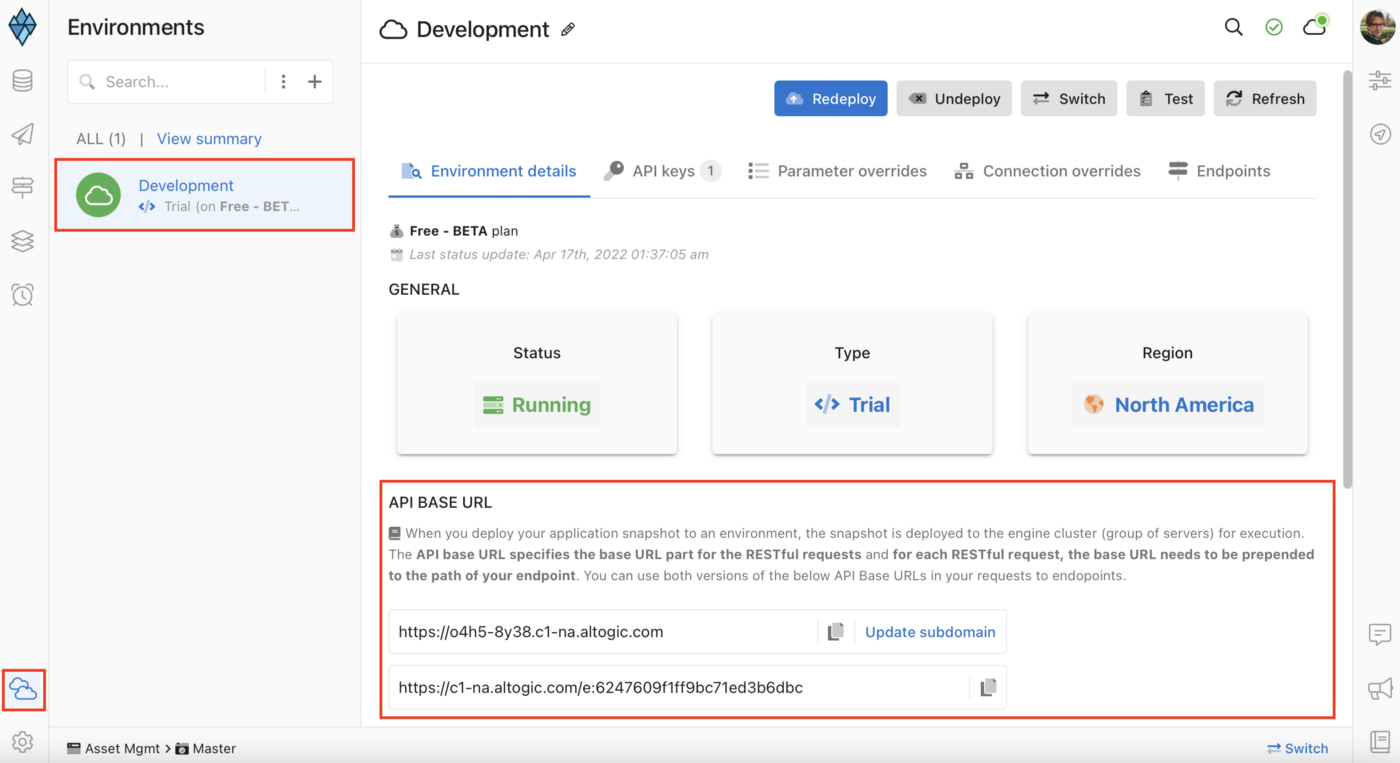
We need envUrl and clientKey to access our environment via Altogic Client Library. envUrl is specific to each environment, and Altogic initially creates one environment for you when you create your app. Here is how to get the envUrl from environment details page.
How to create an application in Altogic Designer.
We need envUrl and clientKey to access our environment via Altogic Client Library. envUrl is specific to each environment, and Altogic initially creates one environment for you when you create your app. Here is how to get the envUrl from environment details page.
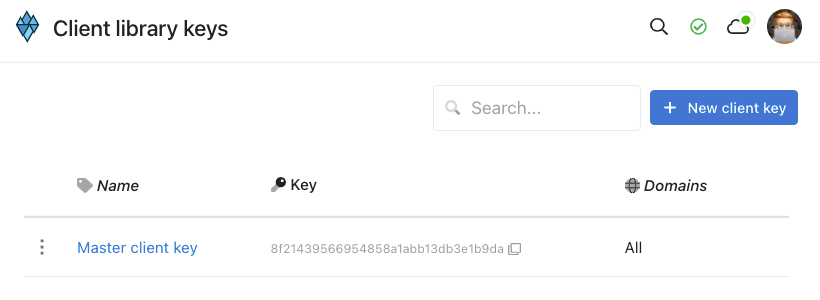
 We can get the clientKey by clicking on the App Settings button in the left-bottom corner of the Designer and clicking on the Client library keys section.
Create models in Altogic
Models define the data structure and data validation rules of your applications. A model is composed of basic, advanced, and sub-model fields. As an analogy, you can think of models as tables and fields as columns in relational databases or models as documents and fields as document properties in non-relational databases.
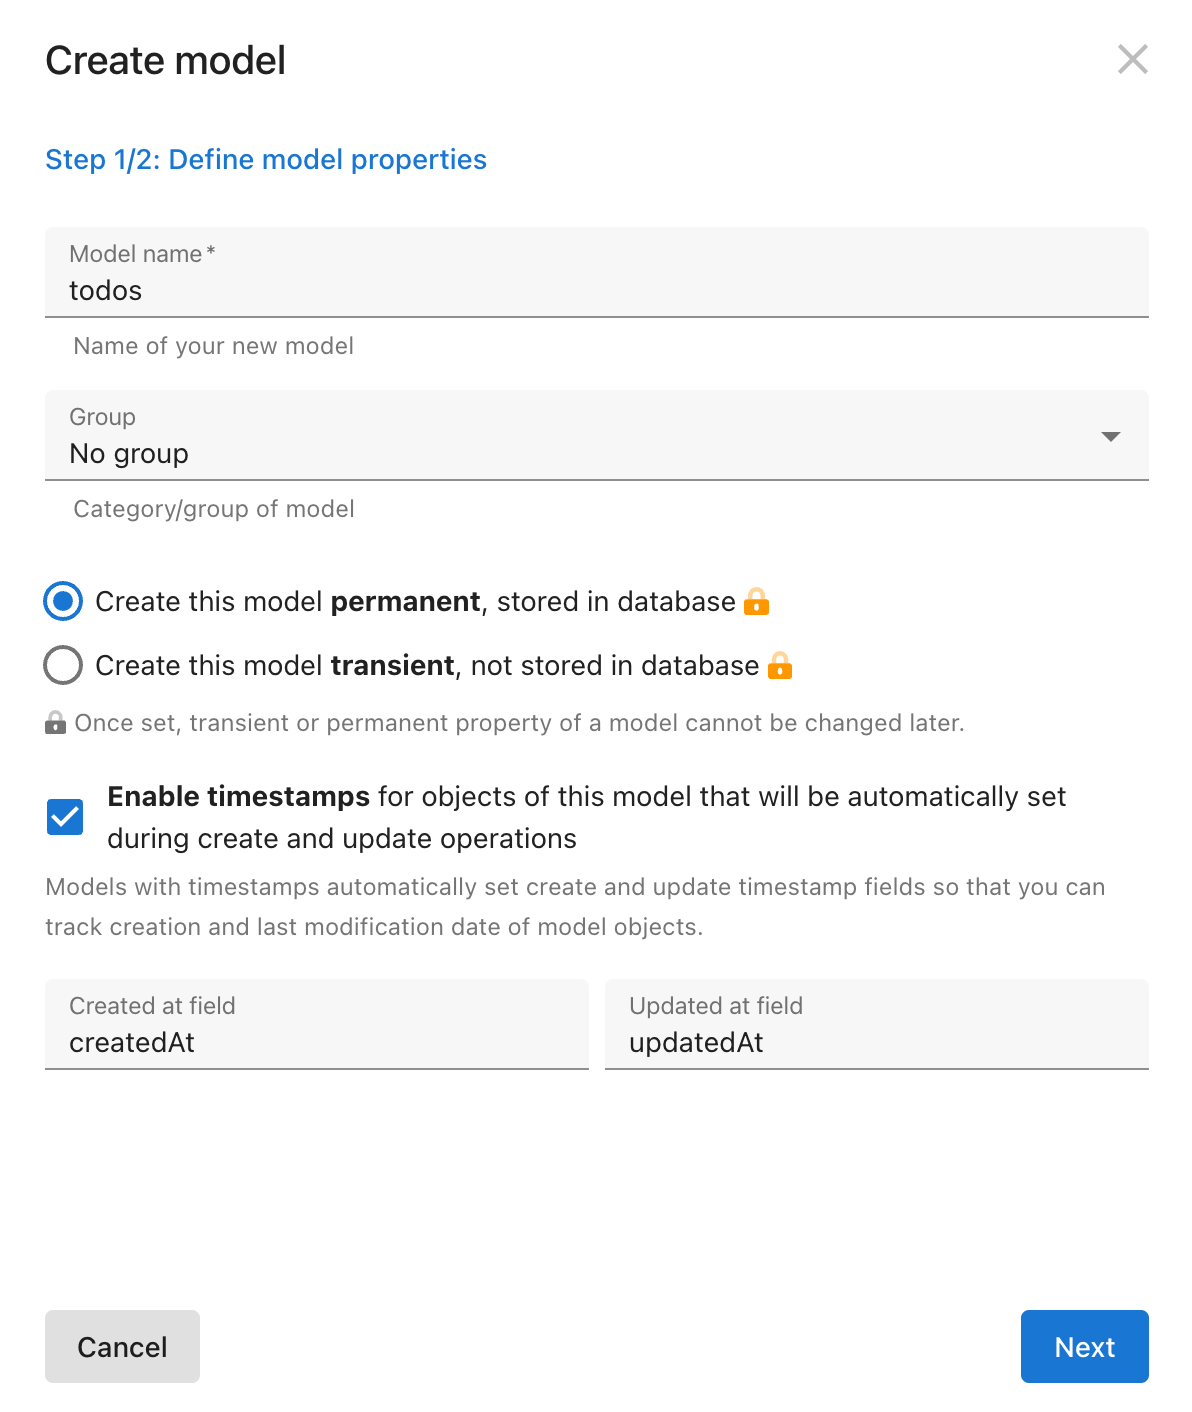
 After, you can pick a Model.
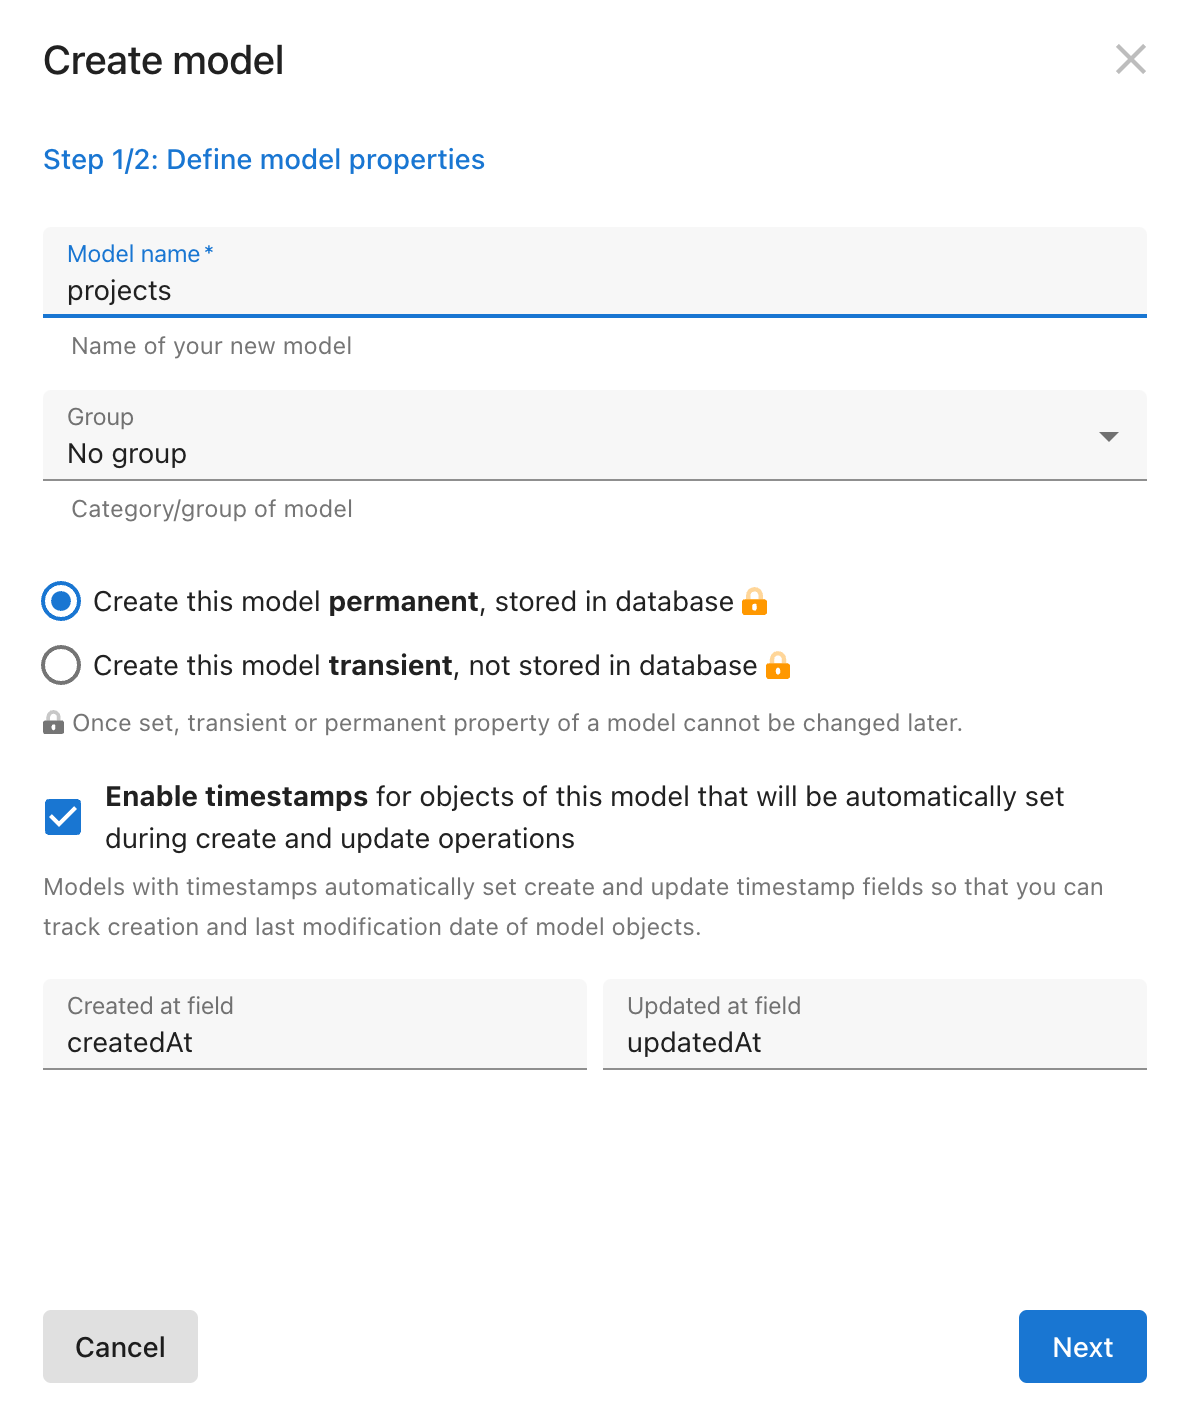 Now, you need to add some fields to your model.
To create a field via the Designer, you need to Navigate to Models view and select the model you would like to add the new field. You will be directed to the model details view.
Now, you need to add some fields to your model.
To create a field via the Designer, you need to Navigate to Models view and select the model you would like to add the new field. You will be directed to the model details view.
- In the model details view, select New field.
- From the dropdown menu, select the Boolean that you would like to create.
- In the field name, type the name.
- Select Create
You need to add the following fields:
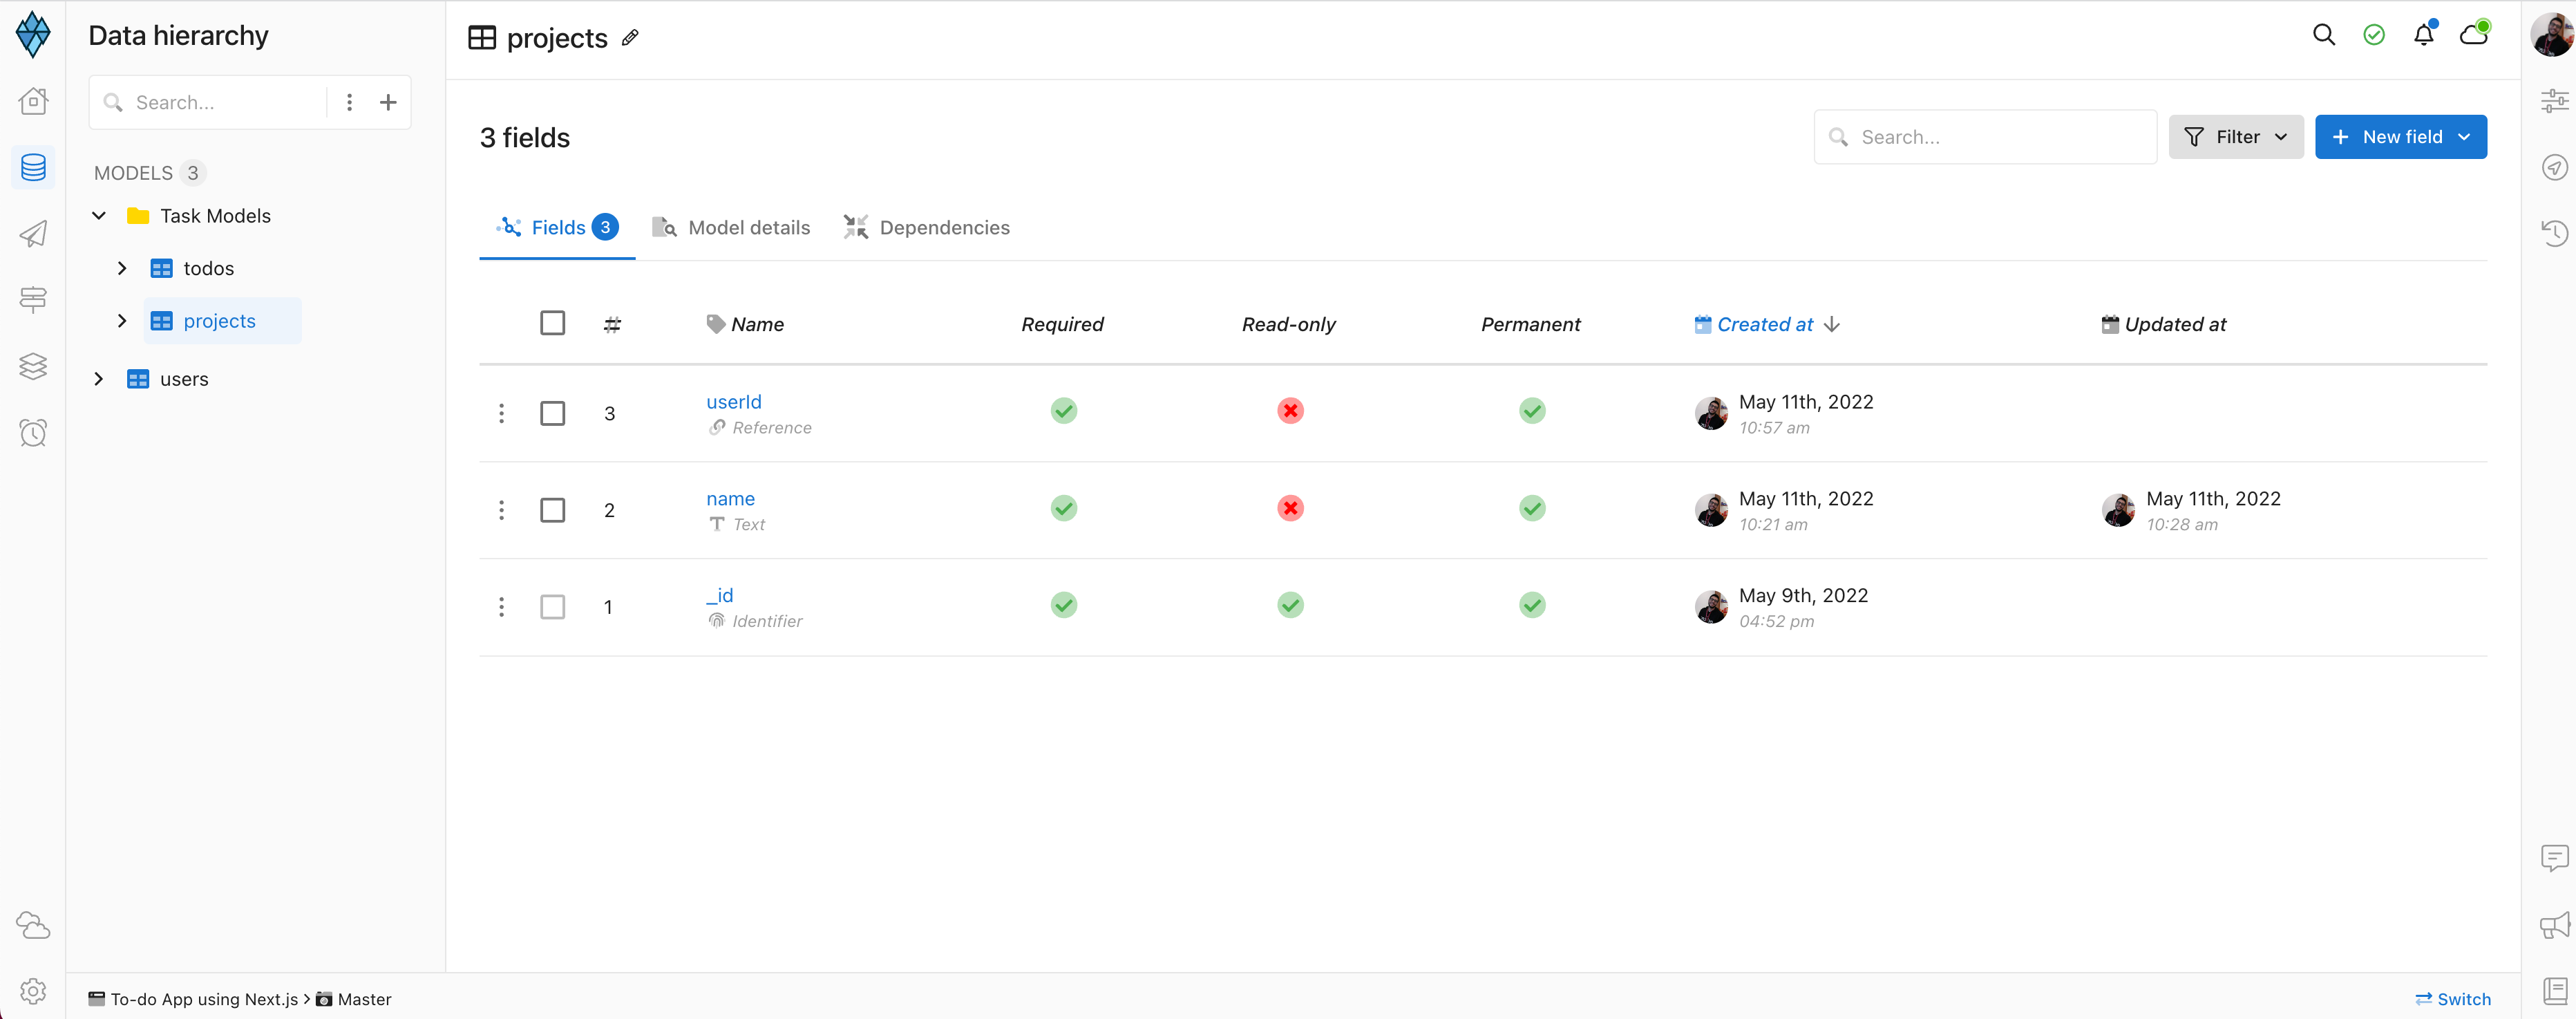
- name, which is a Text.
- userId, which is an Object reference to the users model.
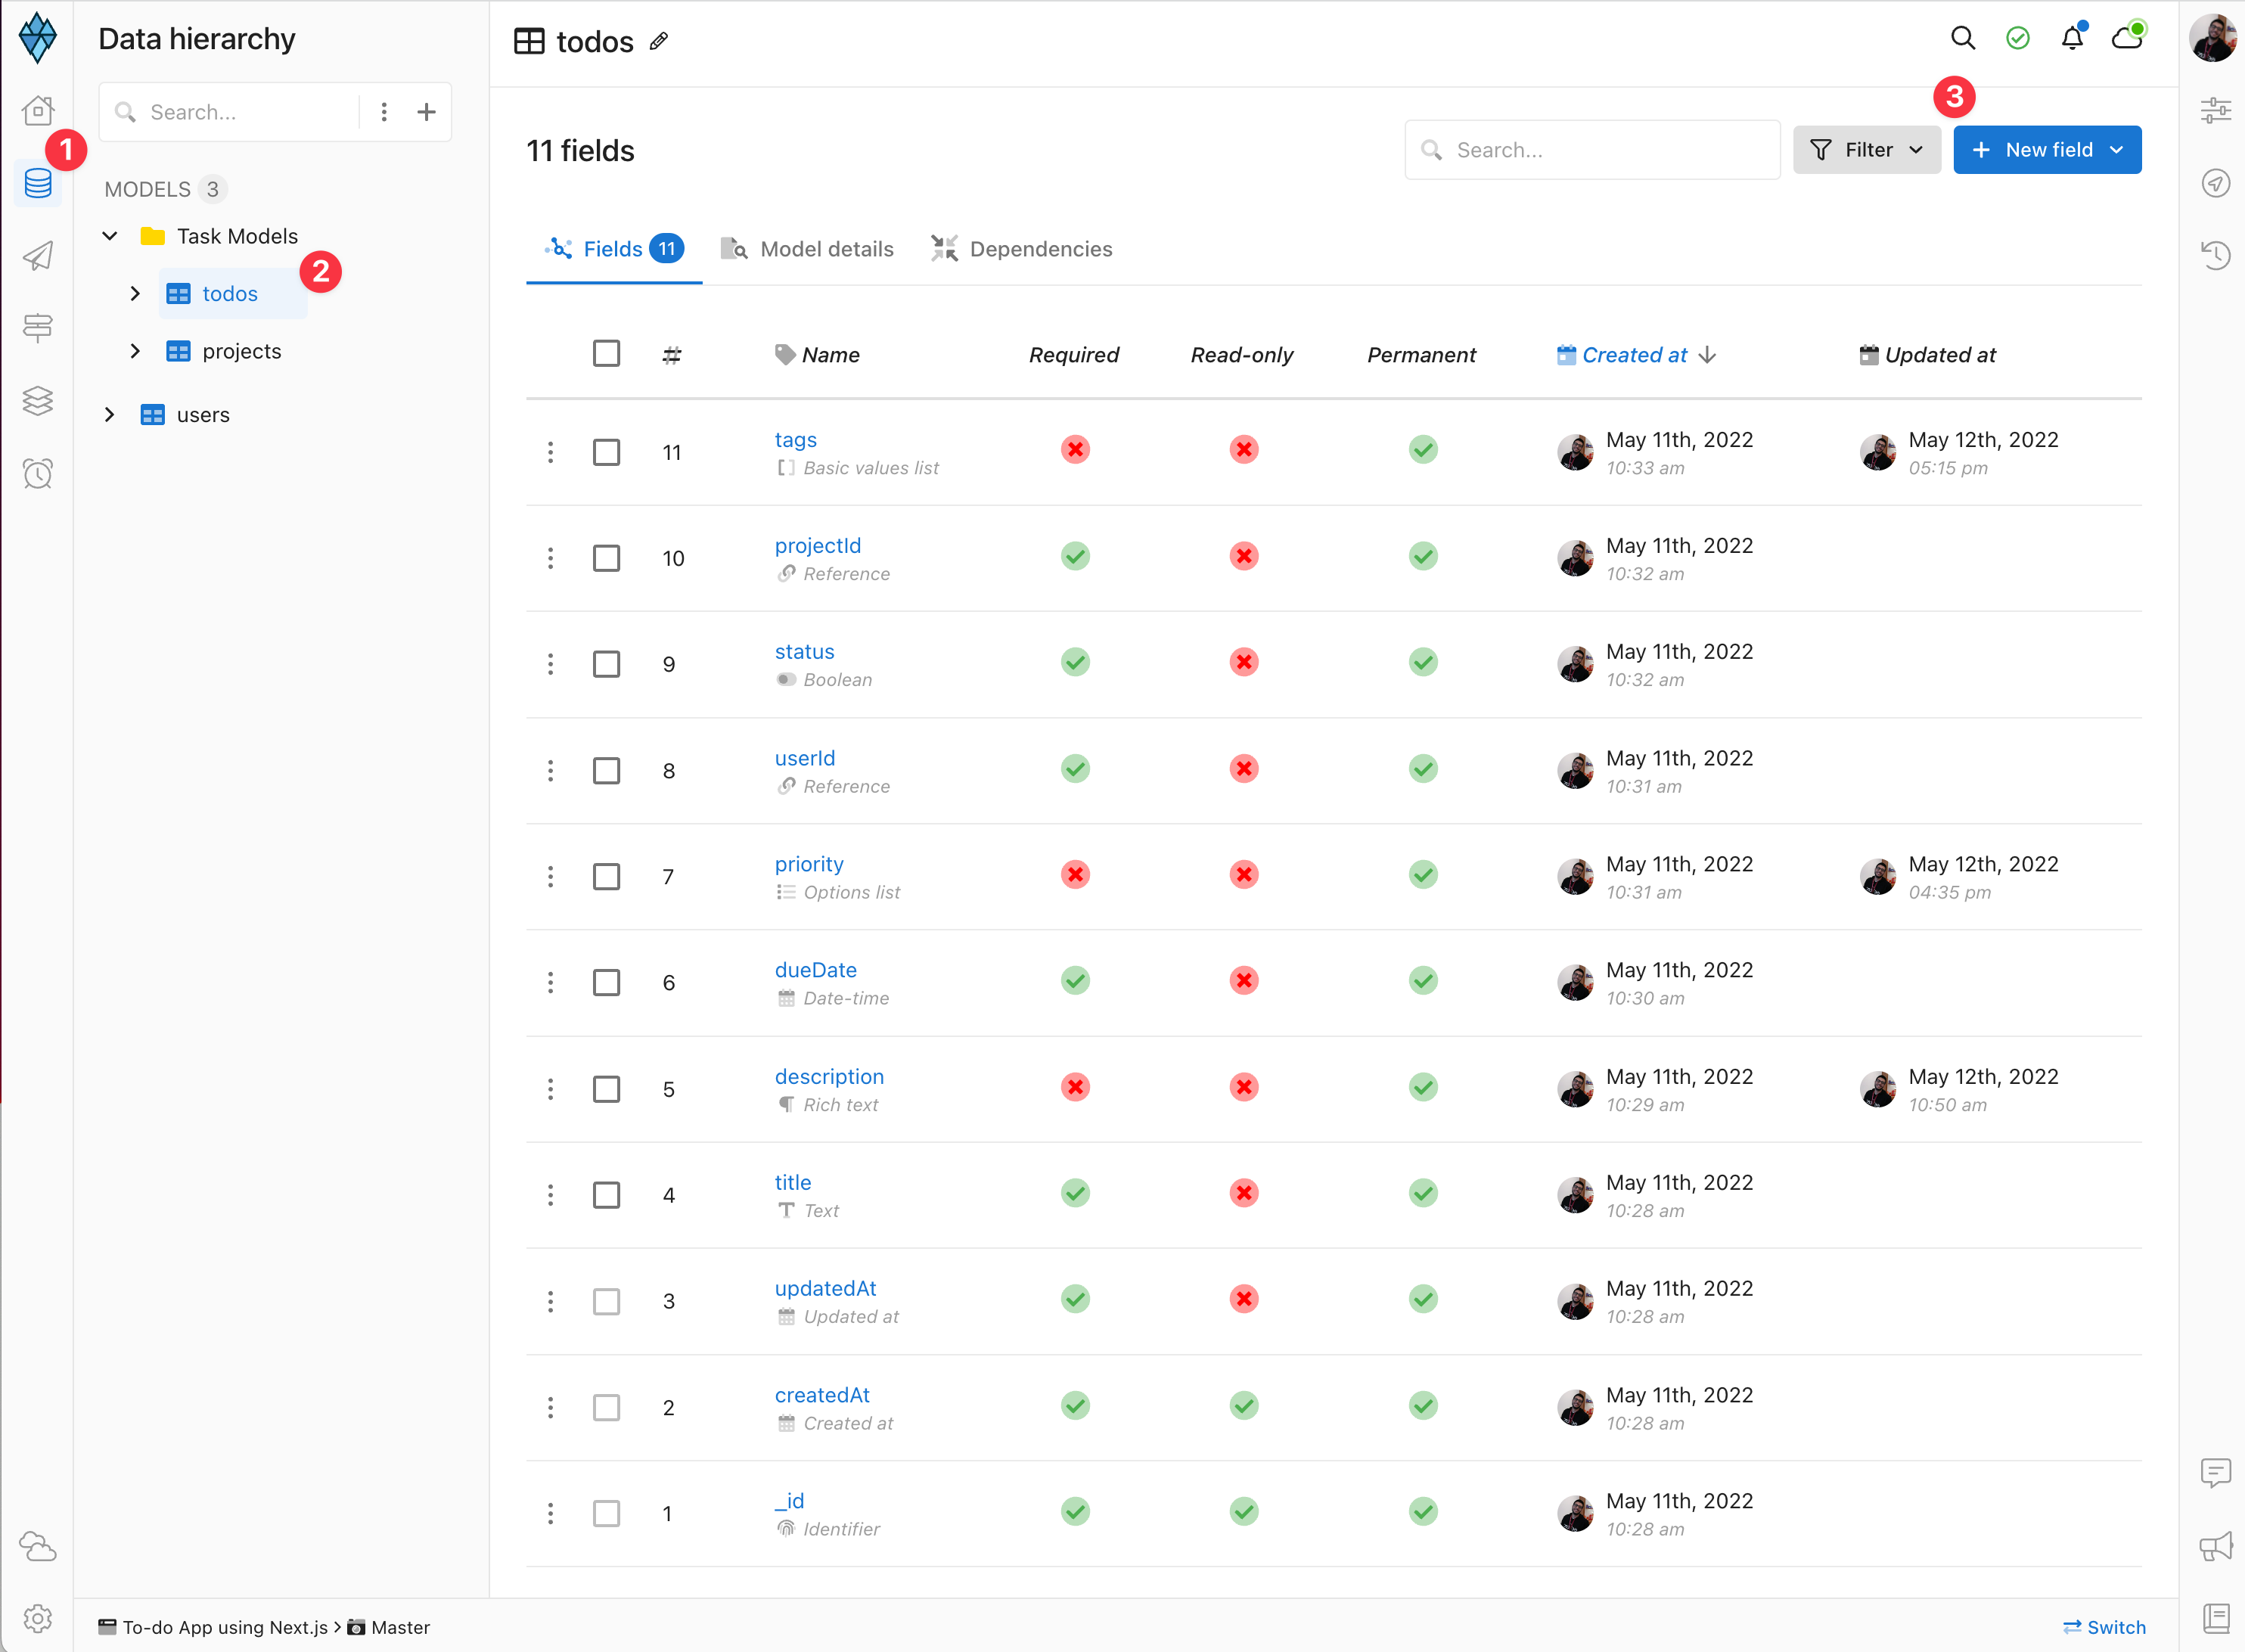
 After, you can create the todos model in the same way. And add the following fields:
 - title, which is a Text.
- description, which is a Rich Text.
- dueDate, which is a Date-time.
- priority, which is a Option list with values “1,2,3”
- userId, which is an Object reference to the users model.
- status, which is a Boolean.
- projectId, which is an Object reference to the projects model.
- tags, which is a Basic values list of type Text.
Set up the Frontend
Install the packages
Before you start to use the npx command, make sure you have NodeJS installed in your development environment. Also, installing VSCode and some extensions might be better for faster development. :bulb: You can visit https://nodejs.org/en/download/ to download. To get started, open the terminal and create a new Next.js project. npx create-next-app@latest Next.js will ask you to name the project. Name it whatever you want; I will use “altogic-task-mgmt-app” for this example. Move to the folder just created and install the Altogic Client Library. cd altogic-task-mgmt-app npm i altogic Open the project in VSCode. Install tailwind CSS and create tailwind.config.js npm install -D tailwindcss postcss autoprefixer npx tailwindcss init -p Add the paths to all of your template files in your tailwind.config.js file.
module.exports = {
  mode: "JIT",
  content: [
    "./pages/**/*.{js,ts,jsx,tsx}",
    "./components/**/*.{js,ts,jsx,tsx}",
  ],
  theme: {
    extend: {},
  },
  variants: {
    extend: {},
  },
};
Add the following directives to your globals.css file.
@tailwind base;
@tailwind components;
@tailwind utilities;
Install Font Awesome to use the icons.
npm i --save @fortawesome/fontawesome-svg-core
npm install --save @fortawesome/free-solid-svg-icons
npm install --save @fortawesome/react-fontawesome
npm i @fortawesome/free-brands-svg-icons
Install @headlesui/react for styling.
npm i @headlessui/react
Update the next.config.js file to allow the Next.js Image component to load images from Altogic’s storage. “c1-na.altogic.com” value is retrieved from the envUrl which starts with c1-na.altogic.com in my case.
/** @type {import('next').NextConfig} */

const nextConfig = {
  reactStrictMode: true,
  images: {
    domains: ["c1-na.altogic.com"],
  },
};

module.exports = nextConfig;
Set up the environment variables
Environment variables are used to secure your secret keys, reuse them in different places and reduce production mistakes. Create a .env.local file in the root directory of your application, open the file in your editor and paste the following. You can check more about environment variables in Next.js here.
NEXT_PUBLIC_ALTOGIC_ENV_URL=YOUR-APPLICATION-ENV-URL
NEXT_PUBLIC_ALTOGIC_CLIENT_KEY=YOUR-APPLICATION-CLIENT-KEY
Replace YOUR-APPLICATION-ENV-URL and YOUR-APPLICATION-CLIENT-KEY with the envUrl and clientKey values you retrieved while setting up your backend. Next, create a file to create the Altogic Client Library instance. mkdir helpers cd helpers touch altogic.js This creates a altogic.js file in the helpers directory. Open the file in your editor and paste the following.
import { createClient } from "altogic";

export const altogic = createClient(
  process.env.NEXT_PUBLIC_ALTOGIC_ENV_URL,
  process.env.NEXT_PUBLIC_ALTOGIC_CLIENT_KEY,
  {
    signInRedirect: "/auth/sign-in-redirect",
  }
);
Here, you need to enter the envUrl and clientKey. Optionally you can paste signInRedirect to redirect your users to the specified sign-in page in some cases. This works in a way that if users try to perform a session-required action while their session has been destroyed, Altogic redirects them to the signInRedirect route.
Let’s start coding!
Now we can start integrating the backend into the frontend. For this, we will create a context for managing the tasks and projects. Inside the context, there will be following and more functionalities.
Create project objects
Our data models are defined as every task has a project. To create a task, first, we need to create a project. Here is the code for that.
async function addProject(projectName) {
    // Add a project and get all the projects again.
    await altogic.db
      .model("projects")
      .create({ name: projectName, userId: userCtx.user._id });
    getAllProjects();
  }
Create task objects
Later, we can create a task in the database.
  async function createTodo(title, description, priority, tags, dueDate) {
    // Create todo object in the database.
    const { data, errors } = await altogic.db.model("todos").create({
      title: title,
      description: description,
      dueDate: dueDate,
      priority: priority,
      userId: userCtx.user._id,
      status: false,
      projectId: currentProject._id,
      tags: tags,
    });
    if (data) {
      setTodos((todos) => [...todos, data]);
    }
    return errors;
  }
Manage the states
In the first useEffect, we fetch all the projects and tasks from the database. It runs every time when user changes, in other words when they sign in and sign out. In the second useEffect, we clear the filters we applied before, compute the stats from the database, and set the selectedTodos array accordingly. This runs when currentProject or todos changes. In the third useEffect, we set the current project when projects change.
 useEffect(() => {
    // Get all the projects and todos when user session changes.
    getAllProjects();
    getAllTodos();
  }, [userCtx.session]);

  useEffect(() => {
    // When current project changes, reset the filters.
    setDateSortedAsc(false);
    setPriortiySortedHighest(true);
    setcurrentlyFilteredPriority(0);
    setcurrentlyFilteredTag(null);

    if (userCtx.user != null) computeStatsByPriority();

    if (currentProject) {
      setSelectedTodos(
        todos.filter((todo) => todo.projectId === currentProject._id)
      );
    } else if (allTodosView) {
      setSelectedTodos(todos);
    }
    if (currentlySelectedDate !== null) {
      handleCalendarSelectedTasks(
        currentlySelectedDate.day,
        currentlySelectedDate.month,
        currentlySelectedDate.year
      );
    }
  }, [currentProject, todos]);

  useEffect(() => {
    if (projects.length === 0) {
      // If there is no project, set the current project to null.
      setCurrentProject(null);
    } else {
      setCurrentProject(projects[0]);
    }
  }, [projects]);
Compute stats using Altogic
In apps like task management apps, we need to show some statistics to the user. Altogic makes it much easier to compute complex statistics in the backend. For this we will use altogic.db.model(“todos”).group(“priority”).compute({name:“count”,type:“count”}) function. This function groups the todos objects by priority and counts them by their group and returns the count of each group in a field named “count”.
You can check out the documentation for more information.
  async function computeStatsByPriority() {
    // Decide if we will compute the todos in all projects or for the current project.
    const filterString =
      currentProject !== null
        ? `userId=='${userCtx.user._id}' && projectId=='${currentProject._id}'`
        : `userId=='${userCtx.user._id}'`;

    // Compute with Altogic Client Library function.
    const { data } = await altogic.db
      .model("todos")
      .filter(filterString)
      .group("priority")
      .compute({ name: "count", type: "count" });

    // Set the counts of priority.
    let priorityLowCount;
    let priorityMediumCount;
    let priorityHighCount;

    data.map((element) => {
      if (element.groupby.group === "1") {
        priorityLowCount = element.count;
      } else if (element.groupby.group === "2") {
        priorityMediumCount = element.count;
      } else if (element.groupby.group === "3") {
        priorityHighCount = element.count;
      }
      setStatsByPriority([
        priorityLowCount ?? 0,
        priorityMediumCount ?? 0,
        priorityHighCount ?? 0,
      ]);
    });
  }
Toggle the done status
Now we have created projects and tasks, we should implement a function to update the status of the tasks. We will use update method of the ObjectManager in Altogic Client Library.
 async function handleDoneTodo(todoId, currentValue) {
    // Toggle the status field of the todo.
    const { data } = await altogic.db
      .model("todos")
      .object(todoId)
      .update({ status: !currentValue });
    if (data) {
      setTodos(
        todos.map((todo) => {
          if (todo._id === todoId) {
            todo.status = !currentValue;
          }
          return todo;
        })
      );
    }
  }
Remove a task
To remove a task, we will use the delete method of the ObjectManager in Altogic Client Library.
  async function removeTodo(todoId) {
    // Remove todo from the database.
    const { errors } = await altogic.db.model("todos").object(todoId).delete();
    if (!errors) {
      setTodos(todos.filter((todo) => todo._id !== todoId));
      setShowModal(false);
    }
  }
Remove a project
When we remove a project, we need to remove all the tasks in it as well. To remove a task, we will use the delete method of the ObjectManager and the delete method of the QueryBuilder in Altogic Client Library.
 async function deleteProject() {
    // Delete the todos of the project first.
    await altogic.db
      .model("todos")
      .filter(
        `userId == '${userCtx.user._id}' && projectId == '${currentProject._id}'`
      )
      .delete();
    // Delete the project.
    const { errors } = await altogic.db
      .model("projects")
      .filter(
        `_id == '${currentProject._id}' && userId == '${userCtx.user._id}' `
      )
      .delete();
    if (!errors) {
      // Set todos and projects in the context.
      setTodos(todos.filter((todo) => todo.projectId !== currentProject._id));
      setProjects(
        projects.filter((project) => project._id !== currentProject._id)
      );
    }
  }
Update a task
Users might want to update the title, description, due date, or priority fields of a task. To update a task, we will use the update method of the ObjectManager in Altogic Client Library.
 async function updateTask(title, description, dueDate, priority) {
    // Update the task in the database.
    const { data } = await altogic.db
      .model("todos")
      .object(currentlyEditedTodo._id)
      .update({
        title: title,
        description: description,
        dueDate: dueDate,
        priority: priority,
      });
    setTodos(
      todos.map((todo) => {
        if (todo._id === data._id) {
          todo = data;
        }
        return todo;
      })
    );
    if (data) {
      // Close the modal.
      toggleModal(null);
    }
  }
Get all projects
Get all project objects from the database using the get method of QueryBuilder in Altogic Client Library.
 async function getAllProjects() {
    // Get all projects from the database and set projects in the context.
    if (userCtx.user) {
      const { data } = await altogic.db
        .model("projects")
        .filter(`userId=='${userCtx.user._id}'`)
        .get();
      setProjects(data);
      setCurrentProject(data[0] ?? null);
    } else {
      setProjects([]);
    }
  }
Get all tasks
Get all task objects from the database using the get method of QueryBuilder in Altogic Client Library.
 async function getAllTodos() {
    // Get all todos from the database and set todos in the context.
    if (userCtx.user) {
      const { data } = await altogic.db
        .model("todos")
        .filter(`userId=='${userCtx.user._id}'`)
        .limit(500)
        .sort("dueDate", "asc")
        .get();
      setTodos(data);
    } else {
      setTodos([]);
    }
  }
TaskContext Full Code
In the above, we have connected our frontend application with Altogic. There are more functions for sorting, toggling modals, etc. and you can check them from our repository.
Conclusion
This article covered how to implement a task management app using Next.js, and Altogic Client Library. Thanks to Altogic, we can build most of the functionality with just a few lines of code. You can check out the GitHub repository for other functionalities and the rest of the code. You can also clone it and build your app on top of it.