
How to build Phone Number-Based Authentication with React & Altogic and Twilio


Introduction
This article will cover phone number-based authentication basics using React and Altogic, a backend-as-a-service platform using its client library. You can checkout the Github repository.
So, what is phone number-based authentication?
Users can sign up for the application by providing their phone number and password only. This authentication method does not require users to specify their email addresses. Thus, users can log in to the application using their phone number and the password they set when signing up.
With phone number authentication, the application will send an SMS code to the user through Twilio. After users receive the SMS message from the provider, they can use this code to verify their phone number.
It is also possible to set up the authentication system through other providers such as MessageBird and Vonage.
In the rest of the article, I’ll explain how phone authentication works and set up phone number authentication to a Web application using the Altogic Client Library and React as a frontend.
How does Phone Number Based Authentication work?
Authentication with the Phone Number consists of a few steps:
Users can enter their phone number and password on the Sign Up page.
Then the system will send an SMS to the given phone number with Twilio.
After the user enters the verification code in the SMS, the system completes the phone number verification.
Users will be able to sign in 2 ways:
- Sign in with credentials: Password and phone number
- Sign in with One-Time Passwords(OTP), where OTP is sent as an SMS message
OTP: The automatically generated password authenticates the user for a single session.
Developers can either configure the validity period of the verification code or the user session duration.
How to Setup Phone Number Based Authentication with Altogic?
Creating App in Altogic
To enable phone number authentication, we need to create an app in Altogic.
We can create an app with the Altogic Designer really fast. To create an app via the Designer:
Log in to Altogic with your credentials.
Select New app.
In the App name field, enter a name for the app.
And click create.
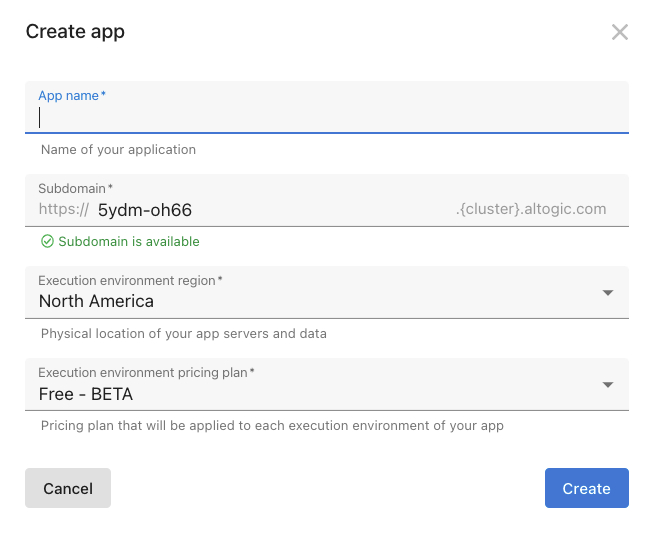
Here, you can customize your subdomain, but not necessarily to do, Altogic automatically creates one for you, which will be your envUrl. You don’t need to worry if you lost your envUrl; you can get it from the Environments view of Designer.
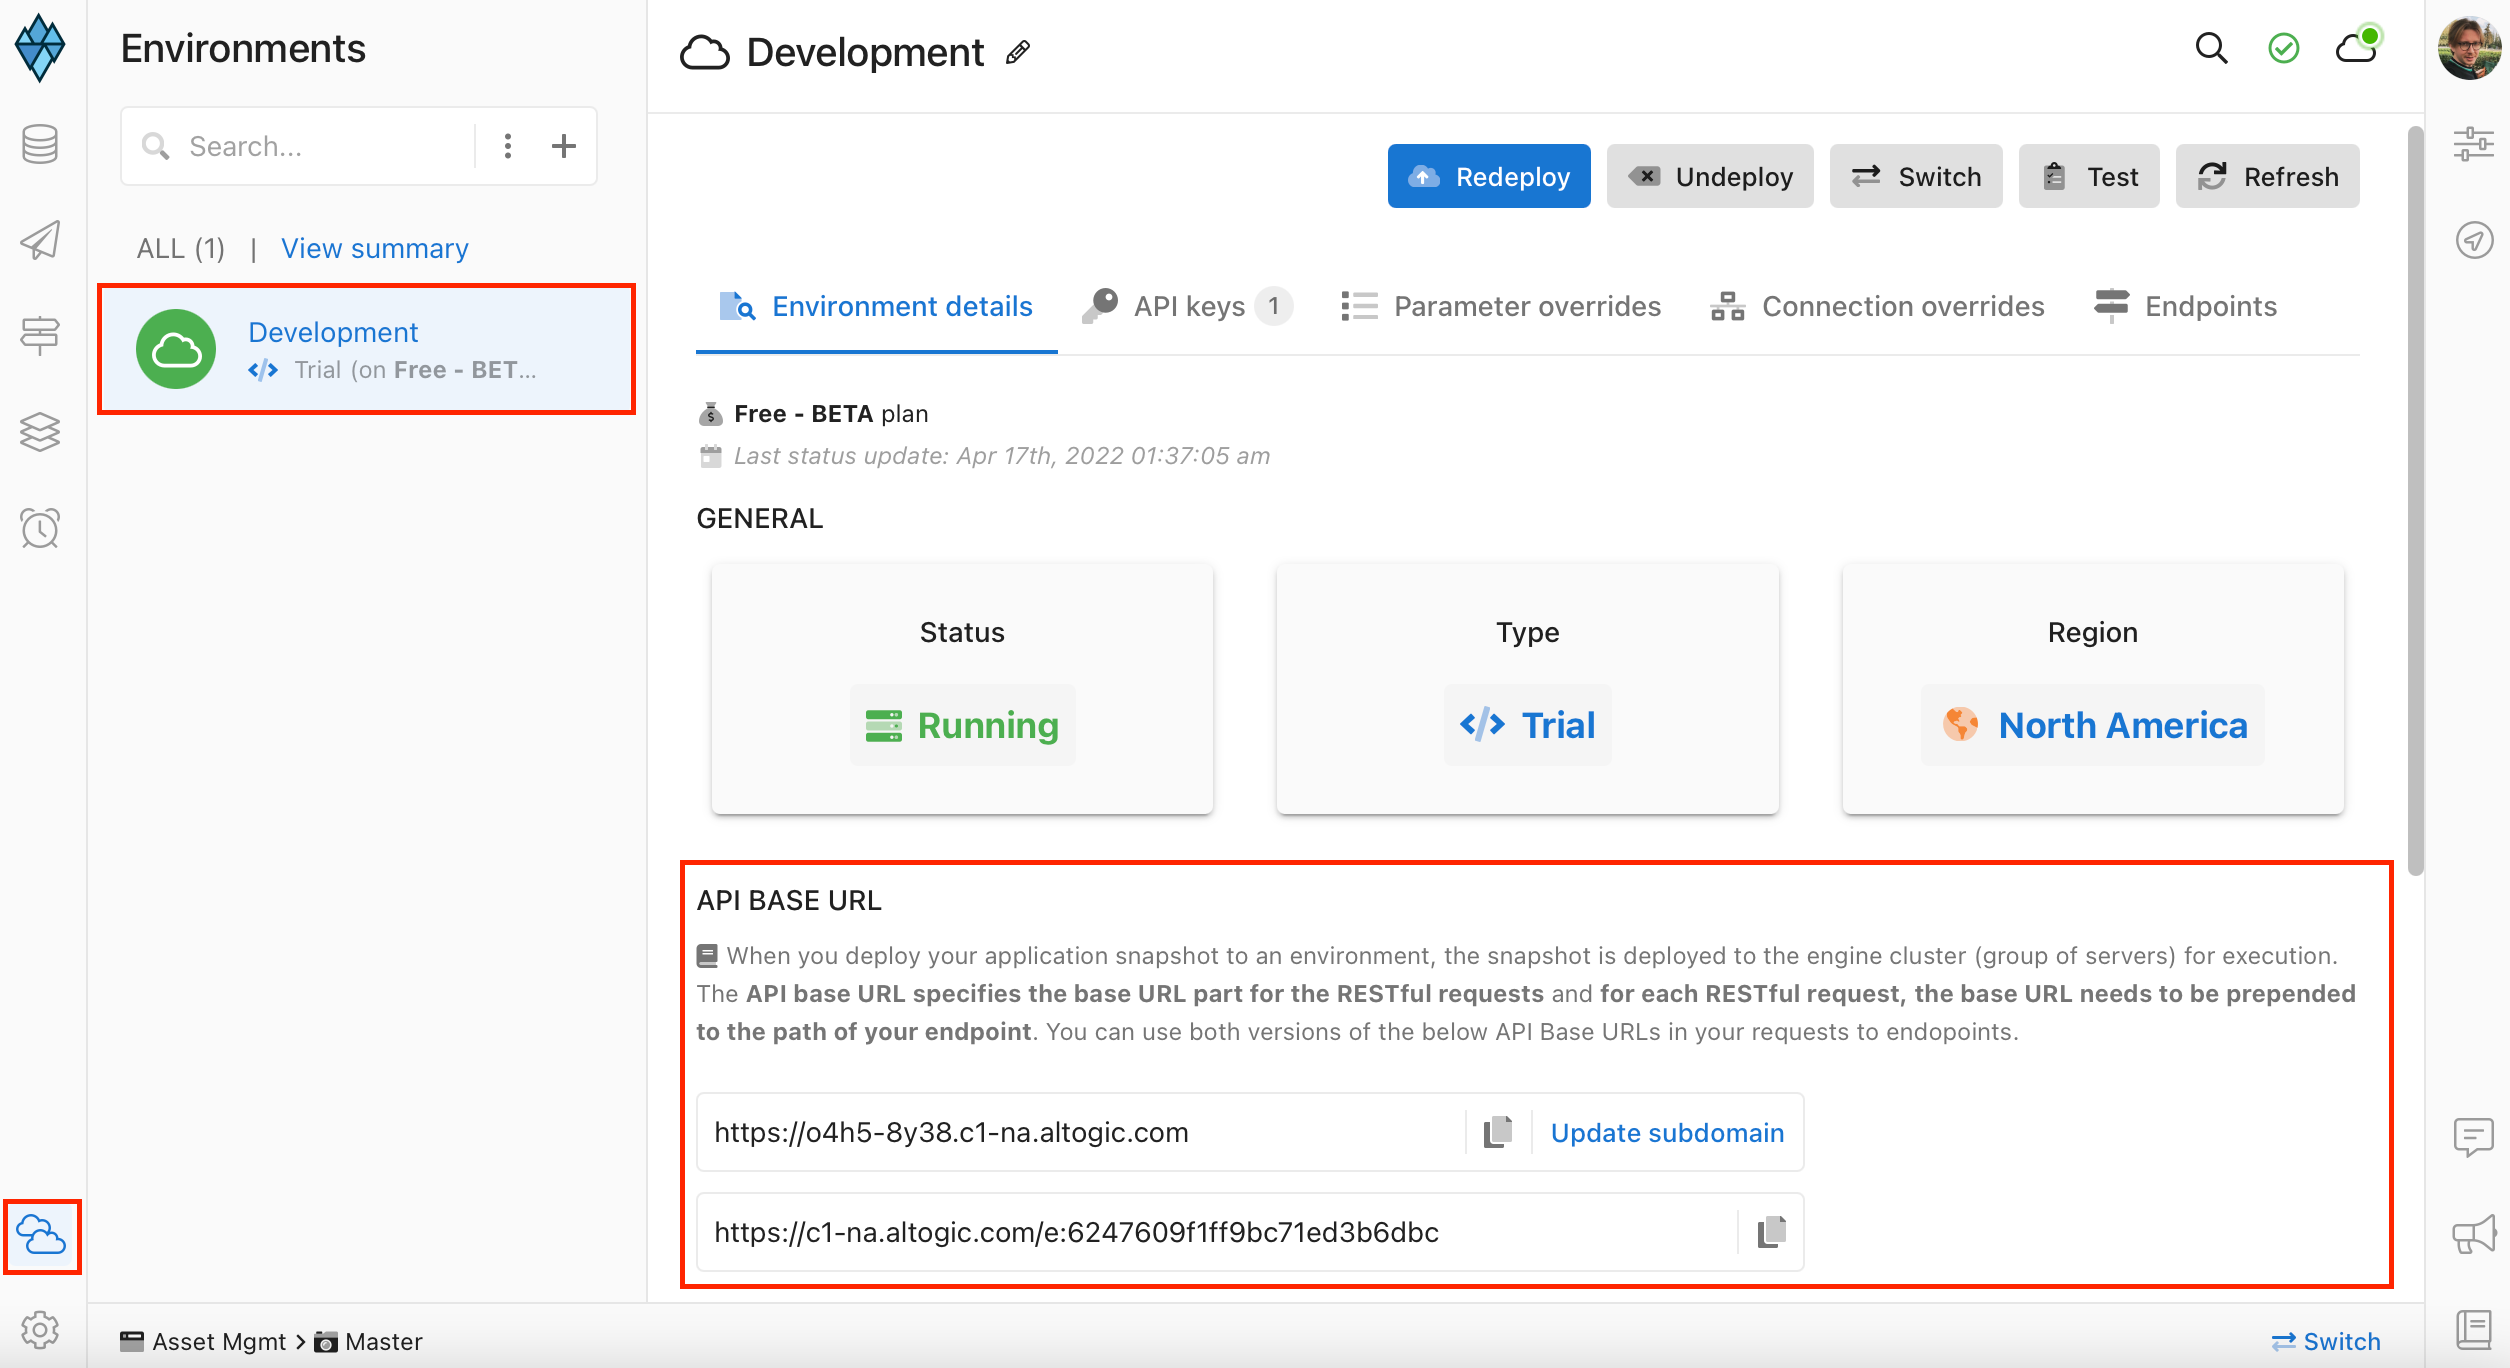
After creating our app, we need envUrl and clientKey to access our app via Altogic Client Library to create a web application.
In order to get the clientKey we need to enter the app which we have created before and;
Click on App Settings at the left-bottom of the designer.
And click on Client library keys section.
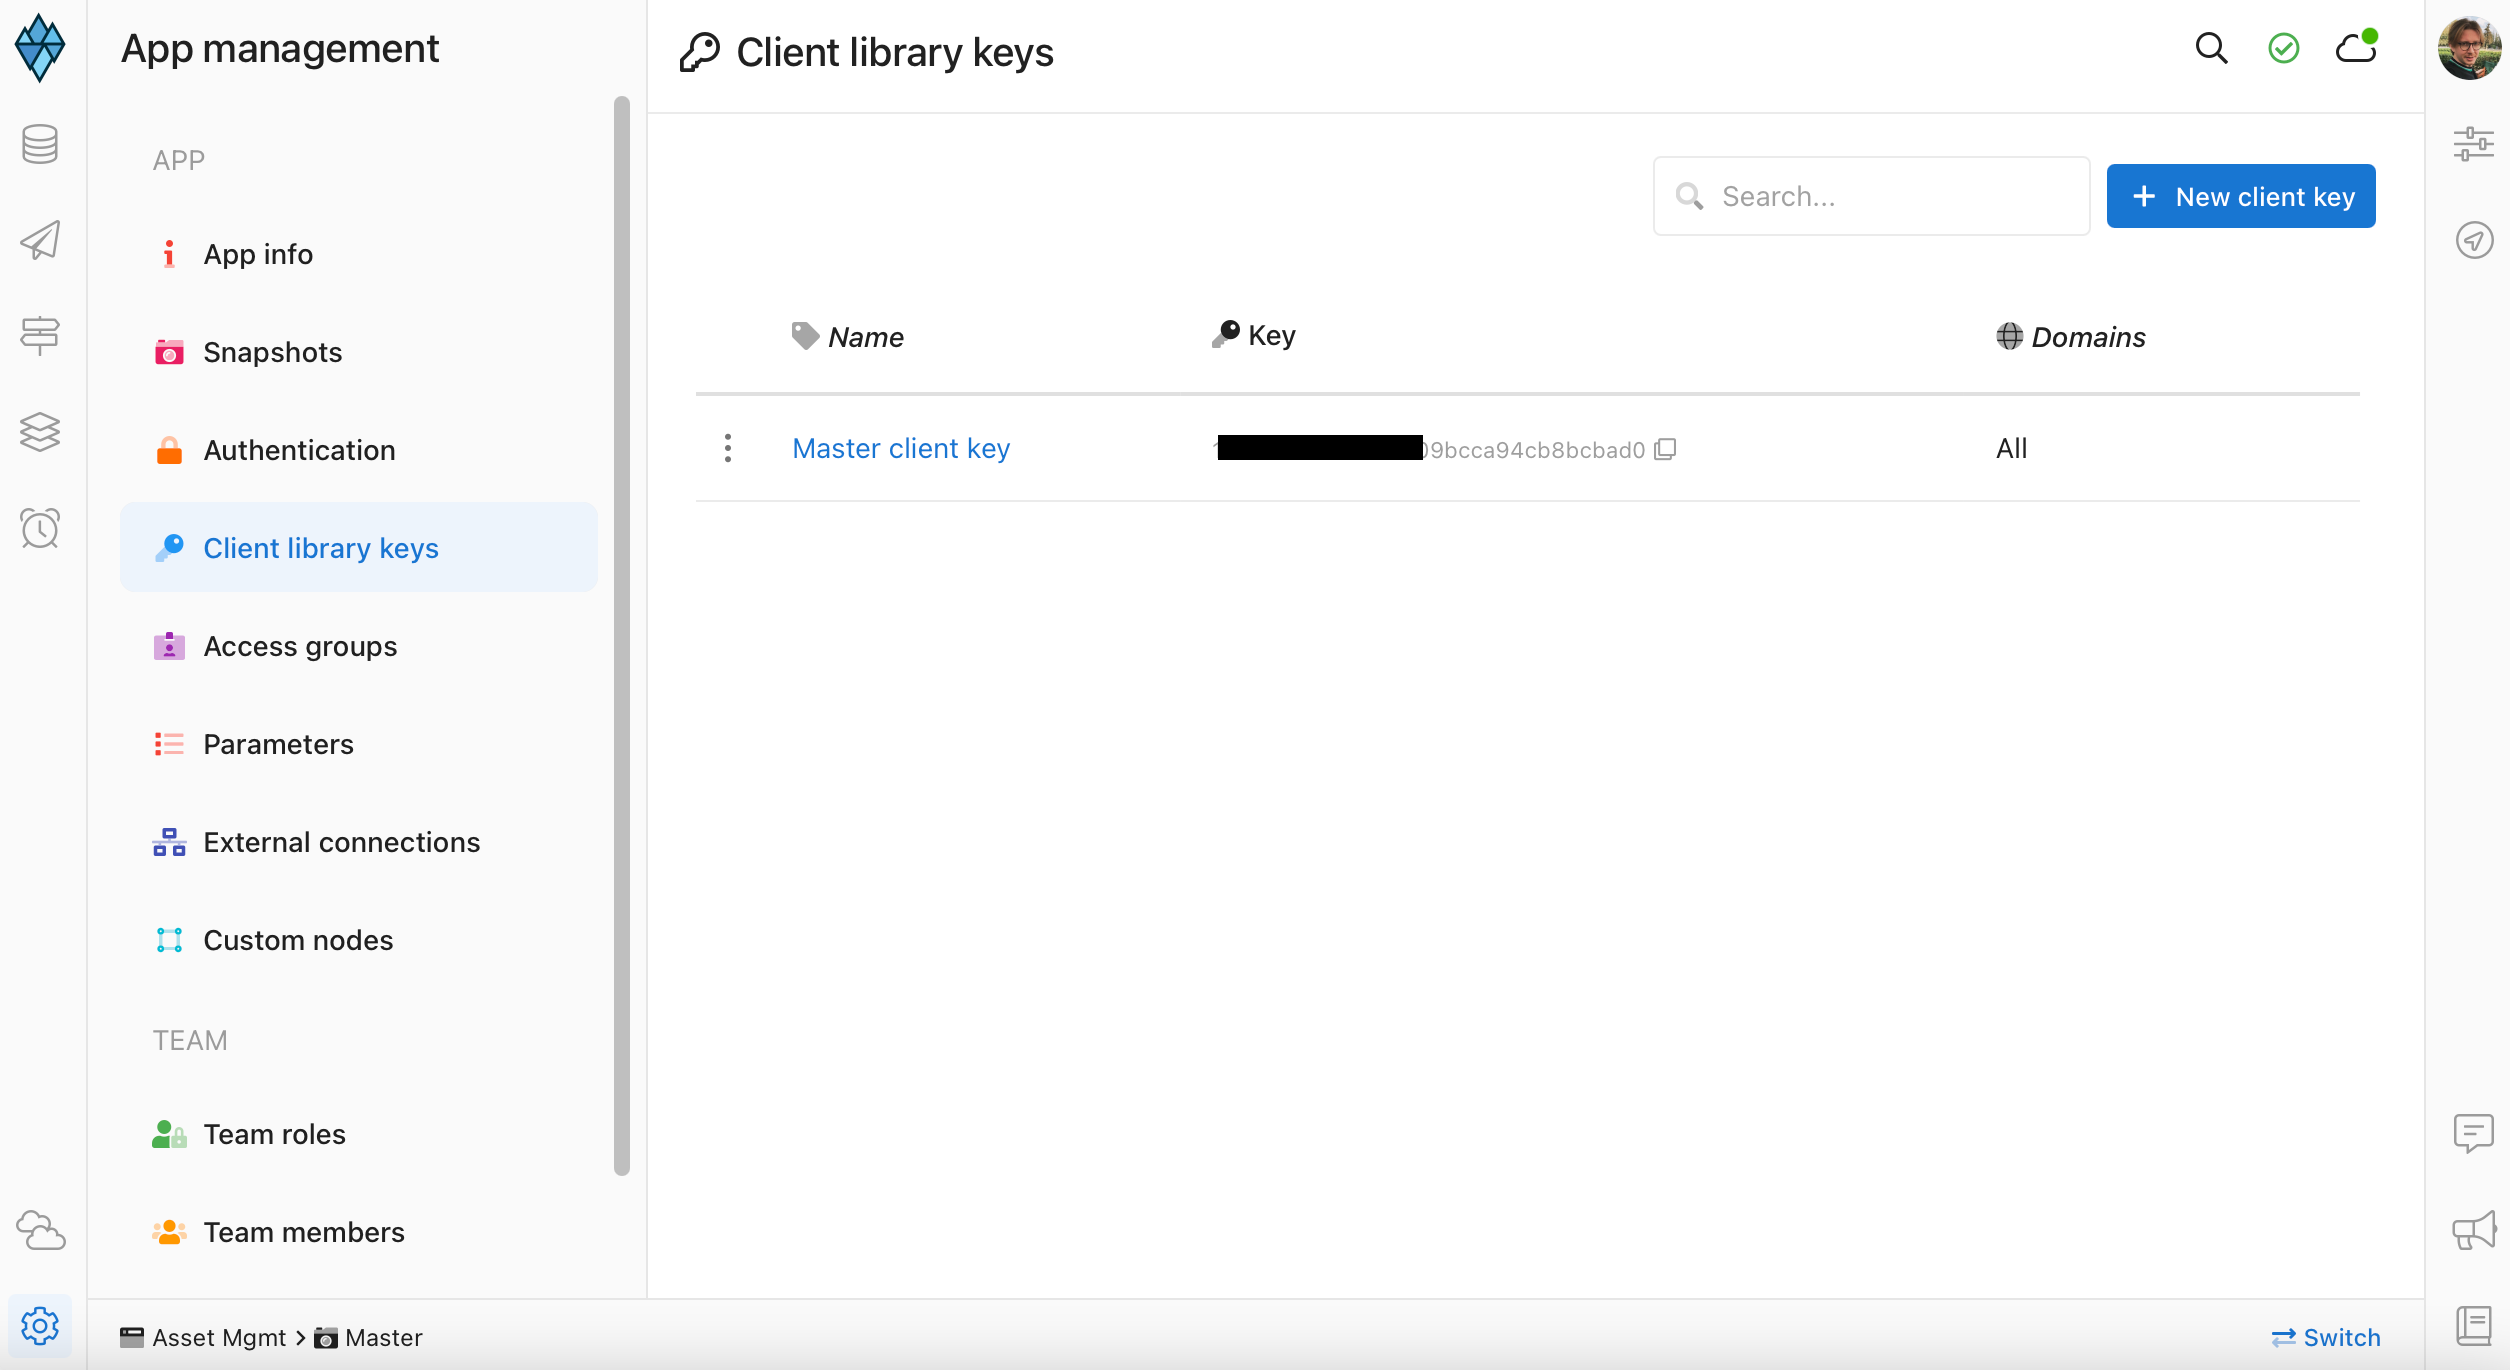
We can create new clientKey from that page, but thanks to Altogic for creating one clientKey automatically for us, so let’s copy the existing clientKey from the list.
Really cool! Now everything is ready at the backend, time to continue Twilio Integration.
Twilio Integration
You need to sign up for Twilio with a free/paid trial. You need to get the Account SID and Auth Token for integration with Altogic Client Library.
If you will use the free trial, you will need to take Twilio phone number to send SMS messages to the users.
Create an Account in Twilio
Open Console
Click “Get a trial phone number” on the left-top of the Console
Copy Account SID, Auth Token and My Twilio phone number values to the clipboard
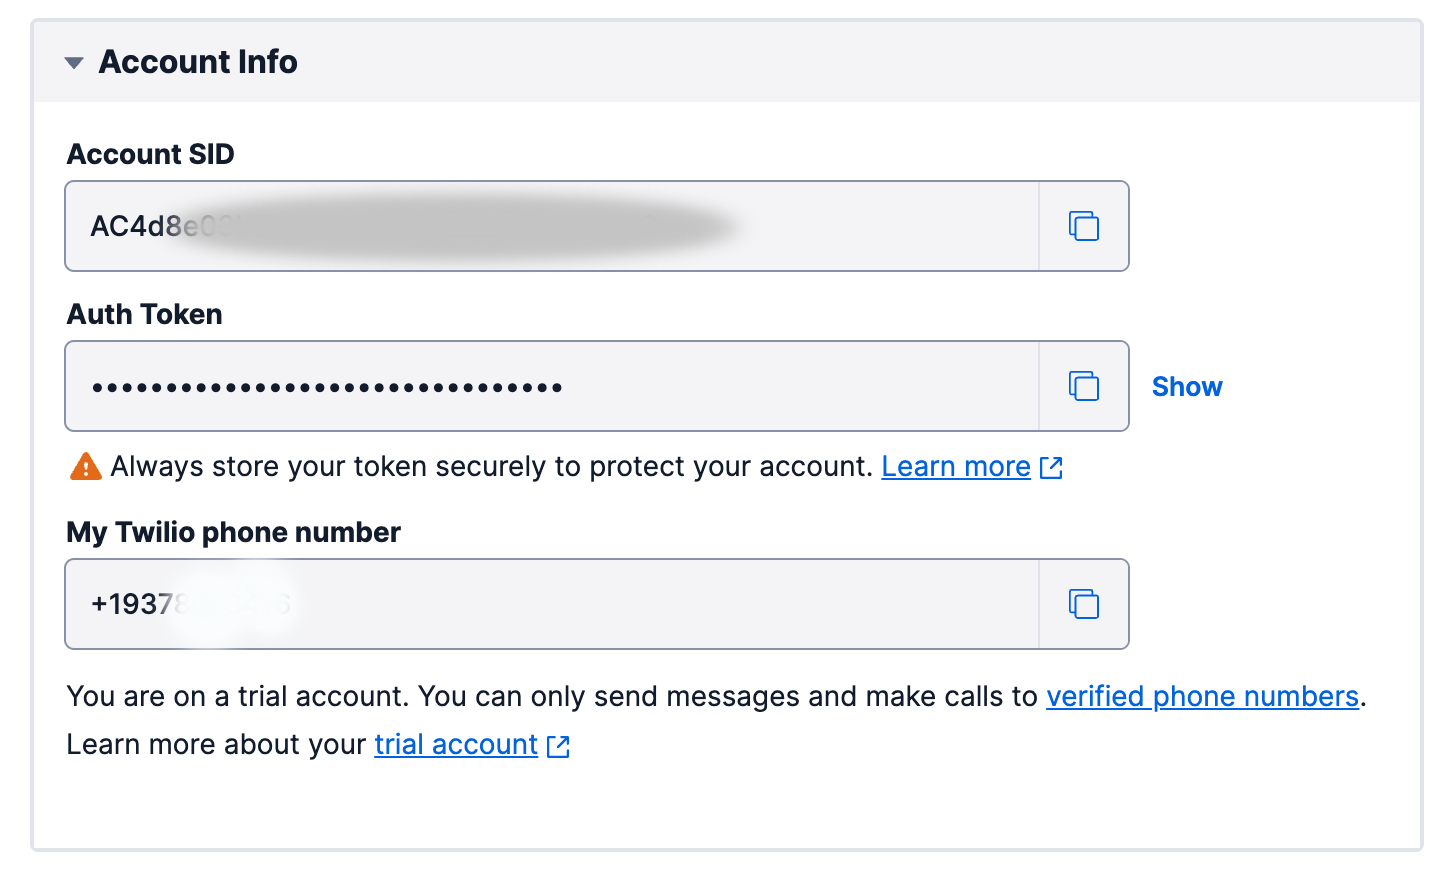
Now, we’ve copied the configuration credentials to the clipboard. In trial accounts, you have to specify the verified phone numbers, which we defined as “to number” in Altogic.
- Click on the Explore Products in the left sidebar
- Be sure that Messaging and Phone Numbers products are selected.
Now you can navigate to the Verified Caller IDs page by Sidebar → Phone Numbers → Manage → Verified Caller IDs.
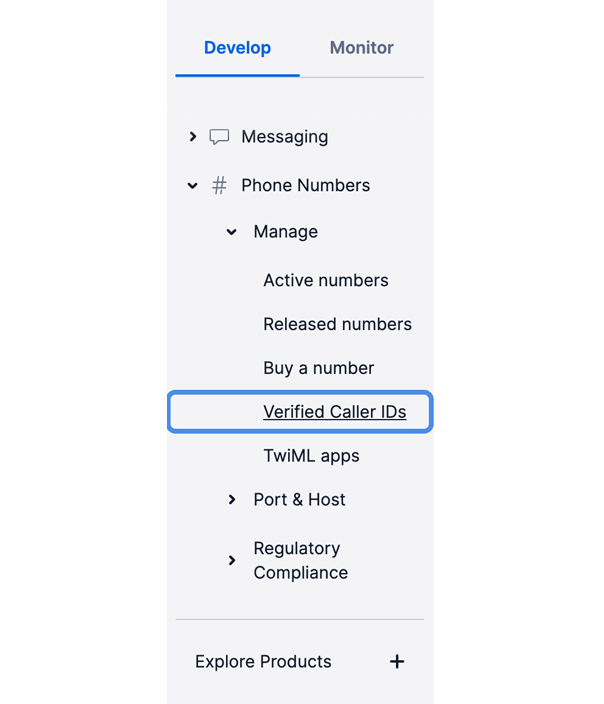
You should add your phone number as a Verified Caller from here.
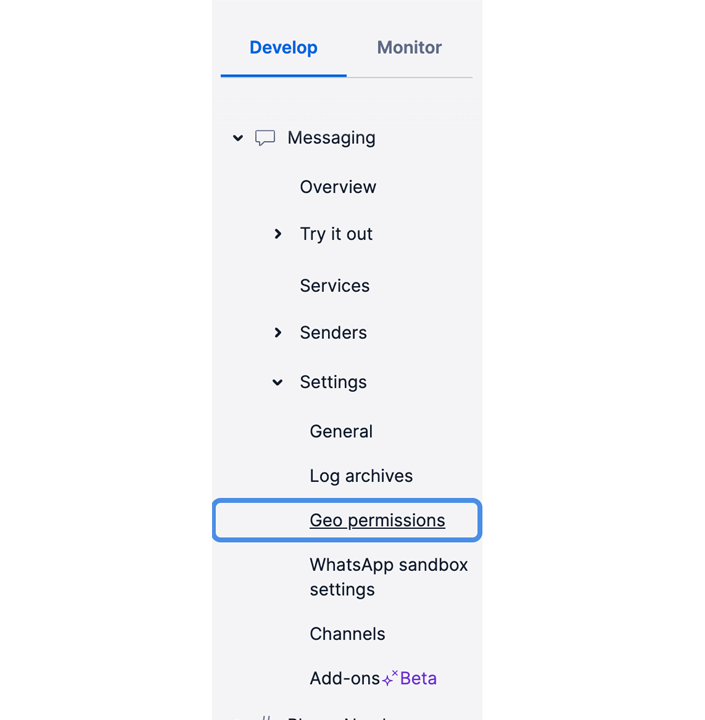
And finally, you have to give geo permission to your phone numbers region. You can go to this page by Sidebar → Messaging → Settings → Geo permissions.
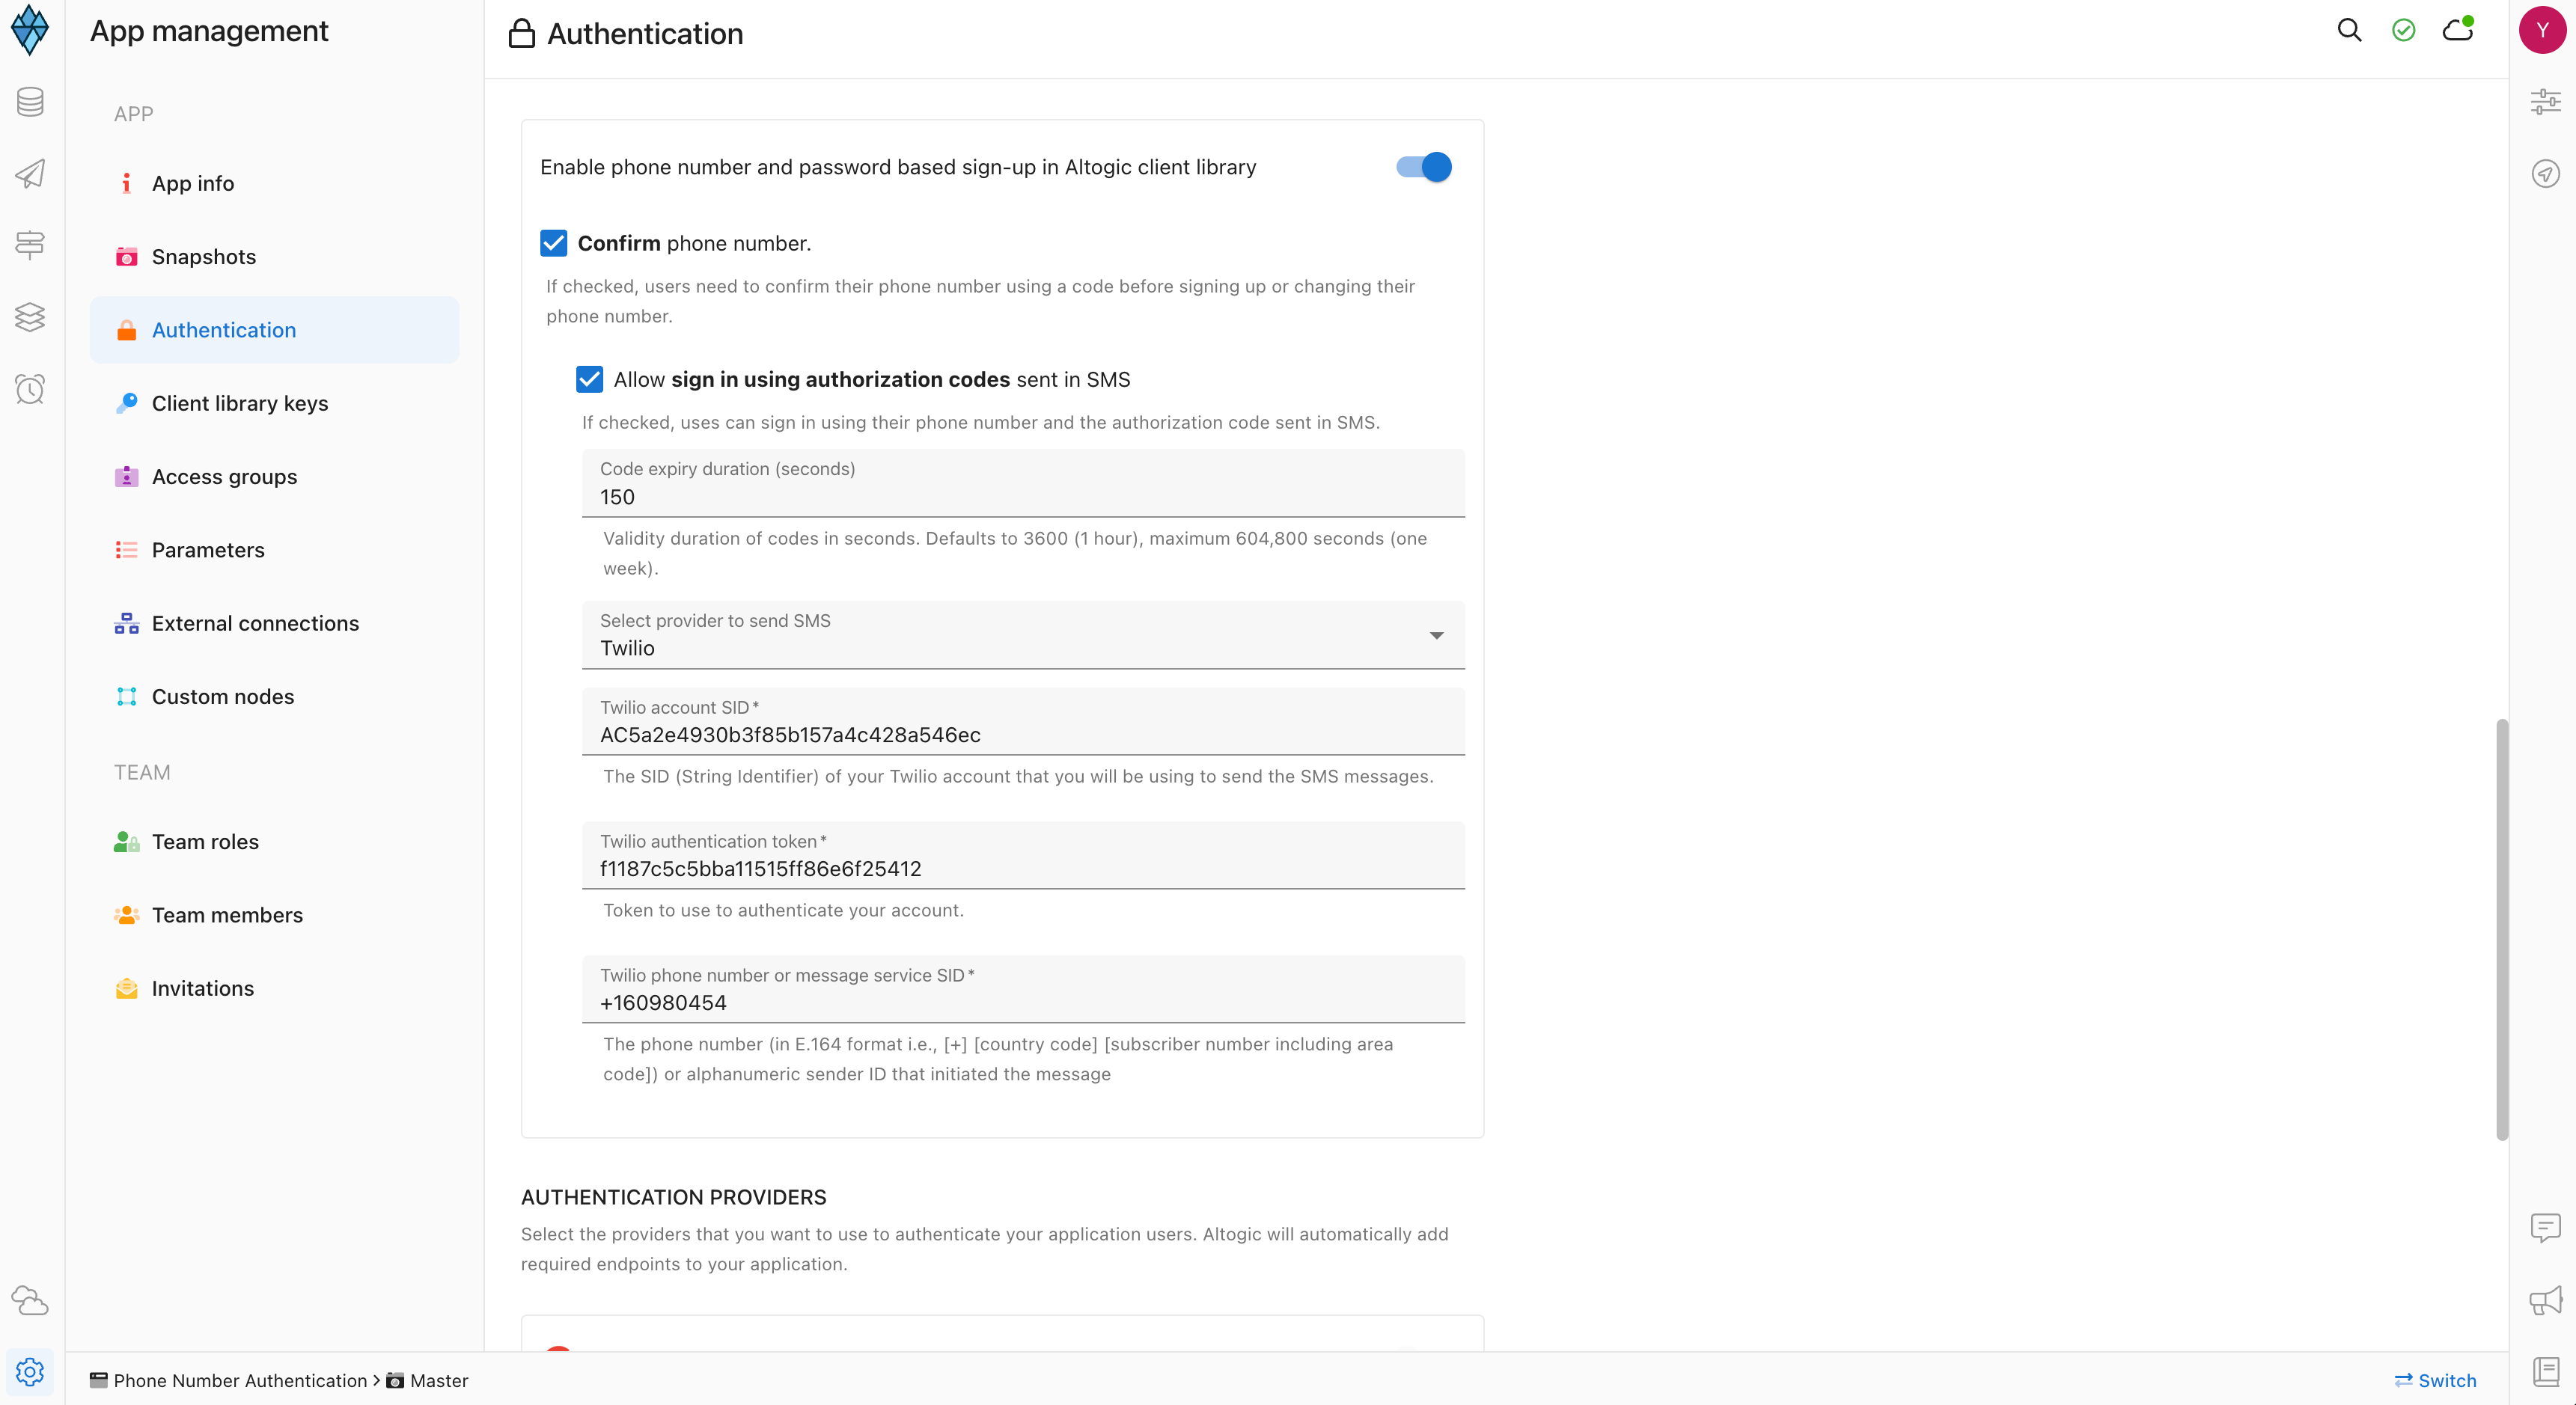
💡 After configuring the Twilio account, you have to enable the phone number and password based sign up from Designer → App Settings → Authentication → Mobile Phone Authentication → Enable phone number and password based sign up in Altogic client library. Paste the Twilio Account SID, Twilio Authentication Token and Twilio Phone Number to the related fields.
Frontend Development
Installation
Before installing the application, be sure you have already installed NodeJS in your development environment.
To install
💡 You can visit: https://nodejs.org/en/download/ to download.
To get started, open the terminal and create a new React project
// creates a react app with the name of `altogic-react-phone-authentication-tutorial`
npx create-react-app altogic-react-phone-authentication-tutorial
The above command creates a React project in the altogic-react-phone-authentication-tutorialdirectory.
cd altogic-react-phone-authentication-tutorial
touch .env
Create a .env file in the root directory of your application, open the file in your editor and paste the following.
REACT_APP_ALTOGIC_ENV_URL=YOUR-APPLICATION-ENV-URL
REACT_APP_ALTOGIC_CLIENT_KEY=YOUR-APPLICATION-CLIENT-KEY
Replace YOUR-APPLICATION-ENV-URL and YOUR-APPLICATION-CLIENT-KEY with the envUrl and clientKey you copied before, then return to your terminal.
Install the Altogic client library to our project by using NPM or Yarn by running the following command:
// Installation of Altogic Client Library with NPM
npm i altogic
Next, create a file to handle the Altogic services and client.
Go back to your root directory and follow the commands below:
cd src
mkdir helpers
cd helpers
touch altogic.js
altogic.js will be created in the src/helpers directory. Open the file in your editor and paste the following.
import { createClient } from "altogic";

let envUrl = process.env.REACT_APP_ALTOGIC_ENV_URL;
let clientKey = process.env.REACT_APP_ALTOGIC_CLIENT_KEY;

const altogic = createClient(envUrl, clientKey, {
  signInRedirect: "/signin",
});

export default altogic;
The third parameter of createClient function signInRedirect handles the redirection to the Sign In page automatically when you have invalid session tokens or signed out. This is a beneficial feature for managing sessions in scenarios when you sign out from your mobile phone.
Building Main React Components
The next step is to create the components that we’ll need for our application,
SignIn— A form component that allows the user to sign in.SignUp— A form component that allows the user to sign up.Verification— A form component that verifies phone number.Home— A component that displays whether or not authentication was successful.RequiresAuthA wrapper component that checks whether the user is authenticated before rendering a component; otherwise, it redirects the user to the signup/login page.RequiresNotAuth— A wrapper component that checks whether the user is not authenticated before rendering a component; otherwise, it redirects the user back to the profile page(for example Sign In page).App— The main application component. It renders all the views with their properties.Sessions— A table component that allows user to manage and view their sessions.Profile— A component that users can view and manage profile data.
switch to the root directory of your react application and run following commands:
cd src
mkdir pages
cd pages
touch SignIn.js SignUp.js Verification.js Home.js Sessions.js Profile.js
Going back to src directory again, and creating components directory. We will create Routes directory under components directory:
cd ..
mkdir components
cd components
mkdir Routes
cd Routes
touch RequiresAuth.js RequiresNotAuth.js
This creates a pages directory with the components in the src directory. Your folder structure should look similar to the screenshot

We’ll be using React Context API to manage the user and session data, and pass them to the components rendered based on whether the user is authenticated or not. We’ll also be using React Router to handle routing.
Go back to your root directory and open the terminal:
cd src
mkdir context
cd context
touch AuthenticationContext.js ModalContext.js CounterContext.js
To install React Router run the following command.
npm install react-router-dom
We will use Tailwind CSS and Headless UI library for styling the project. Run the following commands in the root directory to install the library.
npm install -D tailwindcss postcss autoprefixer
npm install @headlessui/react
Below command will create tailwind.config.js file:
npx tailwindcss init -p
Open the tailwind.config.js in editor and copy/paste following script to configure template paths:
module.exports = {
  content: [
    "./src/**/*.{js,jsx,ts,tsx}",
  ],
  theme: {
    extend: {},
  },
  plugins: [],
}
Open index.css file in src directory and add the following directives:
@tailwind base;
@tailwind components;
@tailwind utilities;
And we will use Font Awesome Icons in our project. You should install the Font Awesome Library to have well-looking components.
Add SVG Core:
npm i --save @fortawesome/fontawesome-svg-core
Add Icon Packages:
npm i --save @fortawesome/free-solid-svg-icons npm i --save @fortawesome/free-regular-svg-icons npm i --save @fortawesome/free-brands-svg-icons
Add React Component
npm i --save @fortawesome/react-fontawesome@latest
Since we built a phone number-based authentication app, we will need a phone number input field. We will use react-phone-number-input library to increase UX.
npm i react-phone-number-input
Finally all dependencies have been installed on our local machine. We can start our application by typing npm run start on the root directory. Let’s start coding!
Implementation
First of all, we will need some interface views and components such as;
VerificationPhone number verification pageResetPasswordandResetPasswordCodeSends users an SMS to reset their passwordNotVerifiedInforms users that their phone number is not verified yet, and resends verification codeCounterSimple countdown timer for verification codes validityFooter,Header,ProfileDropdownNavigation bar and footer badgeNotificationInforms users about the responsesSessionTableandSessionItemfor listing sessionsChangeCredentialsTab structure to change view forChangePhoneandChangePasswordPrimaryButtonandSecondaryButtonCustom buttons
Open your root directory and copy&paste lines one by one to create files.
cd src/components
touch Counter.js Footer.js Header.js Notification.js ProfileDropdown.js SessionItem.js SessionTable.js

mkdir Buttons
mkdir Profile

cd Buttons
touch PrimaryButton.js SecondaryButton.js

cd ../Profile
touch ChangeCredentials.js ChangePhone.js ChangePassword.js
We will need two parent components that instruct routing rules to their child component. Rules mean,
Authenticated users are not able to view Sign Up and Sign In pages.
Unauthenticated users are not able to view Profile and Sessions pages.
Since we have restricted rules, We have designed special particular components that restrict the child components: RequiresNotAuth and RequiresAuth
import React from "react";
import { Navigate } from "react-router-dom";
import altogic from "../../altogic";

const RequiresAuth = ({ children }) => {
    // Altogic creates a session object after the user signs in. The session object is stored in localStorage.
    const auth =  altogic.auth.getSession() &&  altogic.auth.getSession().token;

    // If the useer is not authenticated, it will be redirected to sign in page.
    return auth ? children : <Navigate to="/signin" />;
  }

export default RequiresAuth;
RequiresNotAuth.js
import React from "react";
import { Navigate } from "react-router-dom";
import altogic from "../../altogic";

const RequiresNotAuth = ({ children }) => {
    const auth =  altogic.auth.getSession() &&  altogic.auth.getSession().token;

    // If the user is authenticated, it will be redirected to home page.
    return auth ? <Navigate to="/" /> : children;
  }

export default RequiresNotAuth;
App.js This will be main component of our application. All routes and views will be rendered in App component.
import "./App.css";
import Header from "./components/Header";
import { Routes, Route } from "react-router-dom";
import SignIn from "./pages/SignIn";
import SignUp from "./pages/SignUp";
import Verification from "./pages/Verification";
import Footer from "./components/Footer";
import Home from "./pages/Home";
import Profile from "./pages/Profile";
import AuthenticationProvider from "./context/AuthenticationContext";
import NotVerified from "./pages/NotVerified";
import Sessions from "./pages/Sessions";
import ResetPassword from "./pages/ResetPassword";
import ResetPasswordCode from "./pages/ResetPasswordCode";
import NotFound from "./pages/NotFound";
import RequiresAuth from "./components/Routes/RequiresAuth";
import RequiresNotAuth from "./components/Routes/RequiresNotAuth";
import ModalProvider from "./context/ModalContext";
import CounterProvider from "./context/CounterContext";

// App will be displayed as <Header - Routes - Footer order>
// RequiresAuth and RequiresNotAuth components are route restriction component to protecting components.
function App() {
  return (
    <div className="App h-screen bg-slate-100">
      <CounterProvider>
        <ModalProvider>
          <AuthenticationProvider>
            <Header />
            <Routes>
              <Route
                path="/signin"
                element={
                  <RequiresNotAuth>
                    <SignIn />
                  </RequiresNotAuth>
                }
              />
              <Route
                path="/signup"
                element={
                  <RequiresNotAuth>
                    <SignUp />
                  </RequiresNotAuth>
                }
              />
              <Route
                path="/verification"
                element={
                  <RequiresNotAuth>
                    <Verification isAuth={false} />
                  </RequiresNotAuth>
                }
              />
              <Route path="/" element={<Home />} />
              <Route
                path="/profile"
                element={
                  <RequiresAuth>
                    <Profile />
                  </RequiresAuth>
                }
              />
              <Route
                path="/changePhoneNumber"
                element={
                  <RequiresAuth>
                    <Verification isAuth={true} />
                  </RequiresAuth>
                }
              />
              <Route
                path="/phone_not_verified"
                element={
                  <RequiresNotAuth>
                    <NotVerified />
                  </RequiresNotAuth>
                }
              />
              <Route
                path="/sessions"
                element={
                  <RequiresAuth>
                    <Sessions />
                  </RequiresAuth>
                }
              />
              <Route
                path="/resetPassword"
                element={
                  <RequiresNotAuth>
                    <ResetPassword />
                  </RequiresNotAuth>
                }
              />
              <Route
                path="/resetPassword/code"
                element={
                  <RequiresNotAuth>
                    <ResetPasswordCode />
                  </RequiresNotAuth>
                }
              />
              <Route path="*" element={<NotFound />} />
            </Routes>
          </AuthenticationProvider>
        </ModalProvider>
      </CounterProvider>
      <Footer />
    </div>
  );
}

export default App;
As you can see in the App.js component, we have three different Provider&Context structure:
AuthenticationProvider: Stores functions, states that are related with authentication, such as calling Altogic Client Library functions
ModalProvider: Manages push notification flow in the app
CounterProvider: Stores and handles the deadline of the verification code’s expiry date
Just for now, I am skipping the implementation of AuthenticationContext, we will have further been discussing “How to build context provider structure and how it works?”.
Since we built a phone number based authentication app; we need SignIn and SignUp components to handle form actions. I’ve excluded all the functions ,which works asynchronously because of the Altogic connections, to the Authentication Context to manage and access it easily from other components.
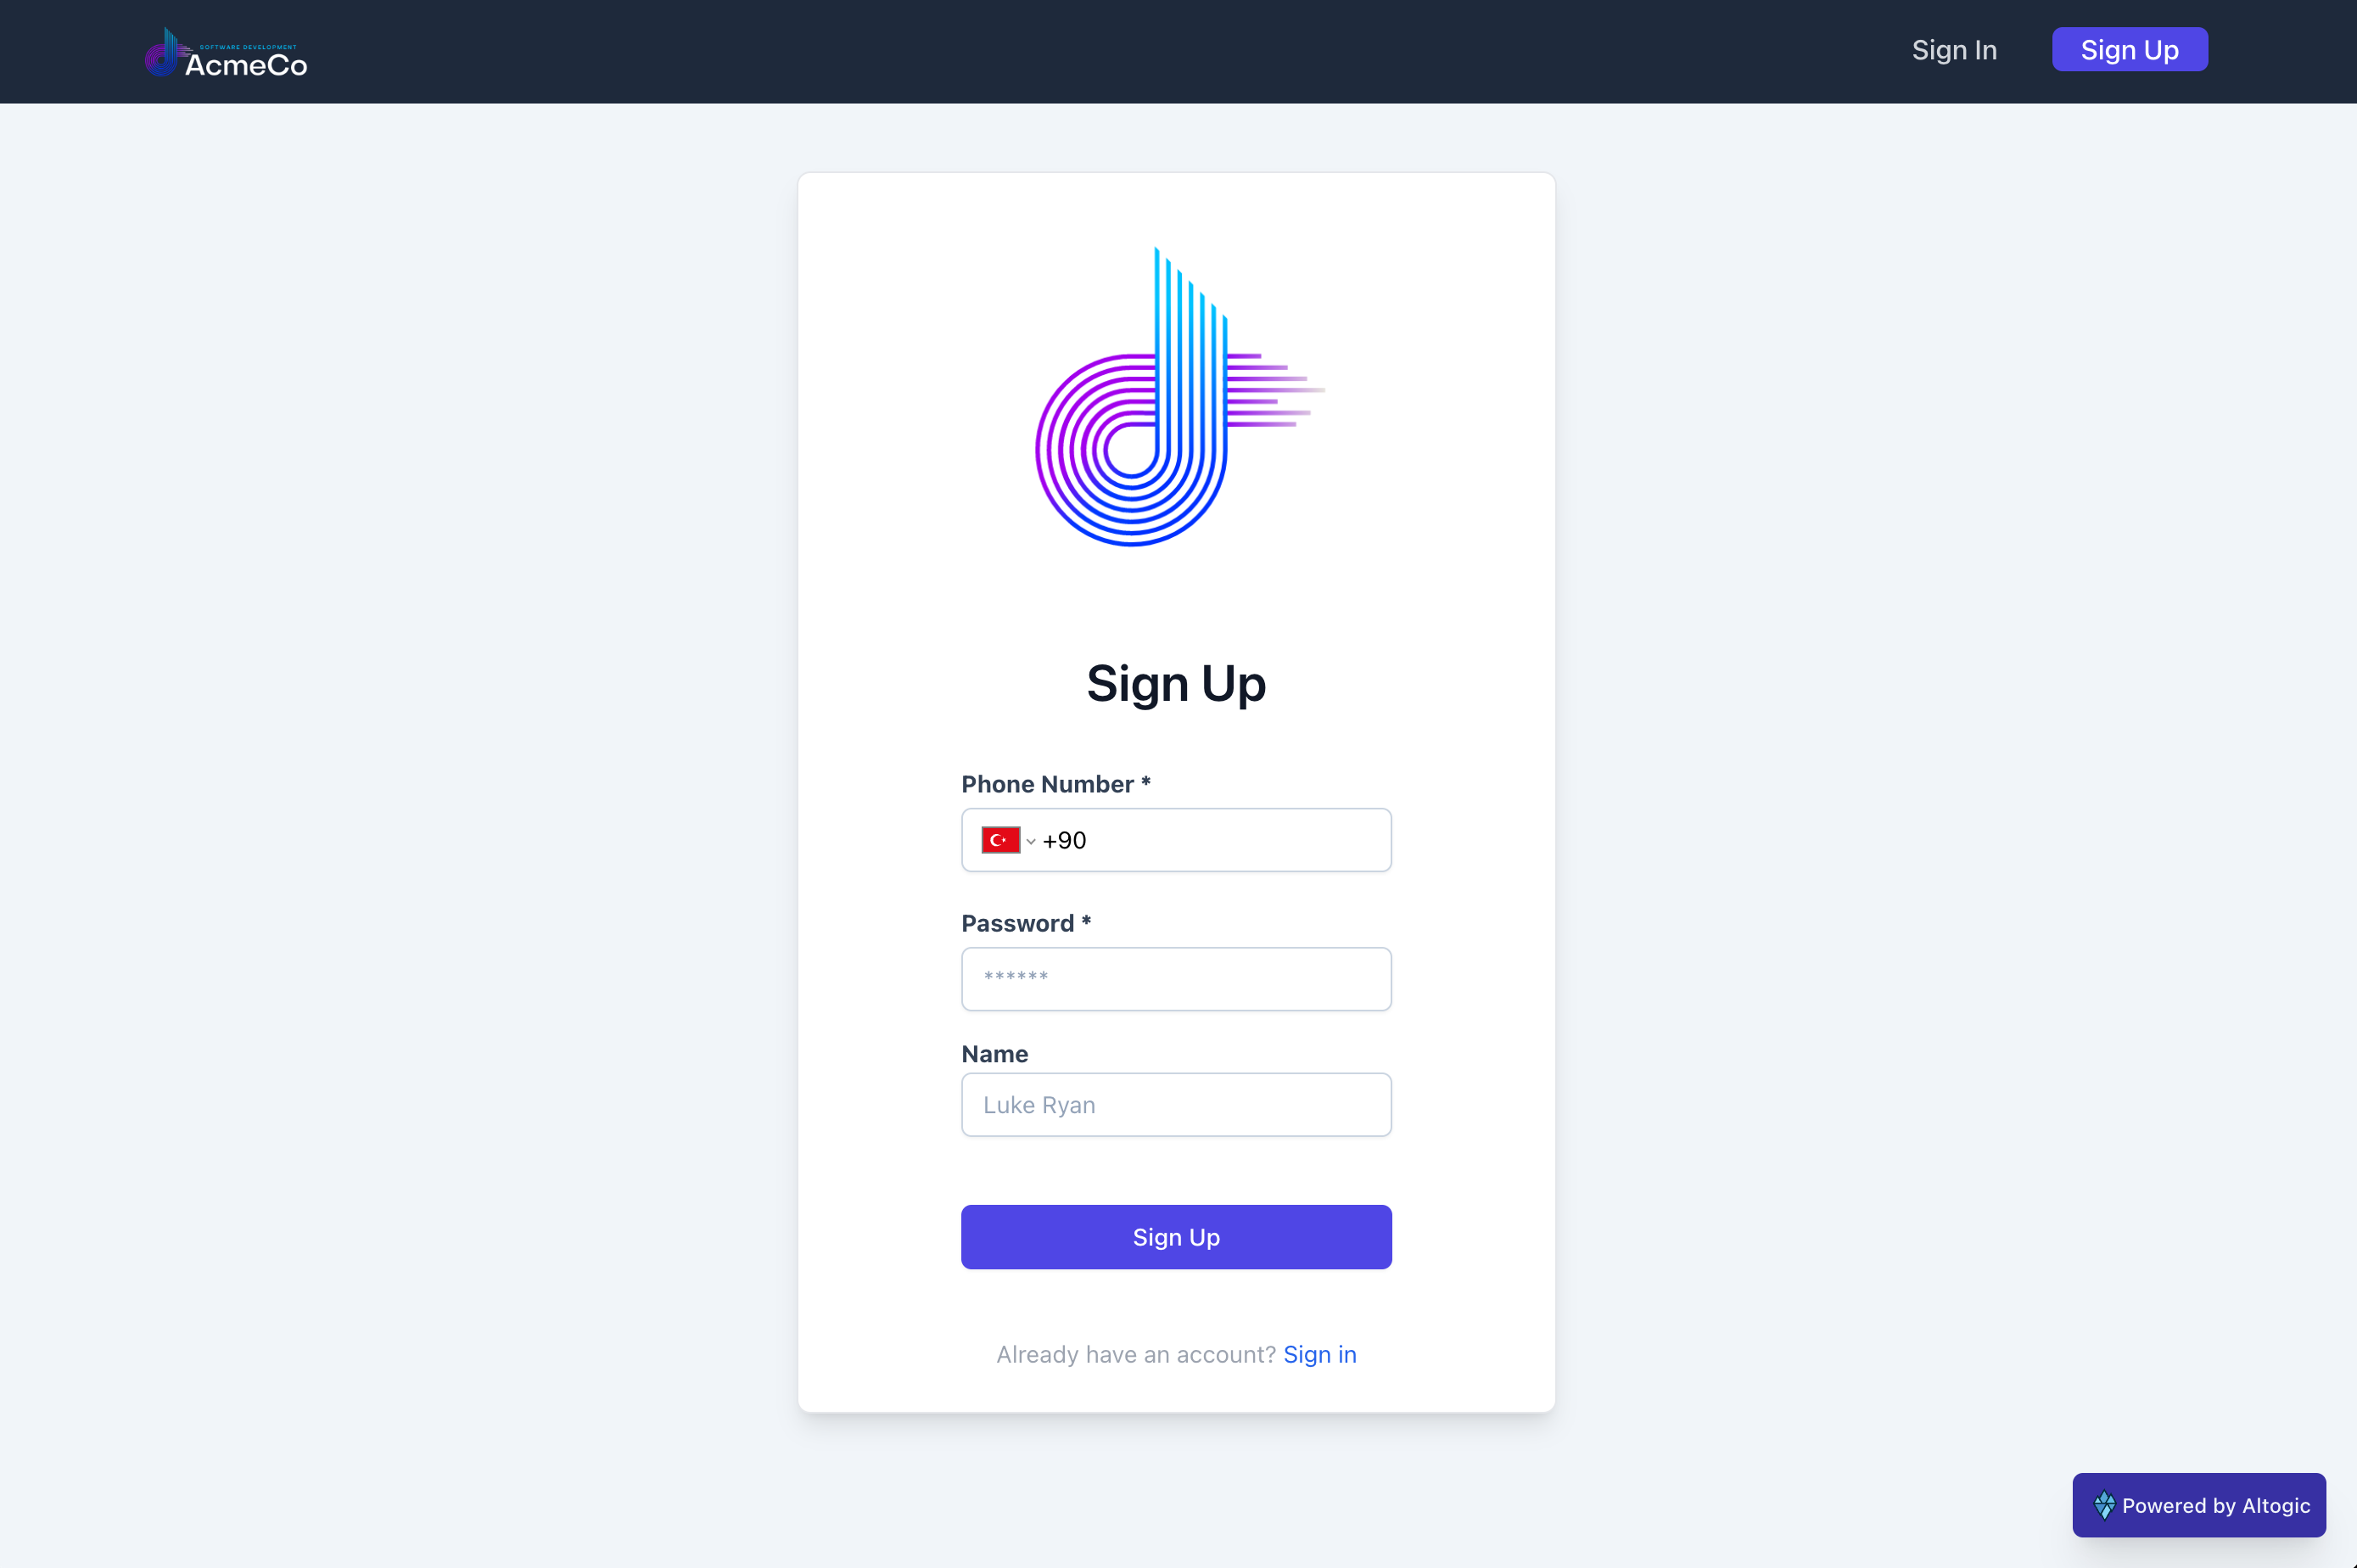
Let’s start coding the SignUp component first. We have a form structure to receive necessary data from the user. There is a button to handle the registration process at the bottom of the form structure. When you click this button, the signup() function is triggered, defined in the 23rd line. Here, we call context.signup() function defined in AuthenticationContext. Thus, Altogic functions stay together and stored in the context.
import { Link, useNavigate } from "react-router-dom";
import { useState, useContext } from "react";
import { AuthenticationContext } from "../context/AuthenticationContext";
import PrimaryButton from "../components/Buttons/PrimaryButton";
import { FontAwesomeIcon } from "@fortawesome/react-fontawesome";
import { faCircleExclamation } from "@fortawesome/free-solid-svg-icons";
import "react-phone-number-input/style.css";
import PhoneInput from "react-phone-number-input";
import { CounterContext } from "../context/CounterContext";
const SignUp = () => {
// Define states
const [phoneNumber, setPhoneNumber] = useState("");
const [password, setPassword] = useState("");
const [name, setName] = useState("");
const [loading, setLoading] = useState(false);
const [message, setMessage] = useState("");
const [haveError, setHaveError] = useState(false);
// We use useNavigate() method to switch routes
const navigate = useNavigate();
// Since we store all authentication related functions and variables in AuthenticationContext,
// we will be using this functions and variables with context such as context.signUp()
const context = useContext(AuthenticationContext);
// Verification code will expire in 150 seconds after successful signup process. We will use countdown timer to handle it.
const counterContext = useContext(CounterContext);
const handlePassword = (event) => {
setPassword(event.target.value);
};
const handleName = (event) => {
setName(event.target.value);
};
// When the user clicks the 'Sign Up' button, this function will be executed first.
const signup = async (event) => {
setLoading(true);
event.preventDefault();
// We call the function context.signUp() that we early defined in AuthenticationContext, and store the Altogic response in resp variable.
const resp = await context.signUp(phoneNumber, password, name);
if (resp.errors == null) {
sessionStorage.setItem("canVerify", true);
// Temporary variable for the text in Verification page
sessionStorage.setItem("phoneNumber", phoneNumber);
// We initiate time counter and navigate user to Verification page
counterContext.initiateCounter();
navigate("/verification");
} else {
// Error scenarios such as existing user, short password, etc.
setHaveError(true);
setMessage(resp.errors.items[0].message);
}
setLoading(false);
};
return (
<div className="flex mt-10">
<div className="w-full max-w-md m-auto bg-white rounded-lg border border-primaryBorder shadow-lg py-1 px-16 ">
<div className="min-h-full flex items-center justify-center py-5 px-4 sm:px-6 lg:px-8 ">
<div className="max-w-md w-full space-y-8">
<div>
<img
className="mx-auto w-auto"
src={require("../images/logo.png")}
alt="logo"
/>
<h2 className="mt-1 font-semibold text-3xl text-gray-900 text-center">
Sign Up
</h2>
</div>
<form className="mt-8">
<div className="mb-5">
<label className="block text-sm font-bold text-slate-700 mb-1">
Phone Number *
</label>
<PhoneInput
international
countryCallingCodeEditable={false}
className="px-3 py-2 bg-white border shadow-sm border-slate-300 w-full rounded-md sm:text-sm"
defaultCountry="TR"
value={phoneNumber}
onChange={setPhoneNumber}
/>
</div>
<div className="mt-3">
<label className="block font-bold text-sm text-slate-700">
Password *
</label>
<div className="mt-1">
<input
type="password"
value={password}
onChange={handlePassword}
placeholder="******"
className="px-3 py-2 bg-white border shadow-sm border-slate-300 placeholder-slate-400 disabled:bg-slate-50 disabled:text-slate-500 disabled:border-slate-200 focus:outline-none w-full rounded-md sm:text-sm disabled:shadow-none"
/>
</div>
</div>
<div className="mt-3">
<label className="text-sm font-bold text-slate-700 mb-1">
Name
</label>
<input
type="text"
className="px-3 py-2 bg-white border shadow-sm border-slate-300 placeholder-slate-400 disabled:bg-slate-50 disabled:text-slate-500 disabled:border-slate-200 focus:outline-none w-full rounded-md sm:text-sm disabled:shadow-none"
placeholder="Luke Ryan"
value={name}
onChange={handleName}
/>
</div>
<div className="mt-10 text-xs w-full text-gray-500">
By creating an account, you agree to accept receiving SMS
messages.
</div>
<div
className="text-center"
title={
phoneNumber === "" || password === ""
? "Phone number and password are mandatory!"
: ""
}
>
<PrimaryButton
content="Sign Up"
customClickEvent={signup}
fullWidth={true}
loading={loading}
disabled={password === "" || phoneNumber === "" || loading}
/>
</div>
</form>
{haveError ? (
<div className="mt-4 text-red-400 text-xs text-center">
<FontAwesomeIcon icon={faCircleExclamation} />
{message}
</div>
) : (
<></>
)}
<div className="text-center text-gray-400 text-sm">
<p>
Already have an account?
<Link to="/signin" className="text-blue-600">
Sign in
</Link>
</p>
</div>
</div>
</div>
</div>
</div>
);
};
export default SignUp;
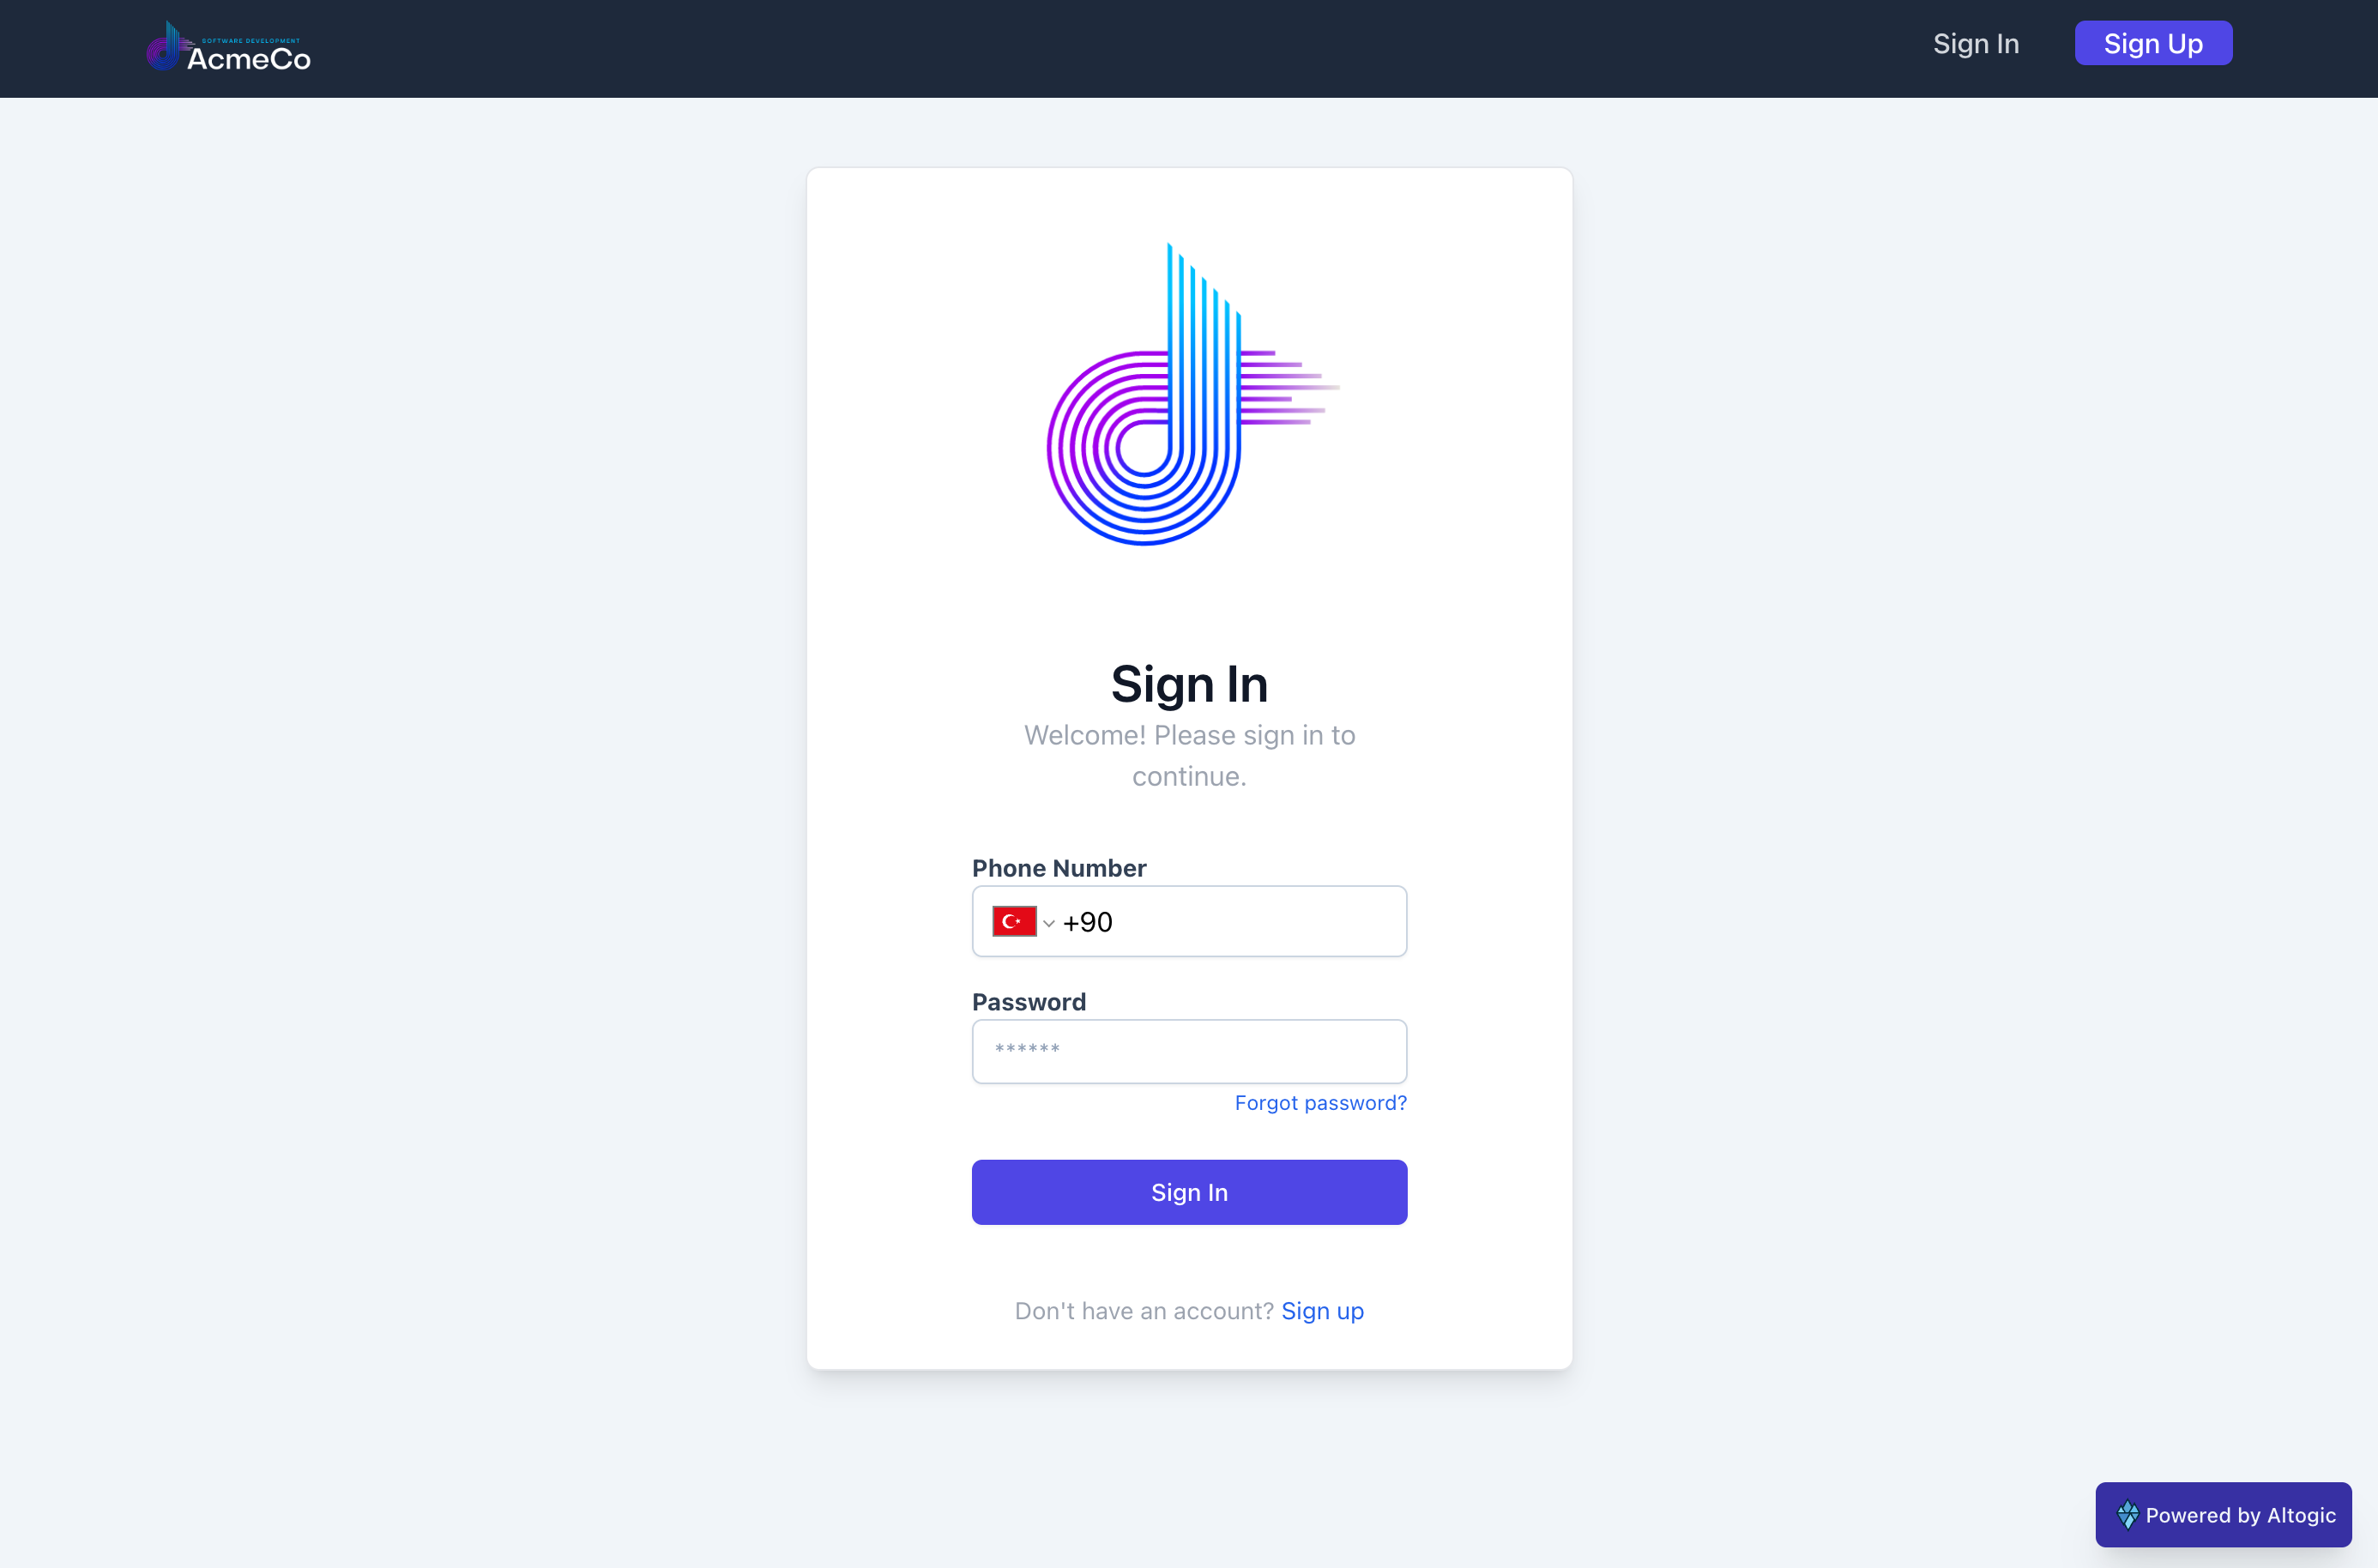
We’ve entirely coded the sign up form. Now, we need a sign in form to sign users in.
We’ve developed signin() function -in line 24-, that will be triggered after the user clicks the button. Like with the SignUp component, context.signin() will be triggered inside the component’s own function.
import { Link } from "react-router-dom";
import { useState, useContext } from "react";
import { AuthenticationContext } from "../context/AuthenticationContext";
import { useNavigate } from "react-router-dom";
import PrimaryButton from "../components/Buttons/PrimaryButton";
import { FontAwesomeIcon } from "@fortawesome/react-fontawesome";
import { faCircleExclamation } from "@fortawesome/free-solid-svg-icons";
import "react-phone-number-input/style.css";
import PhoneInput from "react-phone-number-input";
const SignIn = () => {
// Define state variables
const [phoneNumber, setPhoneNumber] = useState("");
const [password, setPassword] = useState("");
const [loading, setLoading] = useState(false);
const [message, setMessage] = useState("");
const [haveError, setHaveError] = useState(false);
// We use useNavigate() method to switch routes
const navigate = useNavigate();
// Since we store all authentication related functions and variables in AuthenticationContext,
// we will be using this functions and variables with context such as context.signin()
const context = useContext(AuthenticationContext);
const handlePassword = (event) => {
setPassword(event.target.value);
};
// When the user clicks the 'Sign In' button, this function will be executed first.
const signin = async (event) => {
setLoading(true);
event.preventDefault();
// We call the function context.signIn() that we early defined in AuthenticationContext,
// and store the Altogic response in resp variable.
const resp = await context.signIn(phoneNumber, password);
if (resp.errors === null) {
// isAuth state stores the data of is the user authenticated or not.
//This state is setted false by default. After the successful login attempt, isAuth state is updated as true.
// and we push router to /profile page.
context.setIsAuth(true);
navigate("/profile");
} else {
if (resp.errors.items[0].code === "phone_not_verified") {
// Phone Not Verified have some router constraints.
// It is unreachable from any page except login page. We set 'canVerify' variable as true to unlock Phone Not Verified page.
sessionStorage.setItem("canVerify", true);
navigate("/phone_not_verified");
}
setLoading(false);
setHaveError(true);
setMessage(resp.errors.items[0].message);
}
};
return (
<div className="flex mt-10">
<div className="w-full max-w-md m-auto bg-white rounded-lg border border-primaryBorder shadow-lg py-1 px-16">
<div className="min-h-full flex items-center justify-center py-5 px-4 sm:px-6 lg:px-8 ">
<div className="max-w-md w-full space-y-8">
<div className=" text-center">
<img
className="mx-auto w-auto"
src={require("../images/logo.png")}
alt="logo"
/>
<h2 className="mt-1 font-semibold text-3xl text-gray-900 ">
Sign In
</h2>
<p className="text-gray-400 text-md">
Welcome! Please sign in to continue.
</p>
</div>
<form className="mt-8">
<div className="mb-4">
<label className="block text-sm font-bold text-slate-700">
Phone Number
</label>
<PhoneInput
international
countryCallingCodeEditable={false}
className="px-3 py-2 bg-white border shadow-sm border-slate-300 rounded-md"
defaultCountry="TR"
value={phoneNumber}
onChange={setPhoneNumber}
/>
</div>
<div className="mt-1">
<label className="block text-sm font-bold text-slate-700">
Password
</label>
<input
type="password"
name="password"
id="password"
value={password}
onChange={handlePassword}
placeholder="******"
className="px-3 py-2 bg-white border shadow-sm border-slate-300 placeholder-slate-400 disabled:bg-slate-50 disabled:text-slate-500 disabled:border-slate-200 focus:outline-none w-full rounded-md sm:text-sm invalid:border-red-500 invalid:text-red-600 disabled:shadow-none"
/>
</div>
<div className="text-right text-sm mb-4">
<Link to="/resetPassword" className="text-blue-600 text-xs">
Forgot password?
</Link>
</div>
<div
className="my-3"
title={
phoneNumber === "" || password === ""
? "Phone number and password are mandatory!"
: ""
}
>
<PrimaryButton
fullWidth={true}
loading={loading}
customClickEvent={signin}
content="Sign In"
disabled={password === "" || phoneNumber === "" || loading}
/>
</div>
</form>
{haveError ? (
<div className="mt-4 text-red-400 text-xs text-center">
<FontAwesomeIcon icon={faCircleExclamation} />
{message}
</div>
) : (
<></>
)}
<div className="text-center text-gray-400 text-sm">
<p>
Don't have an account?
<Link to="/signup" className="text-blue-600">
Sign up
</Link>
</p>
</div>
</div>
</div>
</div>
</div>
);
};
export default SignIn;
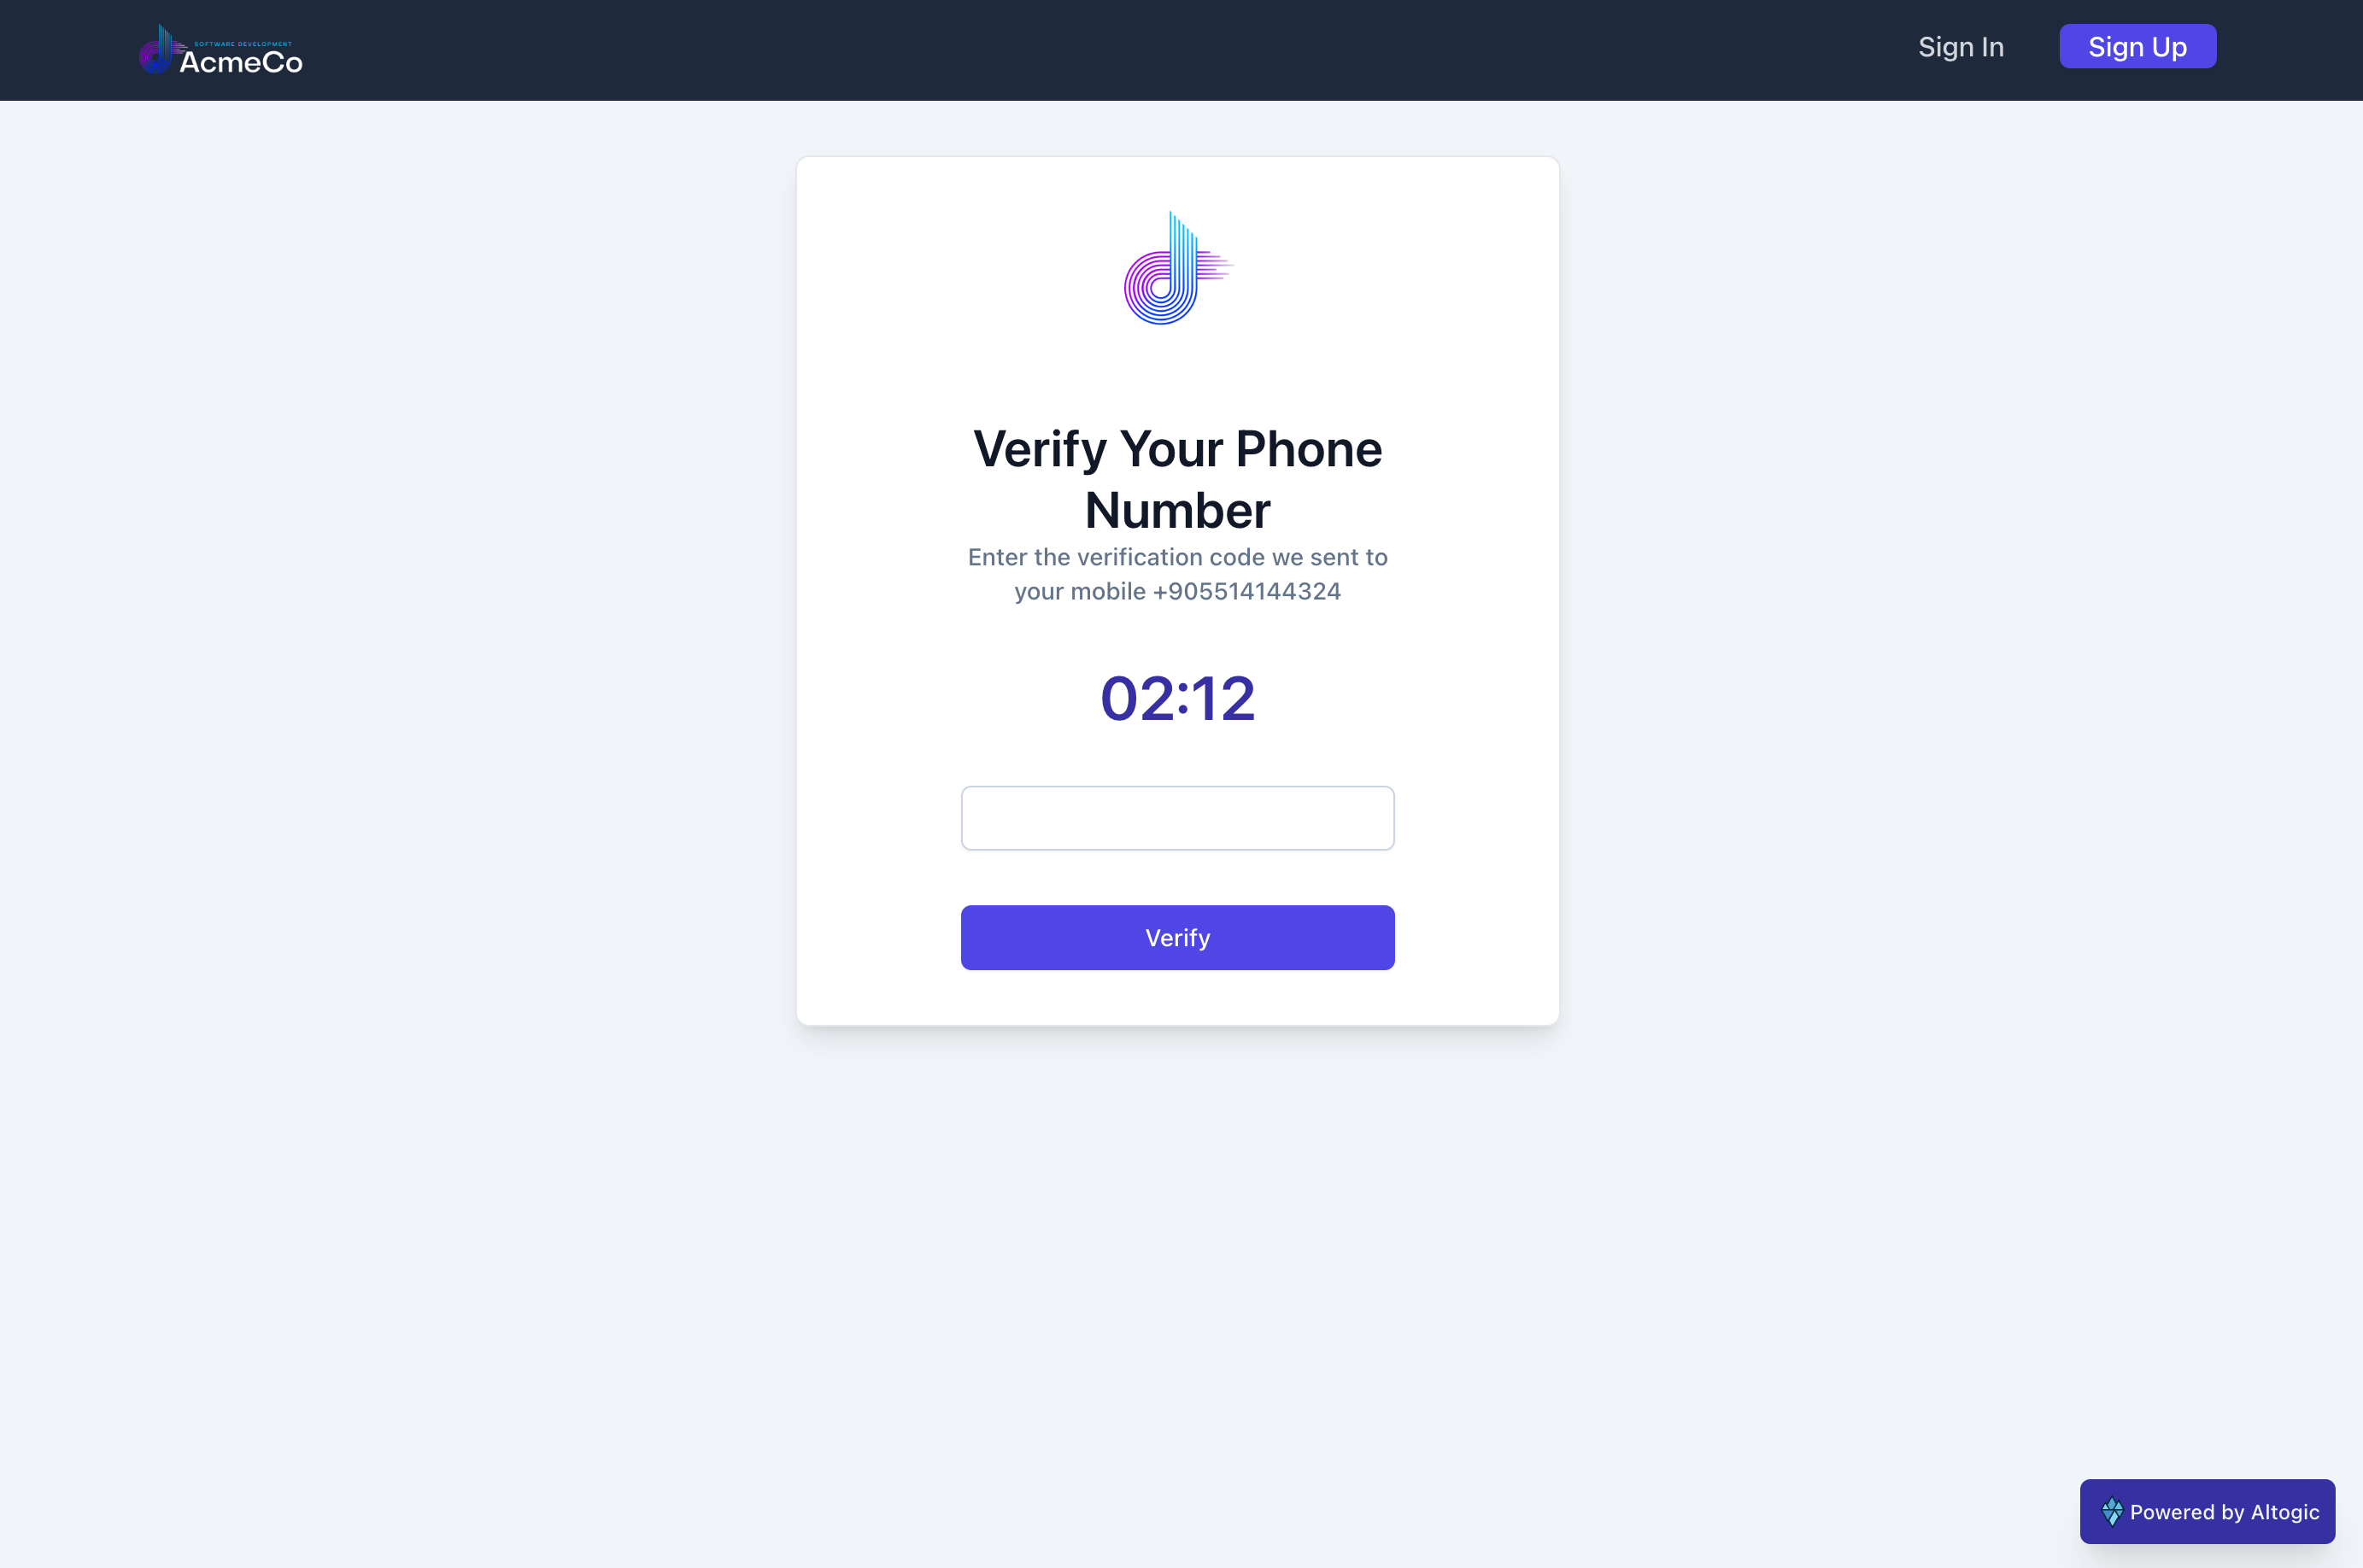
We have finished the implementation of the Sign Up and Sign In page. Since the users have to verify their phone number, we need to built a Verification component, which will take verification code as single parameter. When you click to the button, verify() defined inside the function, will be executed. In this function, we execute context.verifyPhoneNumber() function to verify our phone number with Altogic.
import { useContext, useEffect, useState } from "react";
import { useNavigate } from "react-router-dom";
import { AuthenticationContext } from "../context/AuthenticationContext";
import PrimaryButton from "../components/Buttons/PrimaryButton";
import Counter from "../components/Counter";

function Verification(props) {
  const navigate = useNavigate();
  const context = useContext(AuthenticationContext);
  const [code, setCode] = useState("");
  const [loading, setLoading] = useState(false);

  // Updates the 'code' state when user types the verification code in input field in UI
  const handleCode = (event) => {
    setCode(event.target.value);
  };

  const verify = async (event) => {
    setLoading(true);
    event.preventDefault();
    let phoneNumber = props.isAuth
      ? sessionStorage.getItem("newPhoneNumber")
      : sessionStorage.getItem("phoneNumber");

    try {
      const resp = await context.verifyPhoneNumber(phoneNumber, code);
      setLoading(false);
    } catch (error) {
      console.error(error);
    }
    await new Promise((r) => setTimeout(r, 500));
    setLoading(false);
  };

  useEffect(() => {
    if (!sessionStorage.getItem("canVerify")) {
      navigate("/signin");
    }
  }, []);

  return (
    <div className="flex bg-gray-bg1 my-8 mb-20">
      <div className="w-full max-w-md m-auto bg-white rounded-lg border border-primaryBorder shadow-lg py-1 px-16">
        <div className="min-h-full flex items-center justify-center py-5 px-4 sm:px-6 lg:px-8 ">
          <div className="max-w-md w-full space-y-8">
            <div>
              <img
                className="mx-auto h-24 w-auto"
                src={require("../images/logo.png")}
                alt="logo"
              />
              <h2 className="mt-8 font-semibold text-3xl text-center text-gray-900">
                {props.isAuth
                  ? "Change Your Phone Number"
                  : "Verify Your Phone Number"}
              </h2>
              <p className="block text-sm font-medium text-center text-slate-500">
                Enter the verification code we sent to your mobile{" "}
                {props.isAuth
                  ? sessionStorage.getItem("newPhoneNumber")
                  : sessionStorage.getItem("phoneNumber")}
              </p>
            </div>
            <Counter />
            <form className="mt-8 space-y-6">
              <div className="mt-2">
                <input
                  value={code}
                  className="px-3 mt-7 py-2 bg-white border shadow-sm border-slate-300 placeholder-slate-400 disabled:bg-slate-50 disabled:text-slate-500 disabled:border-slate-200 focus:outline-none focus:border-sky-500 focus:ring-sky-500 block w-full rounded-md sm:text-sm focus:ring-1 invalid:border-red-500 invalid:text-red-600 focus:invalid:border-red-500 focus:invalid:ring-red-500 disabled:shadow-none"
                  onChange={handleCode}
                />
              </div>
              <div className="text-center">
                <PrimaryButton
                  loading={loading}
                  fullWidth={true}
                  customClickEvent={verify}
                  content="Verify"
                  disabled={loading || code.length !== 6}
                />
              </div>
            </form>
          </div>
        </div>
      </div>
    </div>
  );
}
export default Verification;
The common point of the three component SignIn, SignUp and Verification is; they three have buttons, functions and forms inside the component. Also, they also importing AuthenticationContext as context. I want to explain the simplified workflow of communications between components and contexts:
User clicks the button Sign In, Sign Up, Verify
Clicking triggers
signin(),signup(),verify()function inside componentcontext.signIn()function is called byhandleClick()function
Authentication Context
Finally, we came to the Context API part. Before moving on to the coding section, I think going over the Altogic Client Library functions will be very helpful.
altogic.auth.signUpWithPhone(phoneNumber, password, name) → Takes 3 parameters (Name field is optional)
altogic.auth.signInWithPhone(phoneNumber, password) → Return user and session response if the credentials are correct
altogic.auth.signOut(token) → Kill the given token and sign out from the related session
altogic.auth.signOutAll() → Sign out from all session related with your account
altogic.auth.resendVerificationCode(phoneNumber) → Resend verification code to verify your phone number
altogic.auth.changePassword(newPassword, oldPassword) → Change password
altogic.auth.getAllSessions() → Get list of all active sessions with your account
altogic.auth.sendResetPwdCode(phoneNumber) → Send a verification code to your phone number if you forgot your password
altogic.auth.resetPwdWithCode(phoneNumber,code,password) → Reset your password
altogic.auth.changePhone(password, phoneNumber) → Change phone number function takes phone number and password as arguement
altogic.auth.verifyPhone(phoneNumber, code) → Verify phone number with your verification code that comes to your phone number
Here we came to the one of the core component and structure of app, AuthenticationContext created using useContext() hook. Context is used to generate shared data accessible across the component hierarchy without passing props to each component. For example, isAuth state stores the boolean value of is user authenticated or not. Almost every component must use the isAuth state to handle it’s internal functionalities. I could pass props to each component like parent to child. However it is not flexible and easy to use. I built an AuthenticationContext to handle and manage all the data and functionalities related with authentication.
I defined all my Altogic functions and related states in AuthenticationContext to distribute it to the child components.
import { createContext, useContext, useEffect, useState } from "react";
import { useNavigate } from "react-router-dom";
import altogic from "../altogic";
import { ModalContext } from "./ModalContext";
import { CounterContext } from "./CounterContext";

export const AuthenticationContext = createContext();

const AuthenticationProvider = ({ children }) => {
  // Define states
  const [sessions, setSessions] = useState(null);
  const [canVerify, setCanVerify] = useState(false);
  const [isAuth, setIsAuth] = useState(false);
  const context = useContext(ModalContext);

  // We use useNavigate() method to switch routes
  let navigate = useNavigate();

  // Verification code will expire in 150 seconds after successful signup process. We will use countdown timer to handle it.
  // In the AuthenticationContext we will manipulate the countdown timer
  let counterContext = useContext(CounterContext);

  useEffect(() => {
    const sendReq = async () => {
      const resp = await getAllSessions();
      setSessions(resp.sessions);
    };

    // Fetches the session data to determine if the user is authenticated and updates the context
    if (altogic.auth.getSession()) {
      setIsAuth(true);
      sendReq();
    }
  }, [isAuth]);

  // Returns the response of the Altogic Client Library signUpWithPhone() function. SignUp component will handle the response itself
  const signUp = async (phoneNumber, password, name) => {
    try {
      return await altogic.auth.signUpWithPhone(phoneNumber, password, name);
    } catch (error) {
      console.error(error);
    }
  };

  // Returns the response of the Altogic Client Library signInWithPhone() function. SignIn component will handle the response itself
  const signIn = async (phoneNumber, password) => {
    sessionStorage.setItem("phoneNumber", phoneNumber);
    try {
      return await altogic.auth.signInWithPhone(phoneNumber, password);
    } catch (error) {
      console.error(error);
    }
  };

  // Signs out from the current session with Altogic Client Library signOut() function and updates isAuth state. We call this function in ProfileDropdown component
  const signOutCurrentSession = async () => {
    try {
      const resp = await altogic.auth.signOut();

      if (resp.errors === null) {
        setIsAuth(false);
        navigate("/signin");
      }
    } catch (error) {
      console.error(error);
    }
  };

  // This function will call same Altogic Client Library function with above signOutFromTheCurrentSession().
  // But the difference is, we call this function in Sessions component, not in ProfileDropdown
  const signOutSelectedSession = async (token) => {
    const flag = token === altogic.auth.getSession().token;

    try {
      const resp = await altogic.auth.signOut(token);
      if (resp.errors === null) {
        const temp = await getAllSessions();
        setSessions(temp.sessions);
        if (flag) {
          setIsAuth(false);
          navigate("/signin");
        } else {
          await context.openModal(
            "Signed out successfully from the selected session!",
            "success"
          );
        }
      } else {
        await context.openModal(resp.errors.items[0].message, "error");
      }
    } catch (error) {
      console.error(error);
    }
  };

  // Sign out from all sessions with AltogicClientLibrary signOutAll() function
  const signOutAllSessions = async () => {
    try {
      const resp = await altogic.auth.signOutAll();
      if (resp.errors === null) {
        setIsAuth(false);
        navigate("/");
      }
    } catch (error) {
      console.error(error);
    }
  };

  // Call Altogic Client Library function resendVerificationCode() when phone number has not been verified yet
  const resendVerificationCode = async () => {
    try {
      const resp = await altogic.auth.resendVerificationCode(
        sessionStorage.getItem("phoneNumber")
      );
      if (resp.errors === null) {
        counterContext.terminateCounter();
        counterContext.initiateCounter();
        navigate("/verification");
      }
    } catch (error) {
      console.error(error);
    }
  };

  // Call Altogic Client Library function changePassword() to update password
  const changePassword = async (oldPassword, newPassword) => {
    try {
      return await altogic.auth.changePassword(newPassword, oldPassword);
    } catch (error) {
      console.error(error);
    }
  };

  // Get list of all active sessions with Altogic Client Library function getAllSessions()
  const getAllSessions = async () => {
    try {
      return await altogic.auth.getAllSessions();
    } catch (error) {
      console.error(error);
      return null;
    }
  };

  // Send reset code to users phone number with Altogic Client Library function sendResetPwdCode() when users forget their password
  const sendResetCode = async (phoneNumber) => {
    sessionStorage.setItem("phoneNumber", phoneNumber);
    try {
      const resp = await altogic.auth.sendResetPwdCode(phoneNumber);
      if (resp.errors === null) {
        navigate("/resetPassword/code");
      }
    } catch (error) {
      console.error(error);
    }
  };

  // Reseting password with codc comes to users phone number  with Altogic Client Library function resetPwdWithCode()
  const resetPassword = async (phoneNumber, password, code) => {
    try {
      const resp = await altogic.auth.resetPwdWithCode(
        phoneNumber,
        code,
        password
      );
      if (resp.errors === null) {
        navigate("/signin");
        await context.openModal(
          "Your password has been updated successfully!",
          "success"
        );
      } else {
        await context.openModal(resp.errors.items[0].message, "error");
      }
    } catch (error) {
      console.error(error);
    }
  };

  // Call Altogic Client Library function changePhone() to update phoneNumber
  const updatePhoneNumber = async (password, phoneNumber) => {
    try {
      return await altogic.auth.changePhone(password, phoneNumber);
    } catch (error) {
      console.error(error);
    }
  };

  // Verify phone number with Altogic Client Library function verifyPhone()
  const verifyPhoneNumber = async (phoneNumber, code) => {
    try {
      const resp = await altogic.auth.verifyPhone(phoneNumber, code);

      if (resp.errors == null) {
        counterContext.terminateCounter();
        sessionStorage.removeItem("canVerify");
        setIsAuth(true);
        navigate("/success");
        sessionStorage.removeItem("canVerify");
        navigate("/profile");
      } else {
        await context.openModal(resp.errors.items[0].message, "error");
      }
    } catch (error) {
      console.error(error);
    }
  };

  return (
    <AuthenticationContext.Provider
      value={{
        isAuth,
        setIsAuth,
        signIn,
        signUp,
        signOutCurrentSession,
        signOutSelectedSession,
        resendVerificationCode,
        changePassword,
        getAllSessions,
        signOutAllSessions,
        sendResetCode,
        resetPassword,
        updatePhoneNumber,
        canVerify,
        setCanVerify,
        sessions,
        verifyPhoneNumber,
      }}
    >
      {children}
    </AuthenticationContext.Provider>
  );
};

export default AuthenticationProvider;
BONUS: EXTRA FEATURES
You can find extra features in the shared repository. Also you can find more and more functions, database queries, etc. In fact all your needs to build a backend app.
Upload profile photo
Remove profile photo
Update credentials(phone number and password)
List all sessions
Sign out from other sessions
Sign out from all sessions
You can see the list of related Altogic functions with above features:
// Upload file to the cloud storage using buckets
altogic.storage.bucket(<BUCKET_NAME>).upload(<FILENAME>,file,{createBucket:true})

// Update field of an instance on database
altogic.db.model(<MODEL_NAME>).object(<OBJECT_ID>).update({<OBJECT_FIELD>: <VALUE> })

// Remove files from the cloud storage
altogic.storage.bucket(<BUCKET_NAME>).deleteFiles([<LIST_OF_FILENAMES>])

// Unset instance field on database(profilePicture)
altogic.db.model(<MODEL_NAME>).object(<MODAL_ID>).updateFields([{ field: <FIELD_NAME>, updateType: "unset" }])

// Change phone number
altogic.auth.changePhone(password, phoneNumber)

// List all active sessions
altogic.auth.getAllSesssions()

// Sign out from the session
altogic.auth.signOut(token)

// Sign out from all sessions
altogic.auth.signOutAll()
Conclusion
In this tutorial, we walked through how to secure and verify your users in a React app using Altogic, Twilio and Tailwind CSS. Phone number-based authentication is one of the standard authentication method in the sector. Additionally, as a full-stack developer, I have to say that building the backend of the phone number-based authentication apps becomes so confusing to handle with coding the backend and integrating the 3rd party SMS providers simultaneously. Altogic provides terrific services and functions to create a backend app for phone number authentication. As we experienced in the article, it took just a few lines of code to build a backend app.
This super powerful and easy-to-implement app should be a baseline for your phone number-based projects, and you would develop on it. You should check out the repository for the application we built on GitHub for further details.